Practicing Using WSO2
Go to this link; it will take you to the WSO2 API Store to see the API definition.
You should see something like:
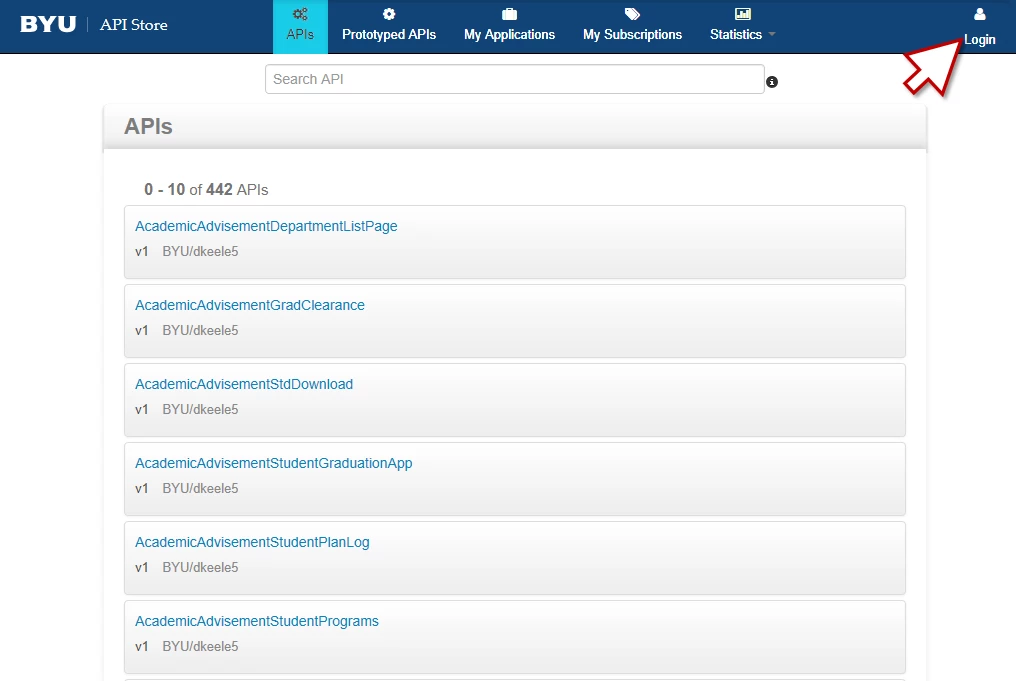
Click on login in the upper right and log in. After successfully logging in, you should see your net_id where the login was before in the top right corner.
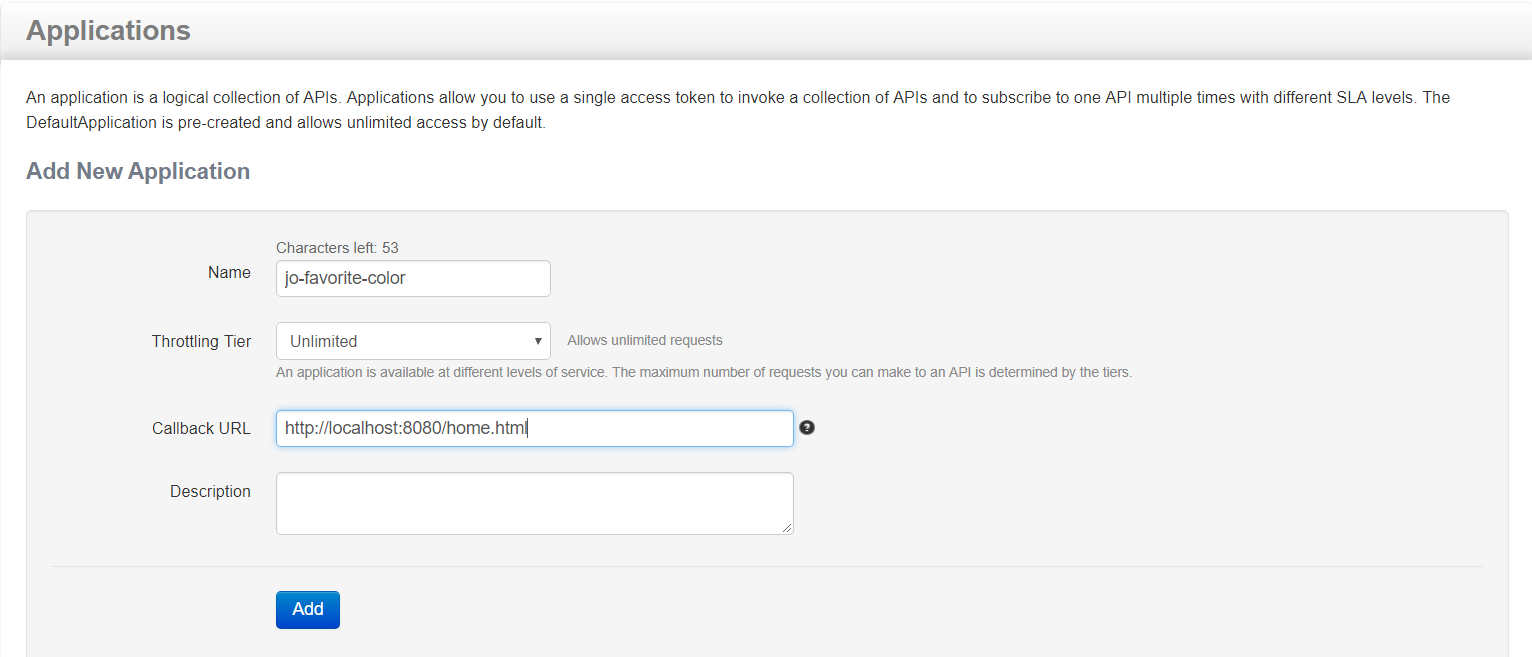
Before searching for the API, you will need to create a new application. Select “My Applications” and under “Add New Application” set the name to be “
A. Find the Persons API
In the Search API box, enter “persons” and press enter.
You should see something like:

Choose “Persons” v3. You should see something like:
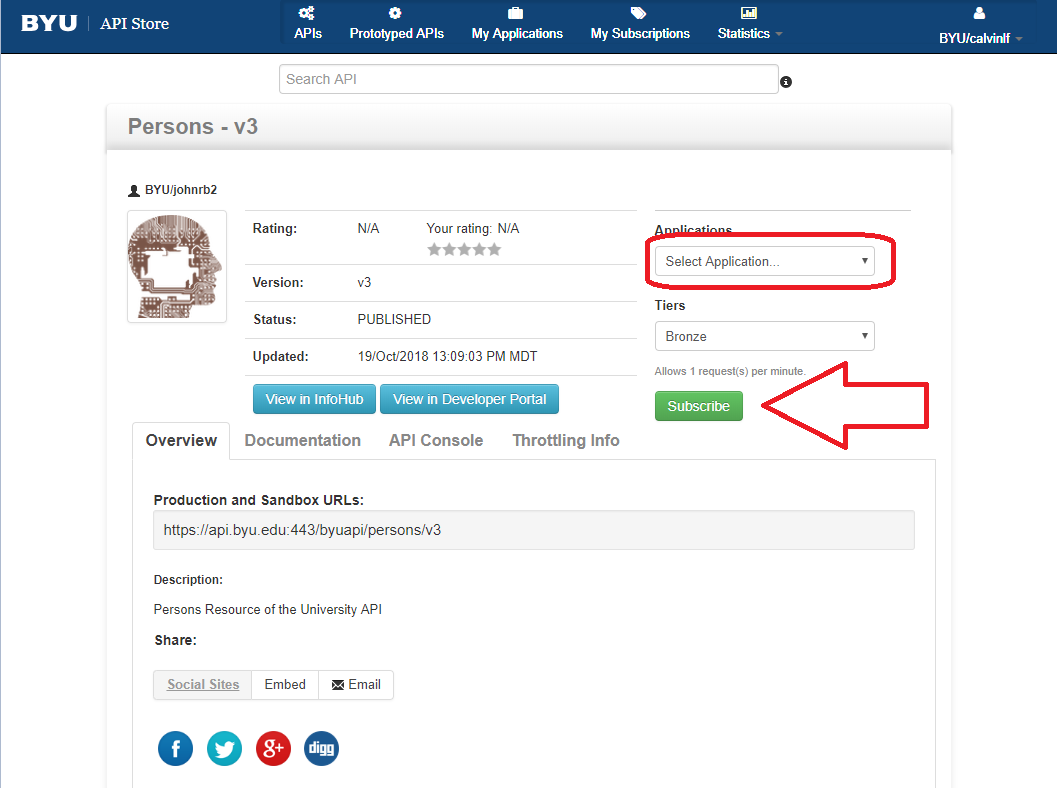
B. Subscribe to the Persons API
If this is the first time you’ve used WSO2 API Store, in the Applications drop down select the application that you created (
You should see something like:
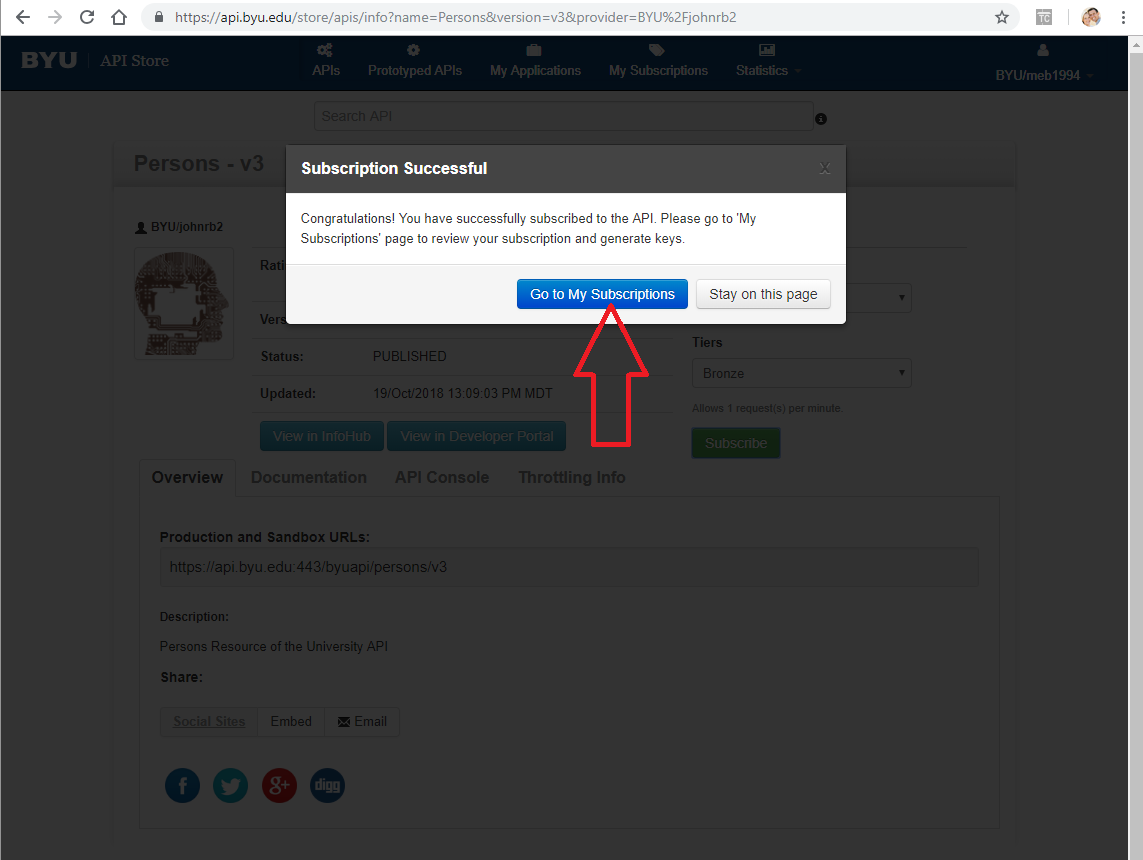
Click on Go to My Subscriptions.
You should see something like:
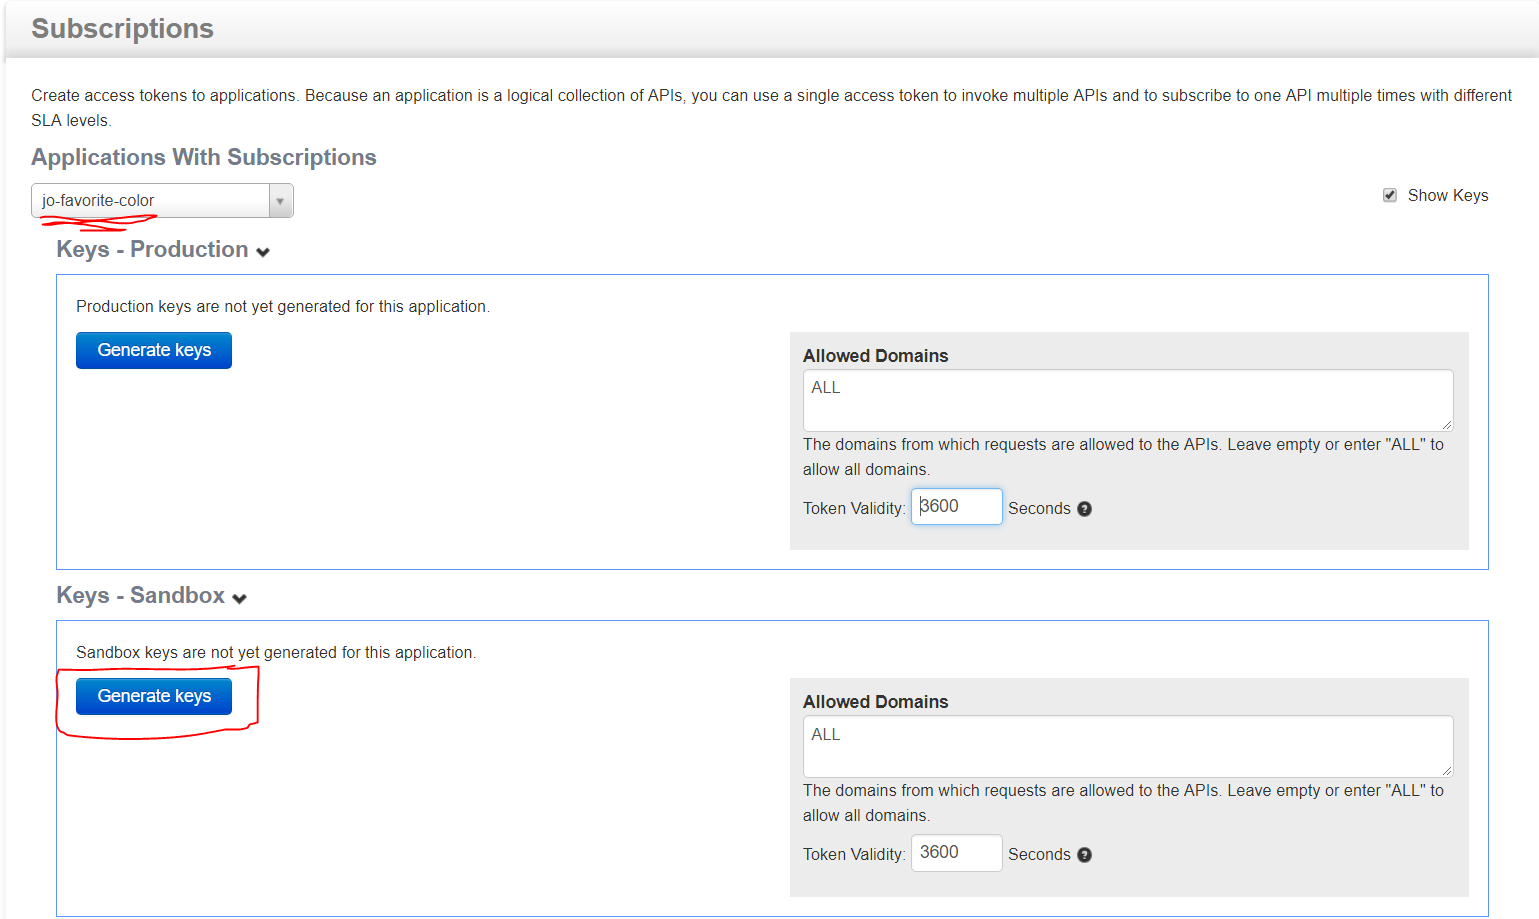
wso2generatekey.PNG
Make sure that Your Application((yourinitials)-favorite-color) is selected in the Applications with Subscriptions. Then click on Generate Keys for the Sandbox as shown above.
Sandbox allows anyone to safely consume the information without actually changing anything. If you use the keys for production things will actually be changed.
This may take a few seconds, you should see this page reloaded with a Consumer Key, Consumer Secret and an Access Token.
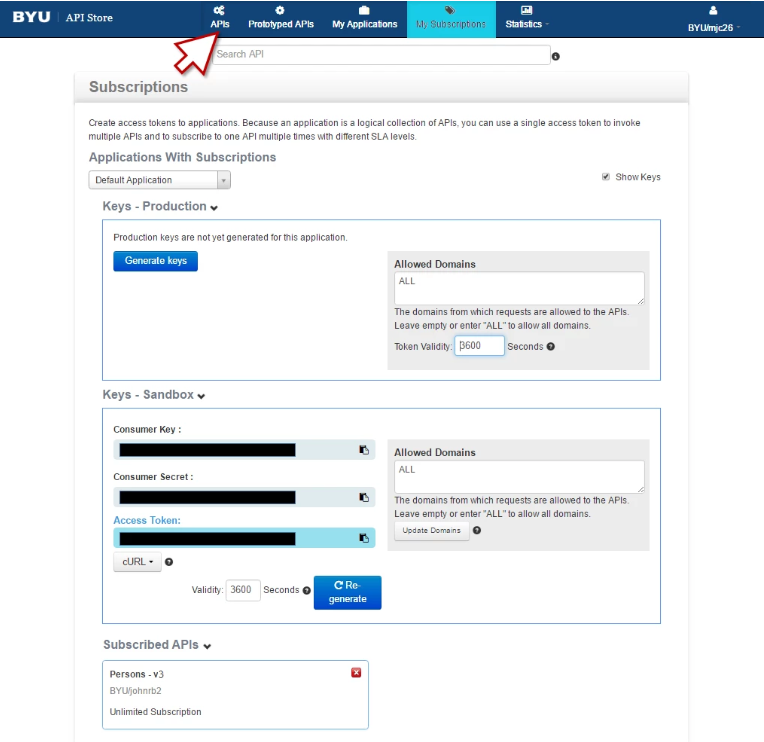
Here is what mine looks like with my keys redacted:
Click on the APIs at the top of the page as shown above.
You will be back to the main API page. Search for the Persons API as follows:
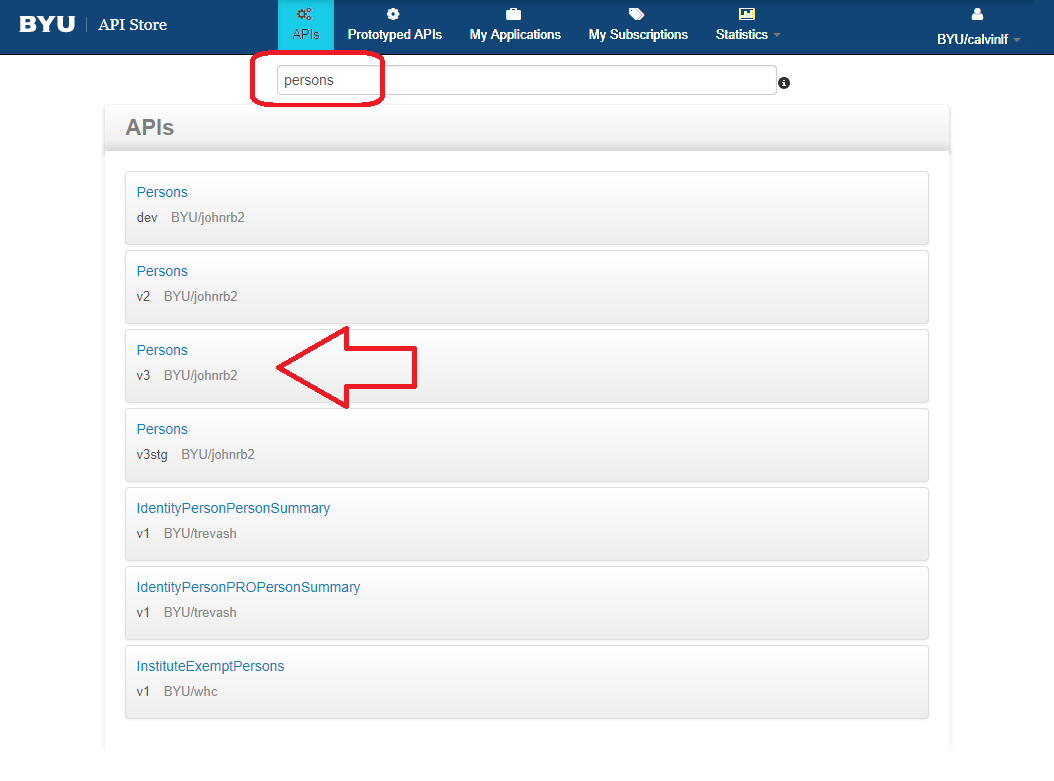
You should see the following:
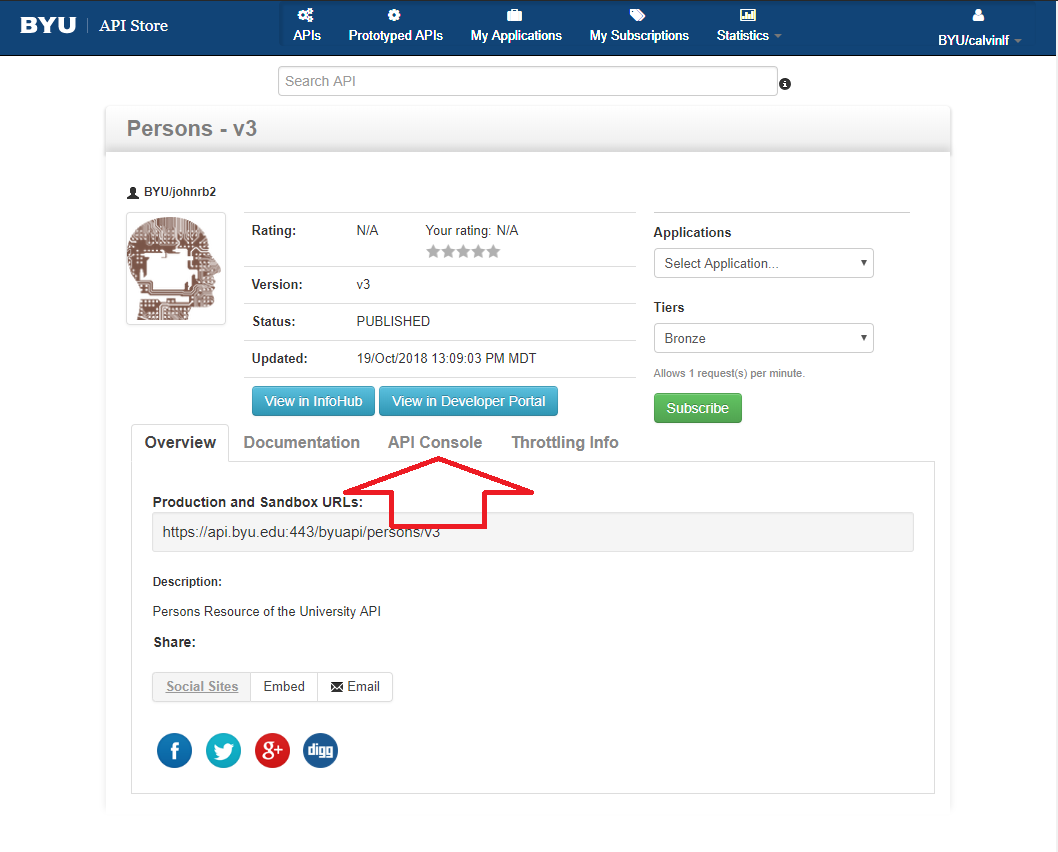
Click on “API Console” near the middle of the page. You should see something like:
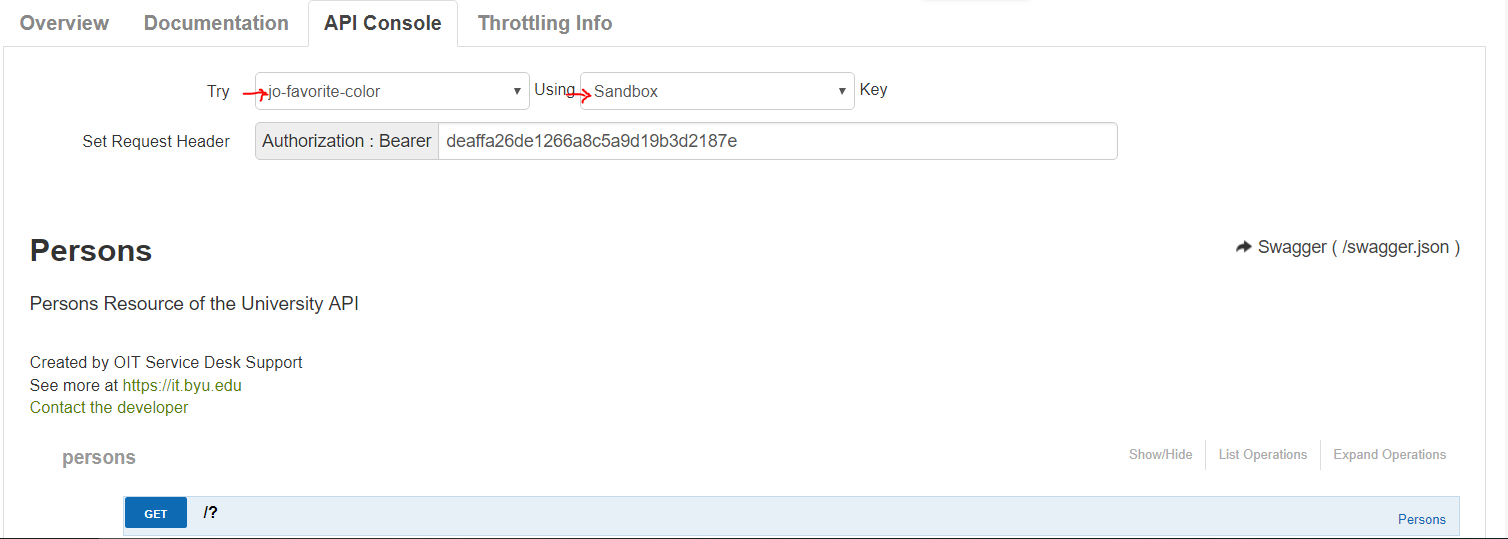
Select (yourinitials)-favorite-color in Try and Sandbox in Using as shown above.
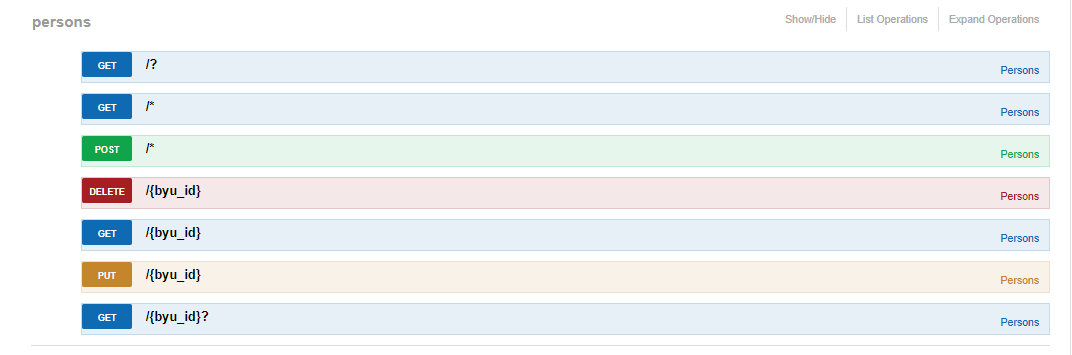
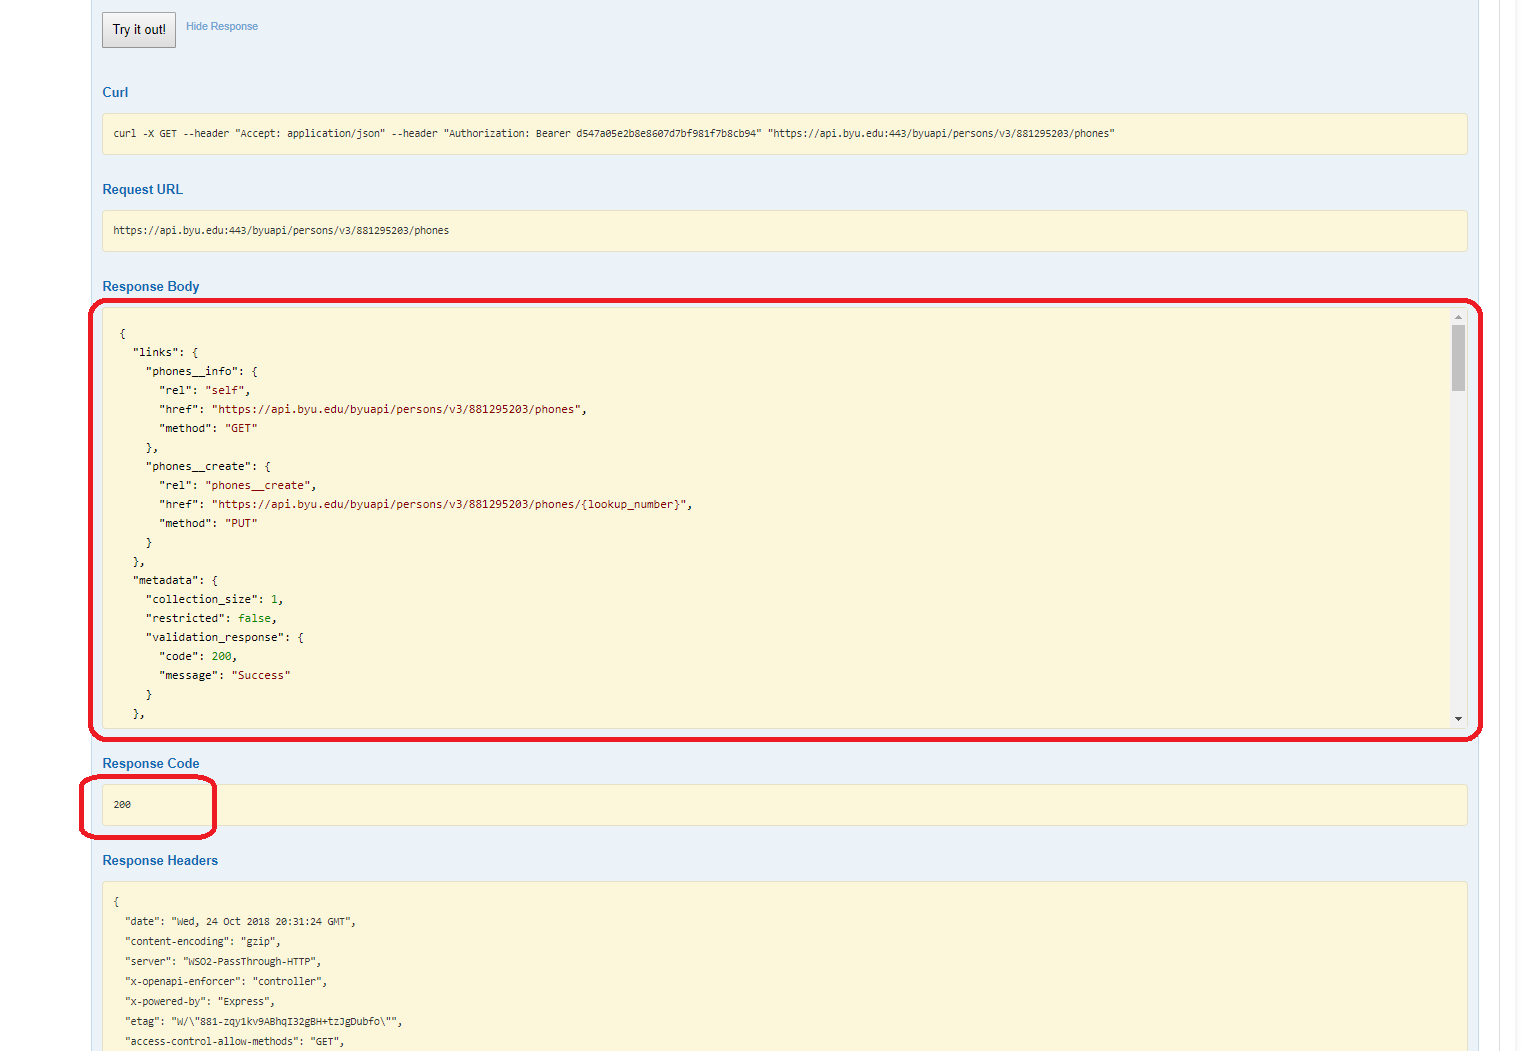
Scroll down to the phones entry point. You should see something like the following. Let’s try and make a request using the GET /{byu_id} method and the GET /{byu_id}
Click on the GET /{byu_id} method.
You should see something like: (phones should say person’s & returns the person with the specified BYU ID)
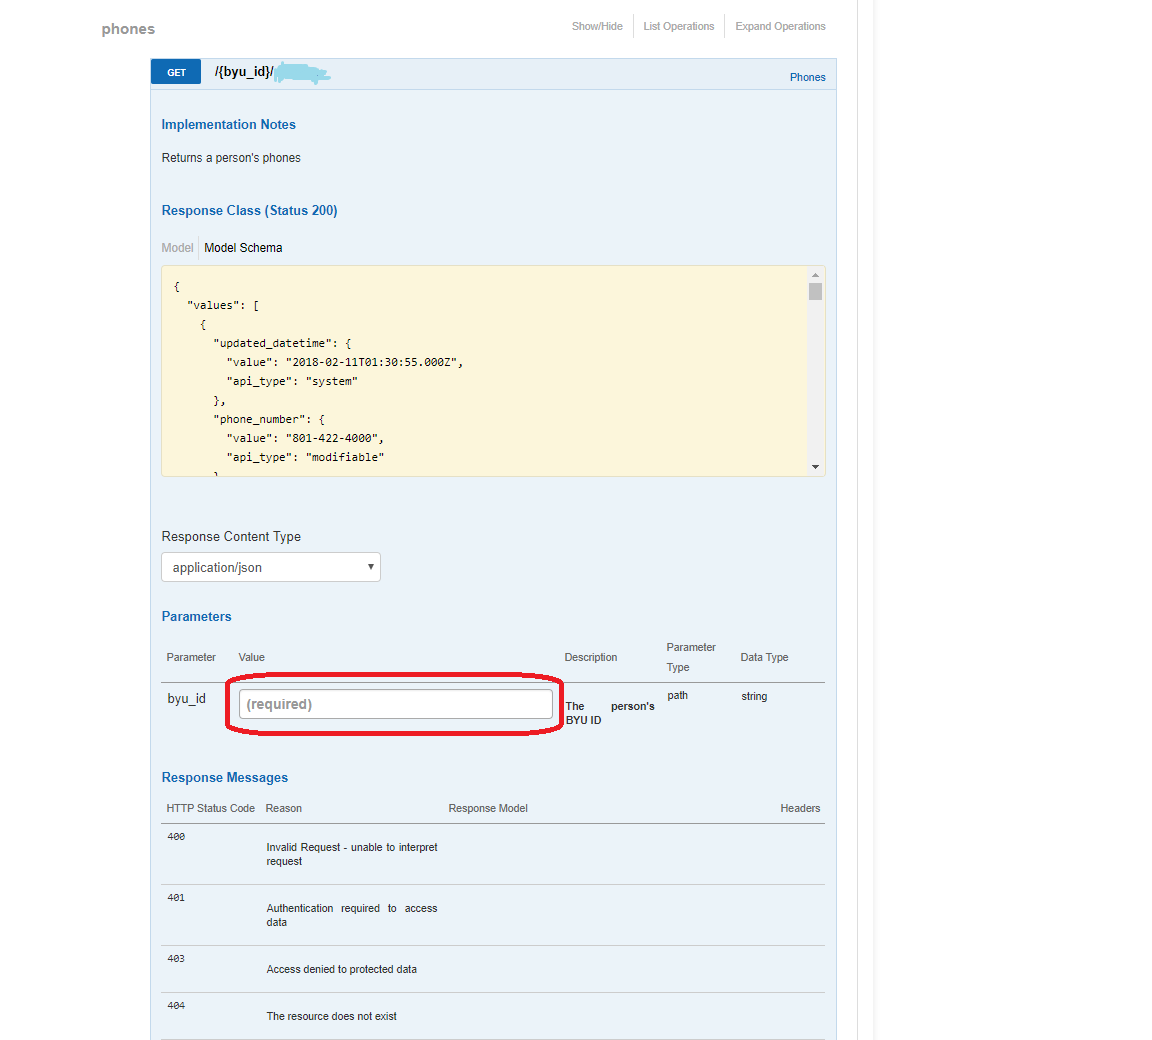
Enter your byu_id in the byu_id field indicated above, then click on the Try it out! button.
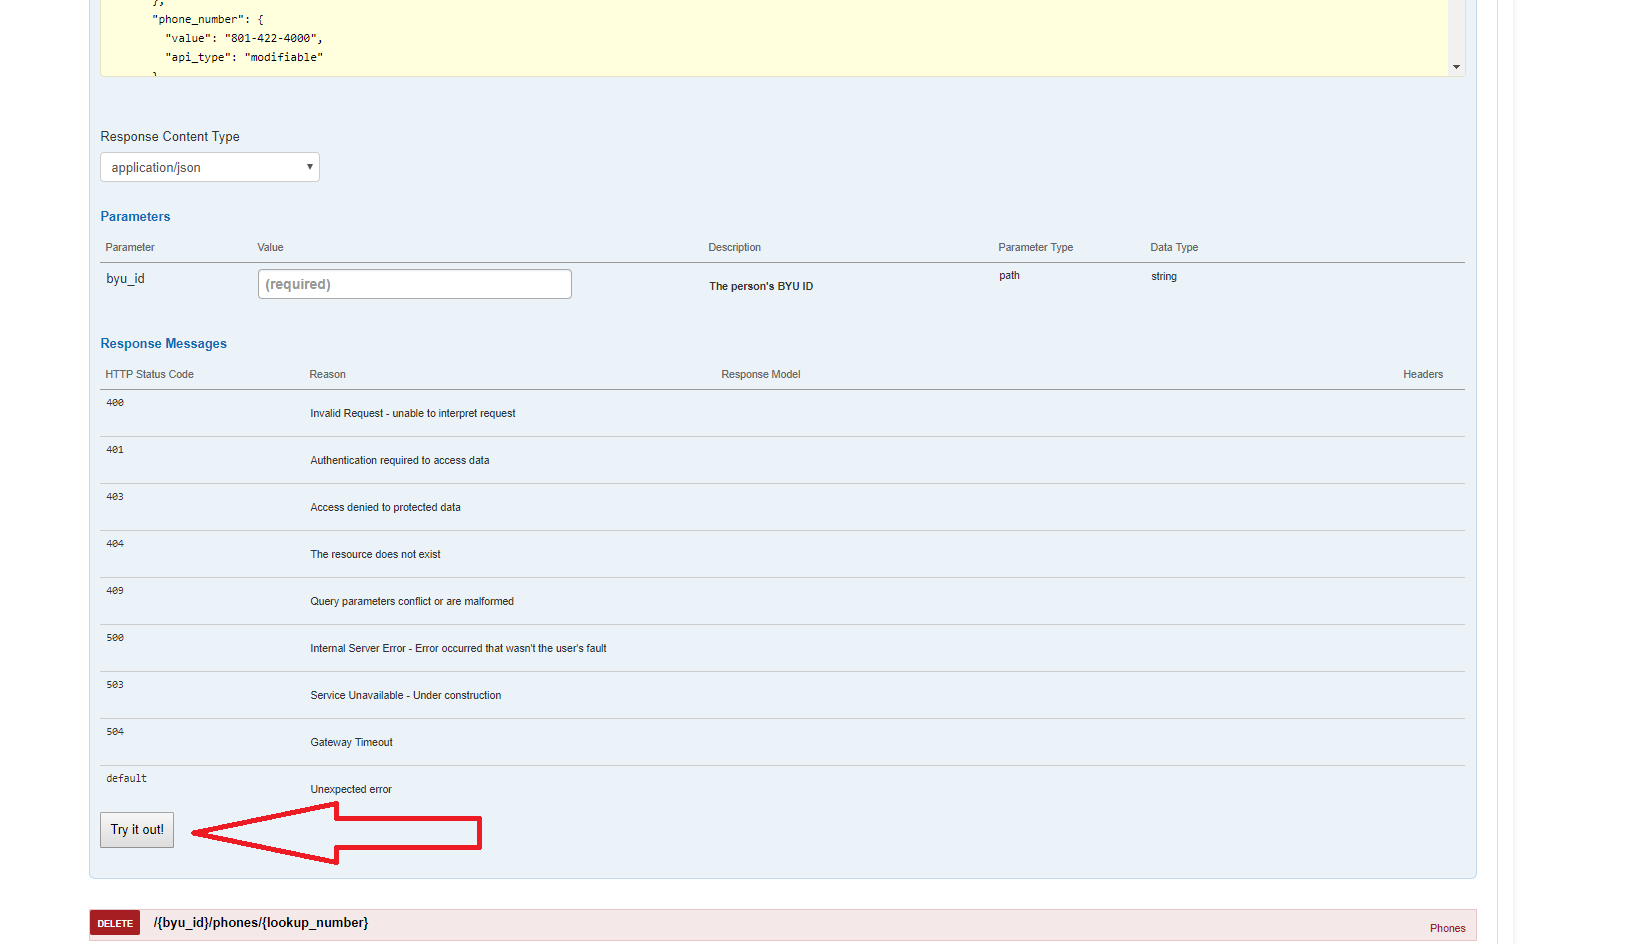
Below the Try it out button you should see something like:
if the key and secret expired, you need to regenerate as well as change to the Sandbox from production
The Response Code in the Response Code section should be 200 as shown above. If it is not, something isn’t right in the request. If you can’t figure it out, you may want to seek some help.
Now, let’s go through WSO2 using Postman.
Open Postman and make a new request (I called mine “get_person”). For your URL use the Request URL from WSO2.
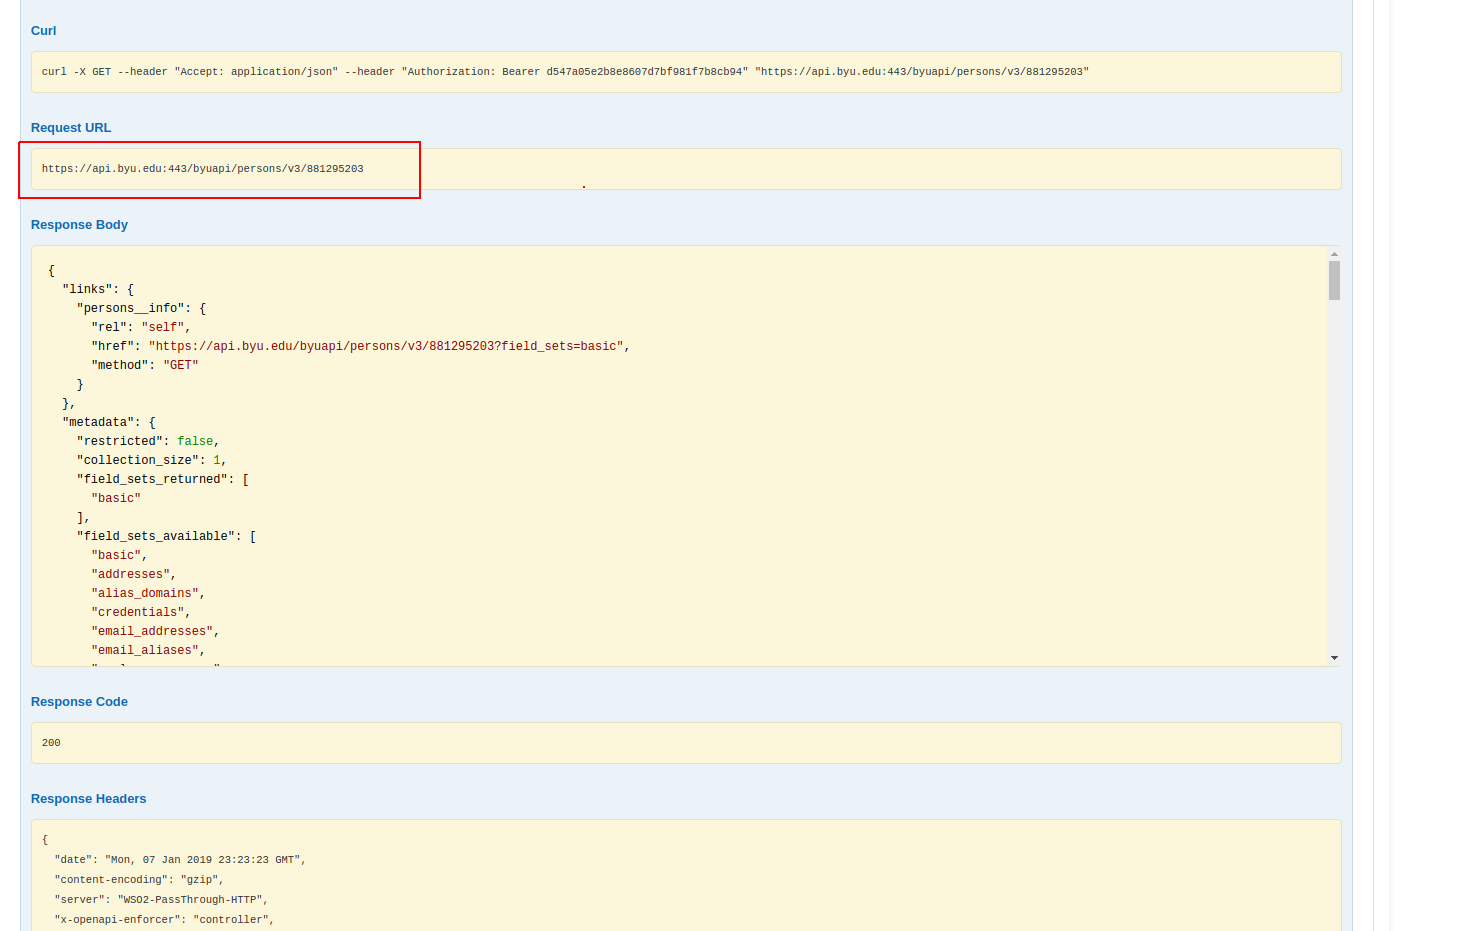
Your postman should look something like this:

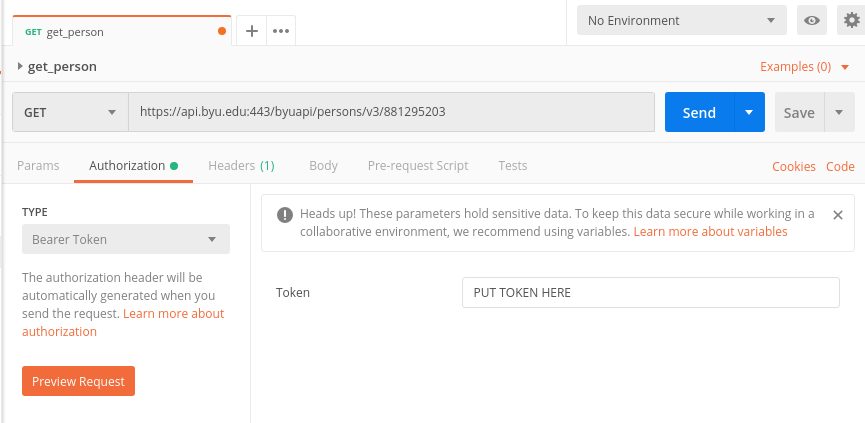
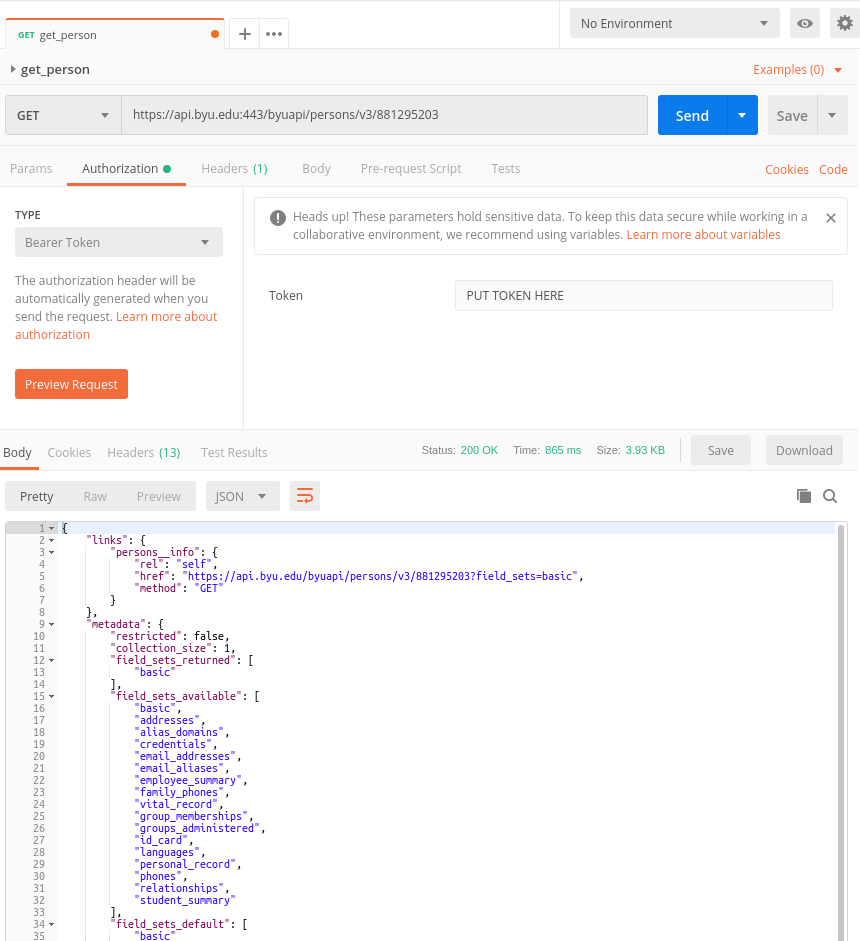
Open up the Authorization section, set the type to “Bearer Token”, and put your token where it tells you to (the one you generated earlier).
Click Send and you should receive the data!
That’s pretty cool, isn’t it?
Here’s a note: a lot of the try it out features do not work due to a bug in WSO2. If you run into any weird errors doing things outside this module, they will be explained more fully in the next module.
Now, let’s have your server consume data from the persons API!
First you are going to want to install the “request-promise” npm module. This does everything that the “request” module does, but instead of having a callback (the function that gets called after the response is received), it returns a promise. This allows the programming to be simpler.

Once it is installed, you can add it to your “favoritecolor.js”.

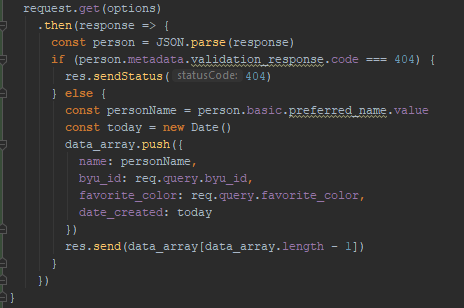
Then you can update your addPerson function so that it can retrieve a person from the WSO2 Persons API. Instead of a URL, we are going to use an object so we can also pass the authorization.
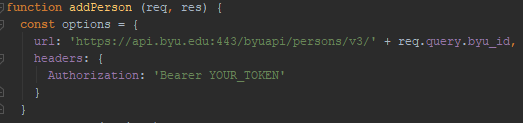
Make a GET request that returns a promise. If you remember from using the “request” module, it will return a variable named response. That response is the JSON that represents a person from the Persons API. You are going to need to parse that JSON to make it into a usable object.

Then you should first check to make sure it’s a real person, and then add that person to the data. (return a 404 error if it’s not a real person)
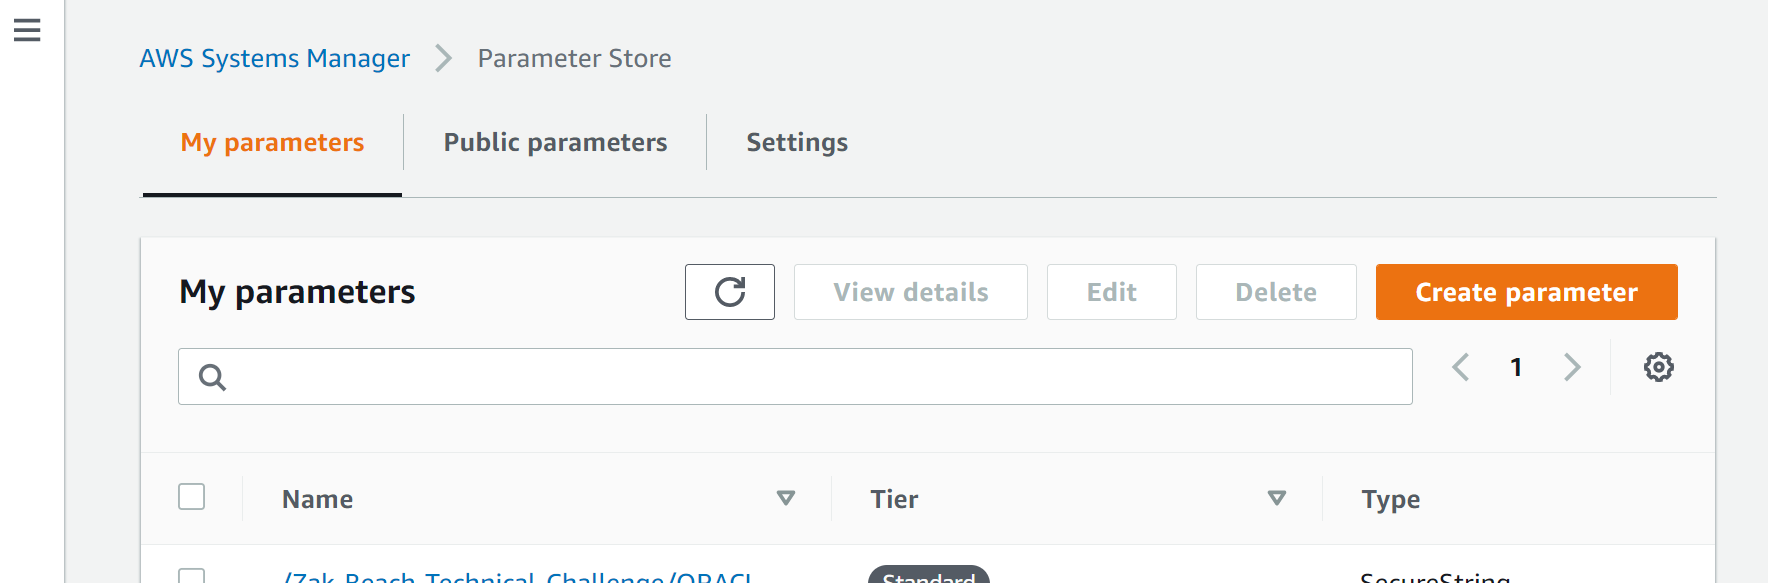
Now, we don’t want the token hard coded into our code. Luckily there is a place for it - the Parameter Store. It can be accessed from the Systems Manager.
Login into AWS and go through the ‘Management Console’.

search for the ‘Parameter Store’.

Once you are there click the big orange ‘Create Parameter’ button.
Before we name the parameter, let’s figure out what it should be called. Let’s go to this documentation link to learn about the naming scheme that our parameters should follow.
Handel is a deployment service BYU uses. Handel automatically wires up anything that follows the patttern “/(appName)/(environmentName)/” to be accessible to our program.

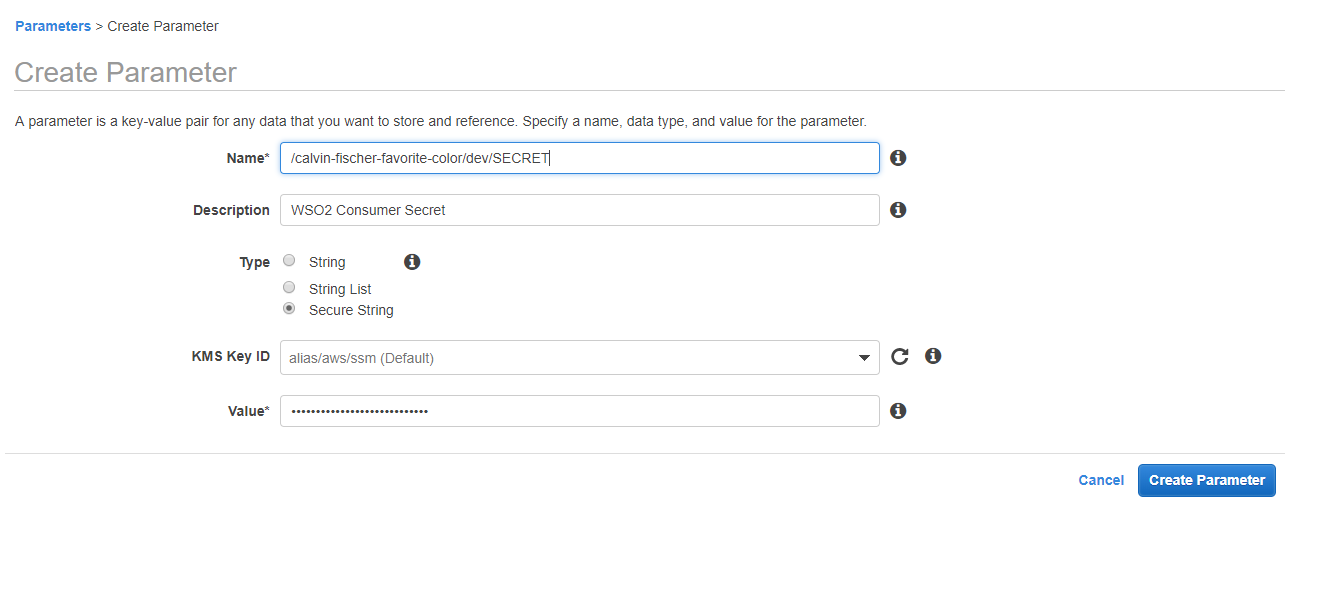
So it should literally be named something like “/calvin-fischer-favorite-color/dev/TOKEN” (use the word “TOKEN” not the actual token) and the value is your actual token. Go ahead and name yours “/(appName)/dev/TOKEN.” Using a secure string encrypts the actual token value so it is more secure. You can add a description to this parameter if you want to.
You should see it show up in the list, visible in the main Parameter Store page.
Reminder: the parameter store (at least on the byu-org-trn) account gets cleared weekly, so you will have to re-add any parameters you are using for ongoing projects to the store every week.
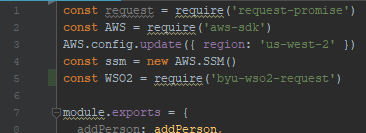
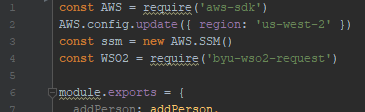
Now, how do we access that from our server, you might ask? To do that we are going to need to use the npm module “aws-sdk” This will allow our server to interact with the rest of AWS. Run “npm install aws-sdk” in your terminal. We are going to be using the AWS.SSM to retrieve our token from the store. (The documentation is here- https://docs.aws.amazon.com/AWSJavaScriptSDK/latest/AWS/SSM.html look over it a bit). Then bring it into your “favoritecolor.js”file. (You are going to need to tell it what part of the AWS world you are in. That is line 4 in the example). Line 5 shows how you create an instance of AWS.SSM().

We are going to want get a parameter, and AWS SDK has a getParameter function just for that! If you go to the documentation, it tells you how to use it:

We are going to use a promise instead of a callback, so ours will look something like this (we will catch errors at the end):

Chain the promises and the final result should look like this (if you want to test it in on localhost, you will need to sign into the AWS CLI ):

If you have questions about what is going on, feel free to ask someone.
That looks really good! Push it to GitHub, watch it deploy, and test it with Postman. Once you are sure that it works, you are ready to move on.
The reason we don’t want to have the Token hard coded in there is because if you do, you will have to be re-generating the token so it can be secure. Tokens generally expire pretty quickly as well, and it would stink to have to frequently re-generate a new token each time one expires. Let’s put our Key and Secret in the Parameter Store in order to generate our own keys.
Save them as ‘/your-name-favorite-color/dev/KEY’ and ‘/your-name-favorite-color/dev/SECRET’.
BYU has a npm module that allows us to set and make calls to the WSO2 store. It is called “byu-wso2-request”. Install it now by running “npm install byu-wso2-request”. Then, bring it into your program at the top of the page. This is going to improve our process for requesting information from WSO2.
Outside of your functions, make a constant variable “params”. It will be similar to the one you made earlier to use the getParameter function, but you will be using it to retrieve multiple parameters, so it will be a little different.
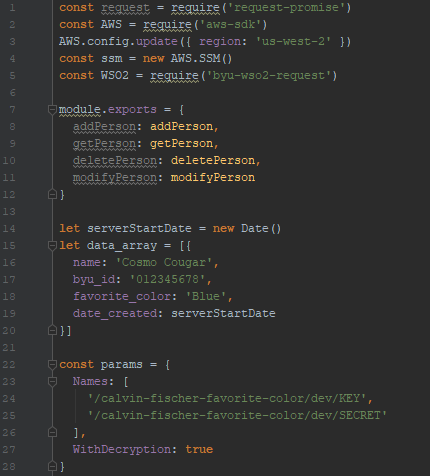
We are going to use the function “getParameters” (https://docs.aws.amazon.com/AWSJavaScriptSDK/latest/AWS/SSM.html#getParameters-property. We will use the data that it gets from the Parameter Store and use it to set out byu-wso2-request module.
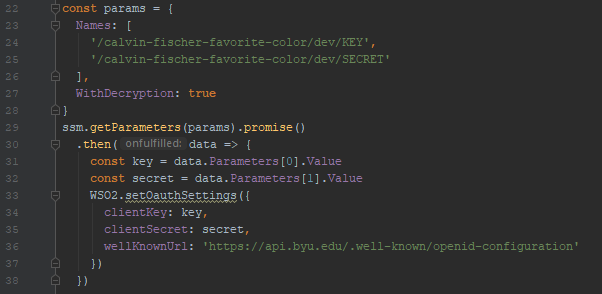
The wellKnownUrl is a URL that it used by many BYU APIs.
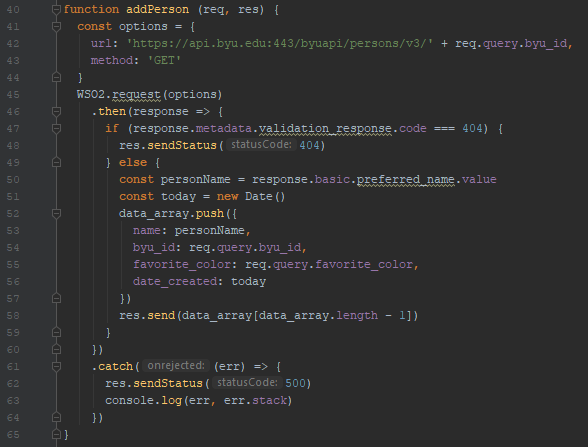
Now let’s fix our “addPerson” function to use byu-wso2-request. We don’t need the “getParameter” part, so we can get rid of that. Then we replace our request with a byu-wso2-request.
We also are no longer using request-promise directly, so we can remove it from the things we import.
Test it. If it works, that is great! (if you want to test it in on localhost you will need to sign into the AWS CLI).
Add, commit, and push it to Github. Once it’s deployed, test it again (make sure you’re logged into AWS).
If it works, then you are ready to Publish it to WSO2!