Deploy to AWS - Beanstalk using Handel/Rockefeller
In the last couple sections we made a web server that we ran from the computer we were using. But we want to make something more useful than that. We want to run that server from the cloud! This is possible through AWS. Remember learning about Amazon EC2 and AWS Elastic Beanstalk? Here’s a link if you don’t remember: Amazon Web Services. We want to put this server that we’ve made on an EC2 instance, and the easiest way to do that is through the Elastic Beanstalk.
AWS Elastic Beanstalk
As you can see, the Elastic Beanstalk can do a lot of things and is connected to a lot of things. That can be a lot to keep track of. Luckily, there is a thing called Handel.
Handel
You’ve probably heard of Handel and Handel Code Pipeline before:
https://handel.readthedocs.io/en/latest/
Handel was made by BYU to make things easier for you. It allows you to easily define and provision resources. Basically, it will set up things in AWS for your server for you.
AWS has a service called CloudFormation that does something really similar, but you can see why we use Handel here: https://handel.readthedocs.io/en/latest/getting-started/handel-vs-cloudformation.html
As you can see, this saves a lot of time.
Let’s make a Handel file for your code. Make a new file titled “handel.yml” and fill it out like so:
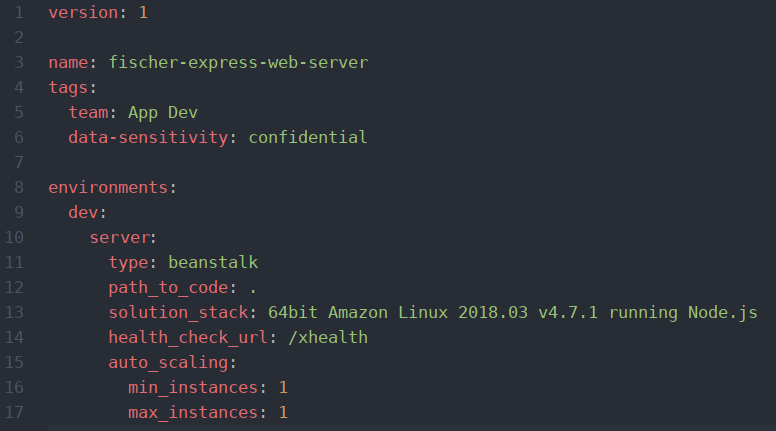
You can find the latest solution stack here if you want to be current:
You’ll also notice that it is going to be doing a health check by making a request to the path “/xhealth”. You are going to need to make it so you program can handle that. Add a health checking function to your index.js file of your “[lastname]-express-web-server” project:

While you are here, update your listening function so it is ready to listen on whatever port your server wants it to. Update your listening function like so:

Note: Handel Code Pipeline is depricated for this training. Use Terraform- Terraform
Now you are ready to make your Handel Code Pipeline. Make a new file titled “handel-codepipeline.yml” and set it up to deploy your code. Remember to change out “fischer” for your last name. Be careful to make sure the indentation remains the same as mine:
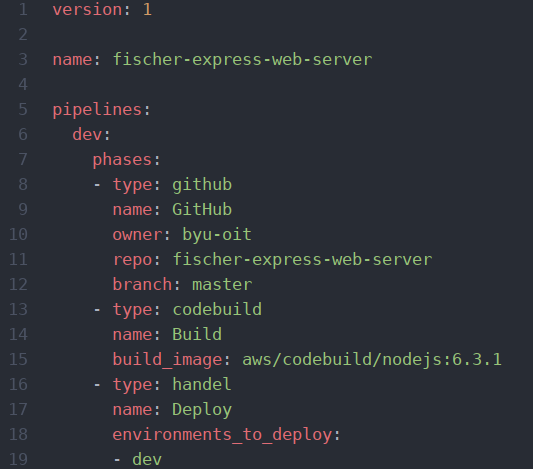
Let’s take a moment to talk about continuous integration(CI) and continuous deployment(CD). There’s a lot written about CI/CD (here is an example: https://www.atlassian.com/continuous-delivery/principles/continuous-integration-vs-delivery-vs-deployment), but the main idea is that as you push your code to GitHub, it is automatically implemented on the cloud. The Handle Code Pipeline you just made will do that. In a pipeline called “dev”, it will first go to GitHub and then implement that code in AWS codebuild. Then it will use your Handel file to deploy the server. For AWS codebuild to work, you are also going to need a file called “buildspec.yml” that will look like this:

AWS codebuild can be used to do a lot of things, this is about a simple as it gets. Here is a link to the Amazon User Guide on all the things you can do: https://docs.aws.amazon.com/codebuild/latest/userguide/build-spec-ref.html
As you can see, it is quite extensive. Normally you would do tests (and we will in the future), this is all you need for this project.
Before we are ready to deploy, you will need one more thing. Add a start script to your “package.json” file:

Now you are ready to put your server on the cloud!
Be sure to add these new files to your GitHub repository before moving on to the next step!
Create your pipeline
Let’s turn the time over to Lyndsey to show us how to do it!
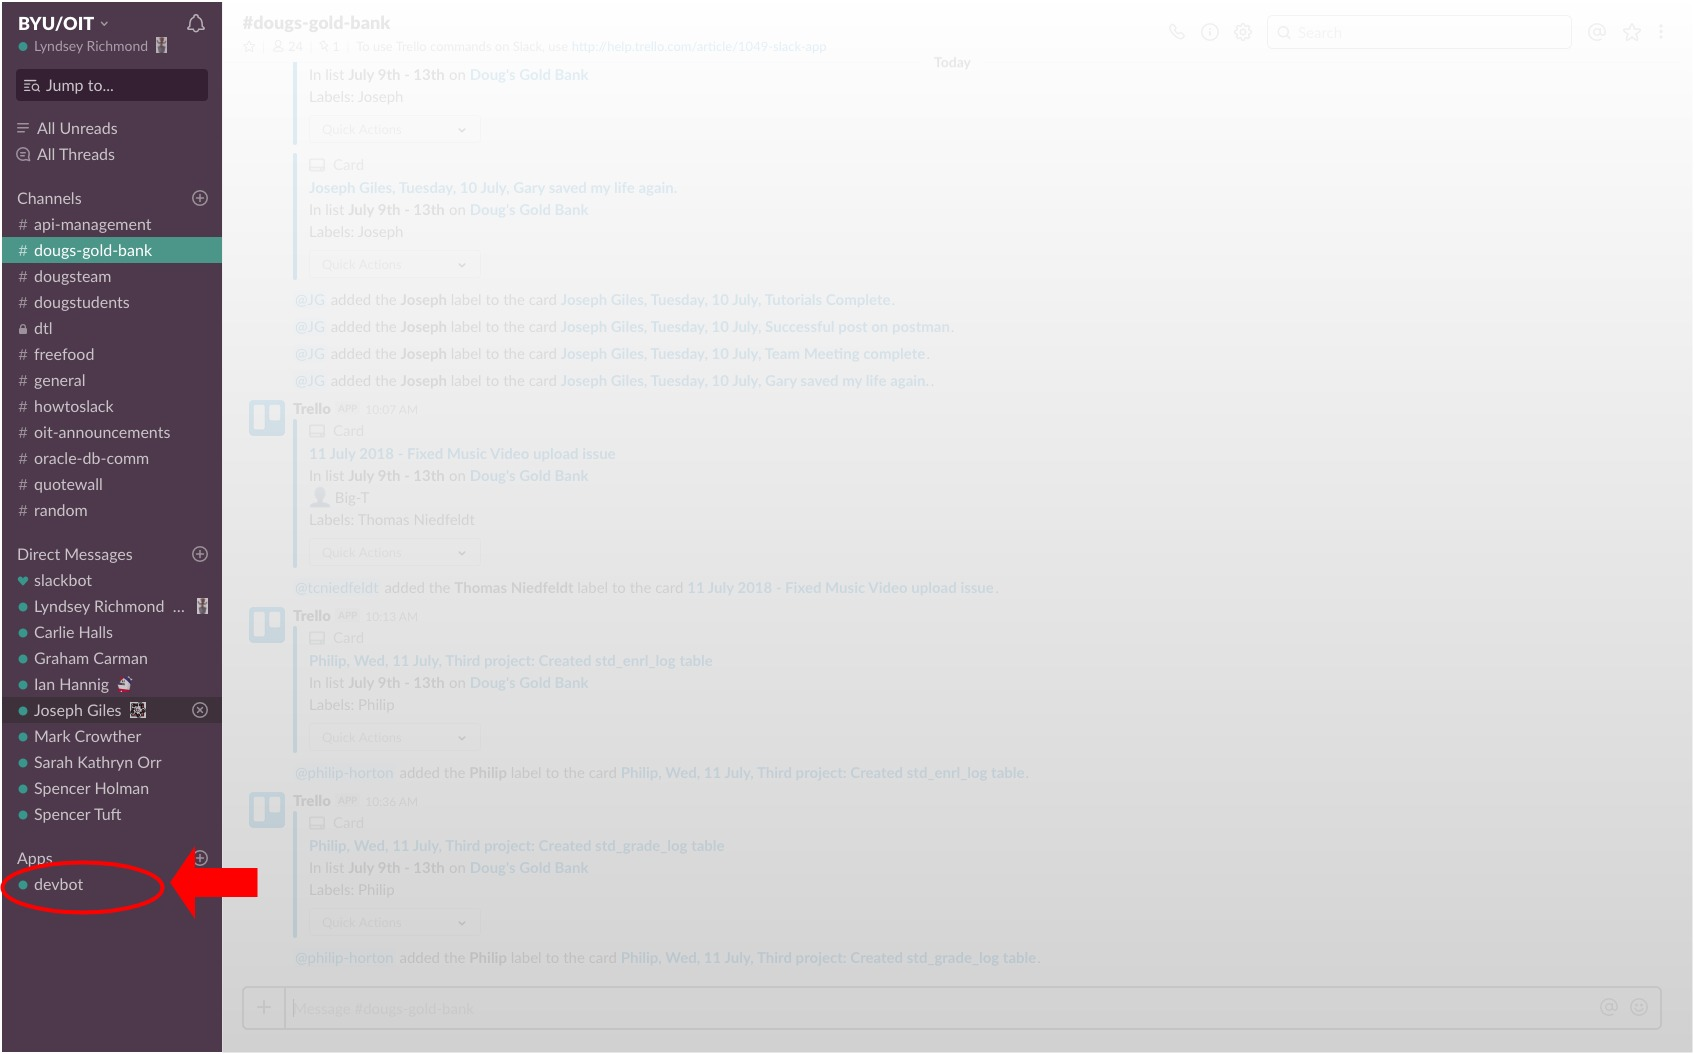
Once upon a time, when you got to this step, you had to get up from your desk and go talk to a member of the SWAT team. But now you can do this from your desk with a handy little bot that Spencer Holman created! To start, open up Slack and find the devbot app. If you’ve used it before, click on it. It should show up here:
If you haven’t used the devbot before, click the little plus sign by the apps.
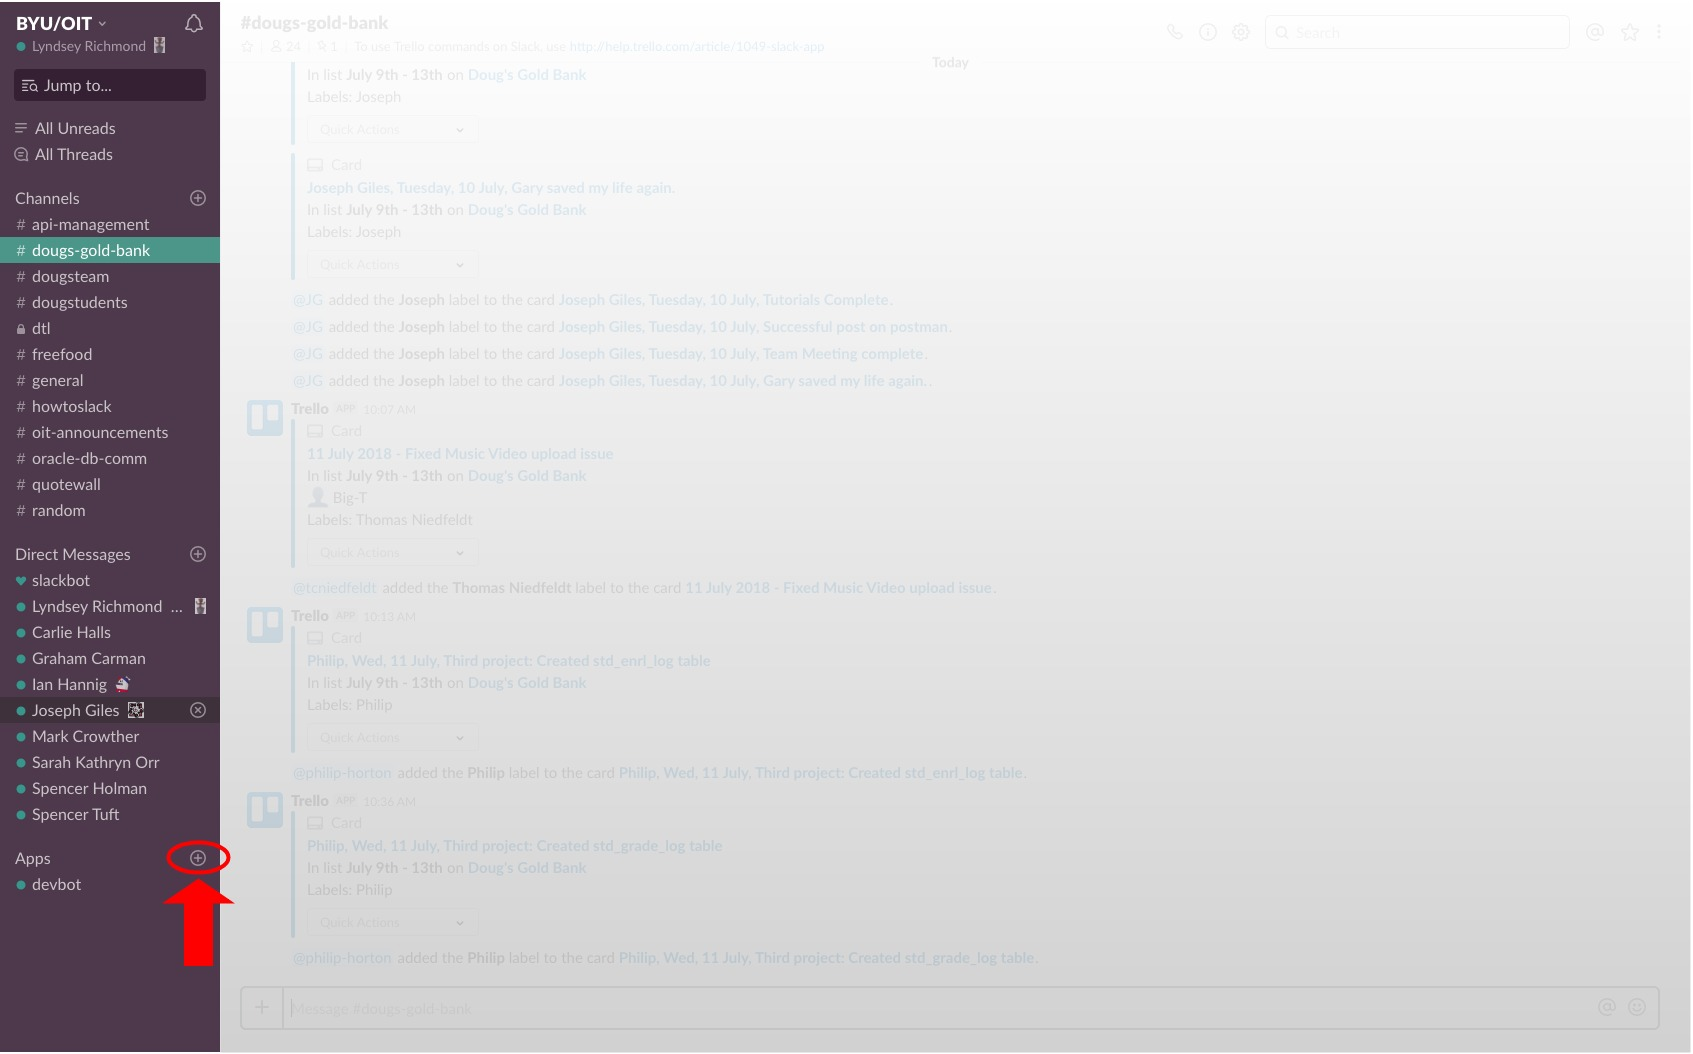
And search for ‘devbot’.
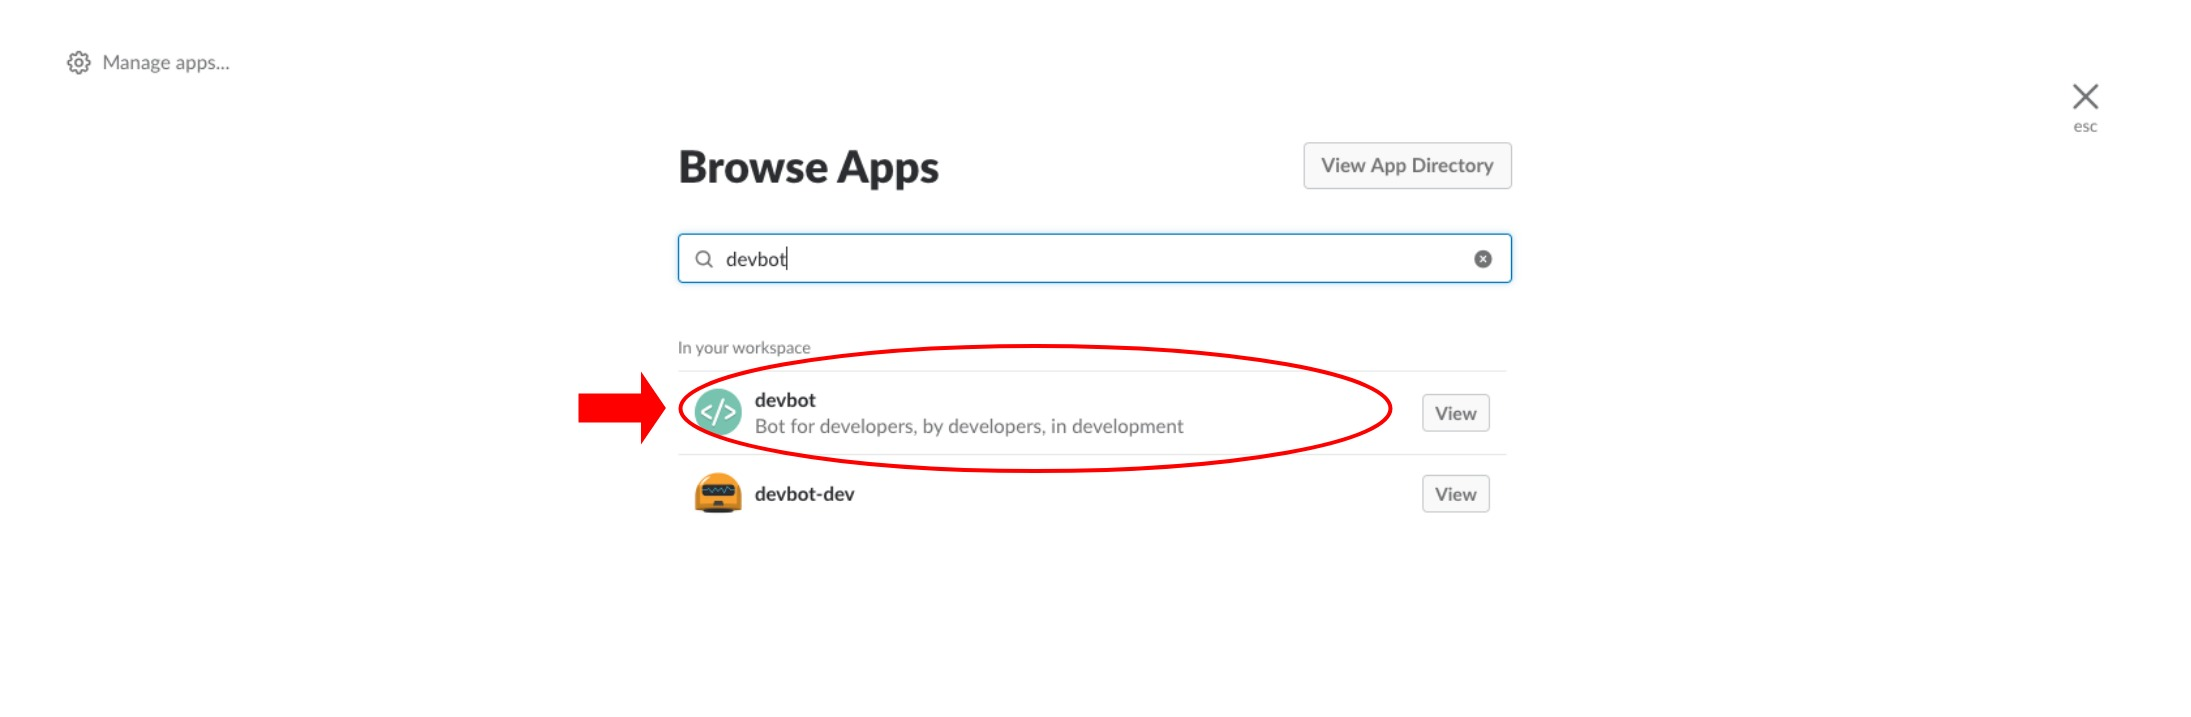
Click on it.
Now, type in ‘handel-codepipeline deploy’ and follow the prompts on screen. Most of it will be similar to what I have, except for the Github repository and the account will be byu-trn-org. You will be using “(your last name)-express-web-server”. Here’s what I saw when I was done:

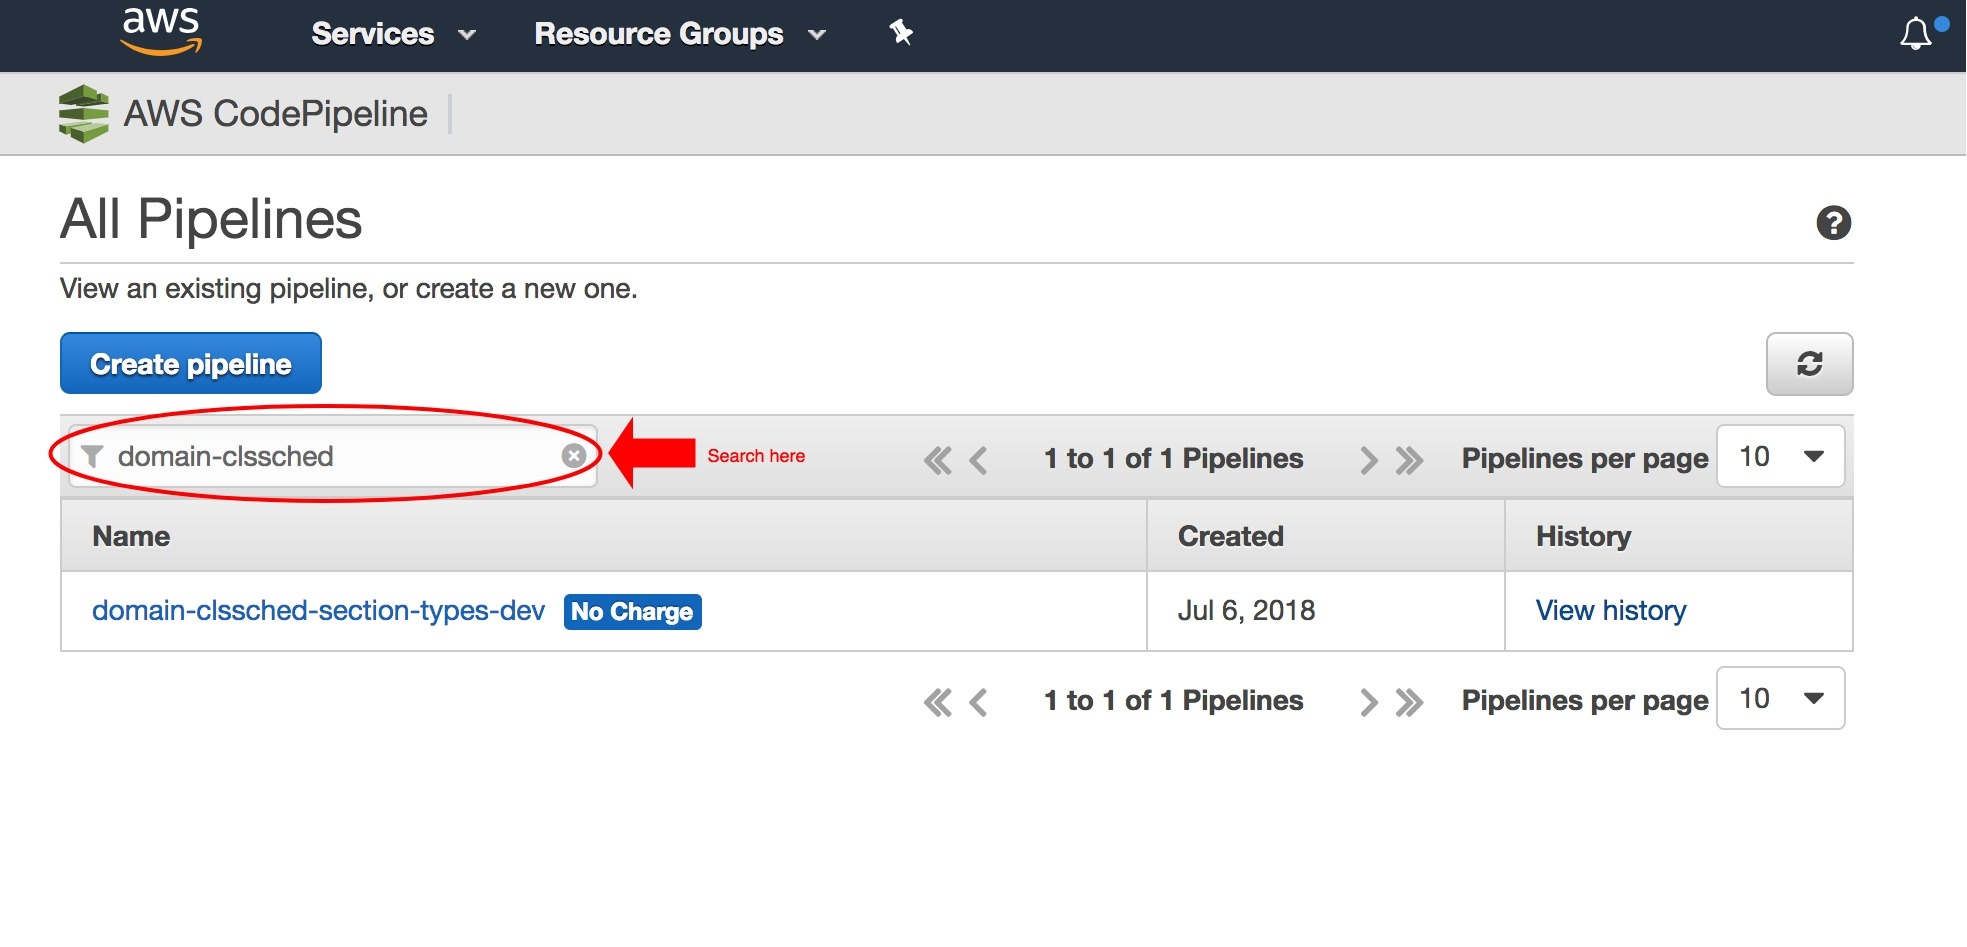
After the devbot tells you that your pipeline was successfully deployed, go login to AWS, and go to CodePipeline. Search for your pipeline, and click on it to watch as it builds and deploys.
Hopefully, your pipeline successfully builds and deploys. It should look something like this:
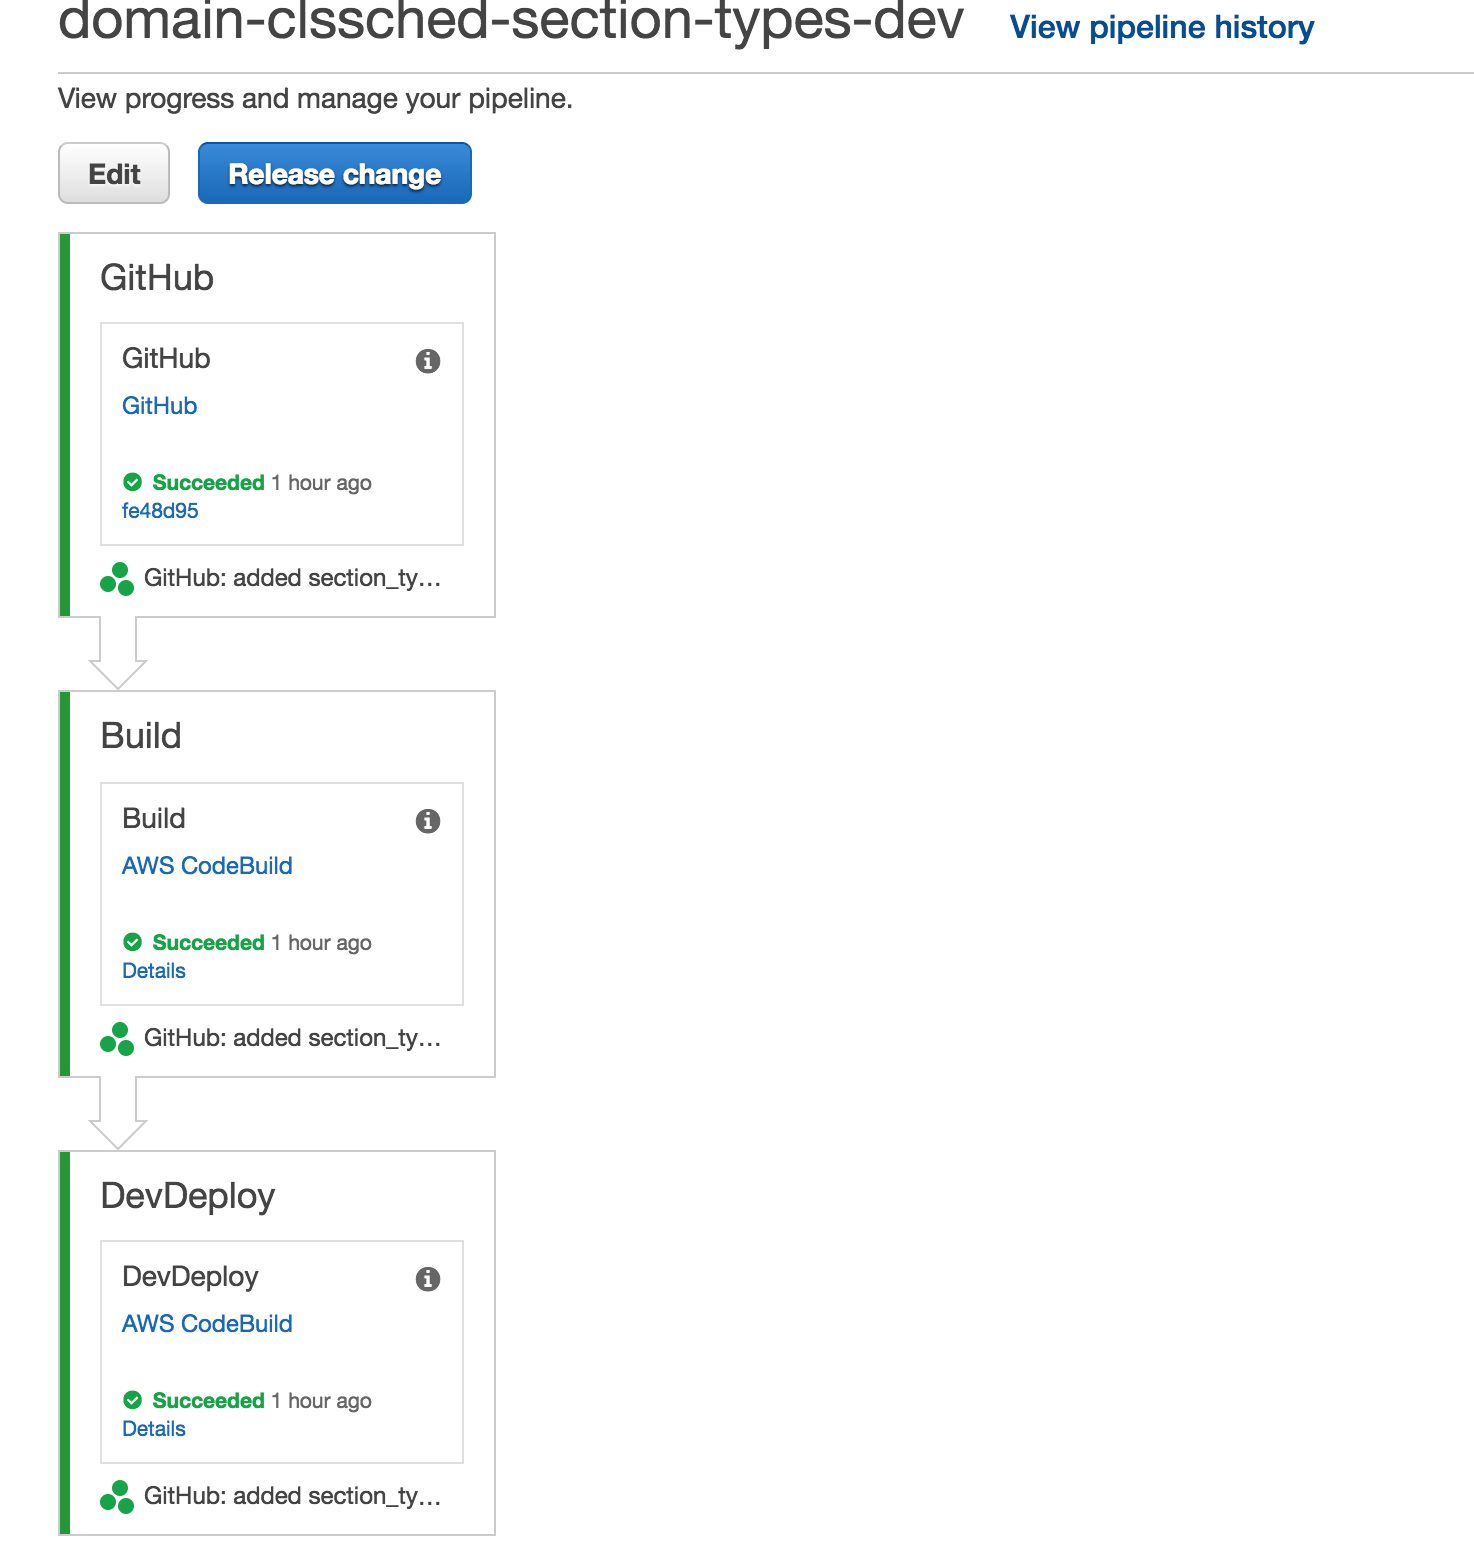
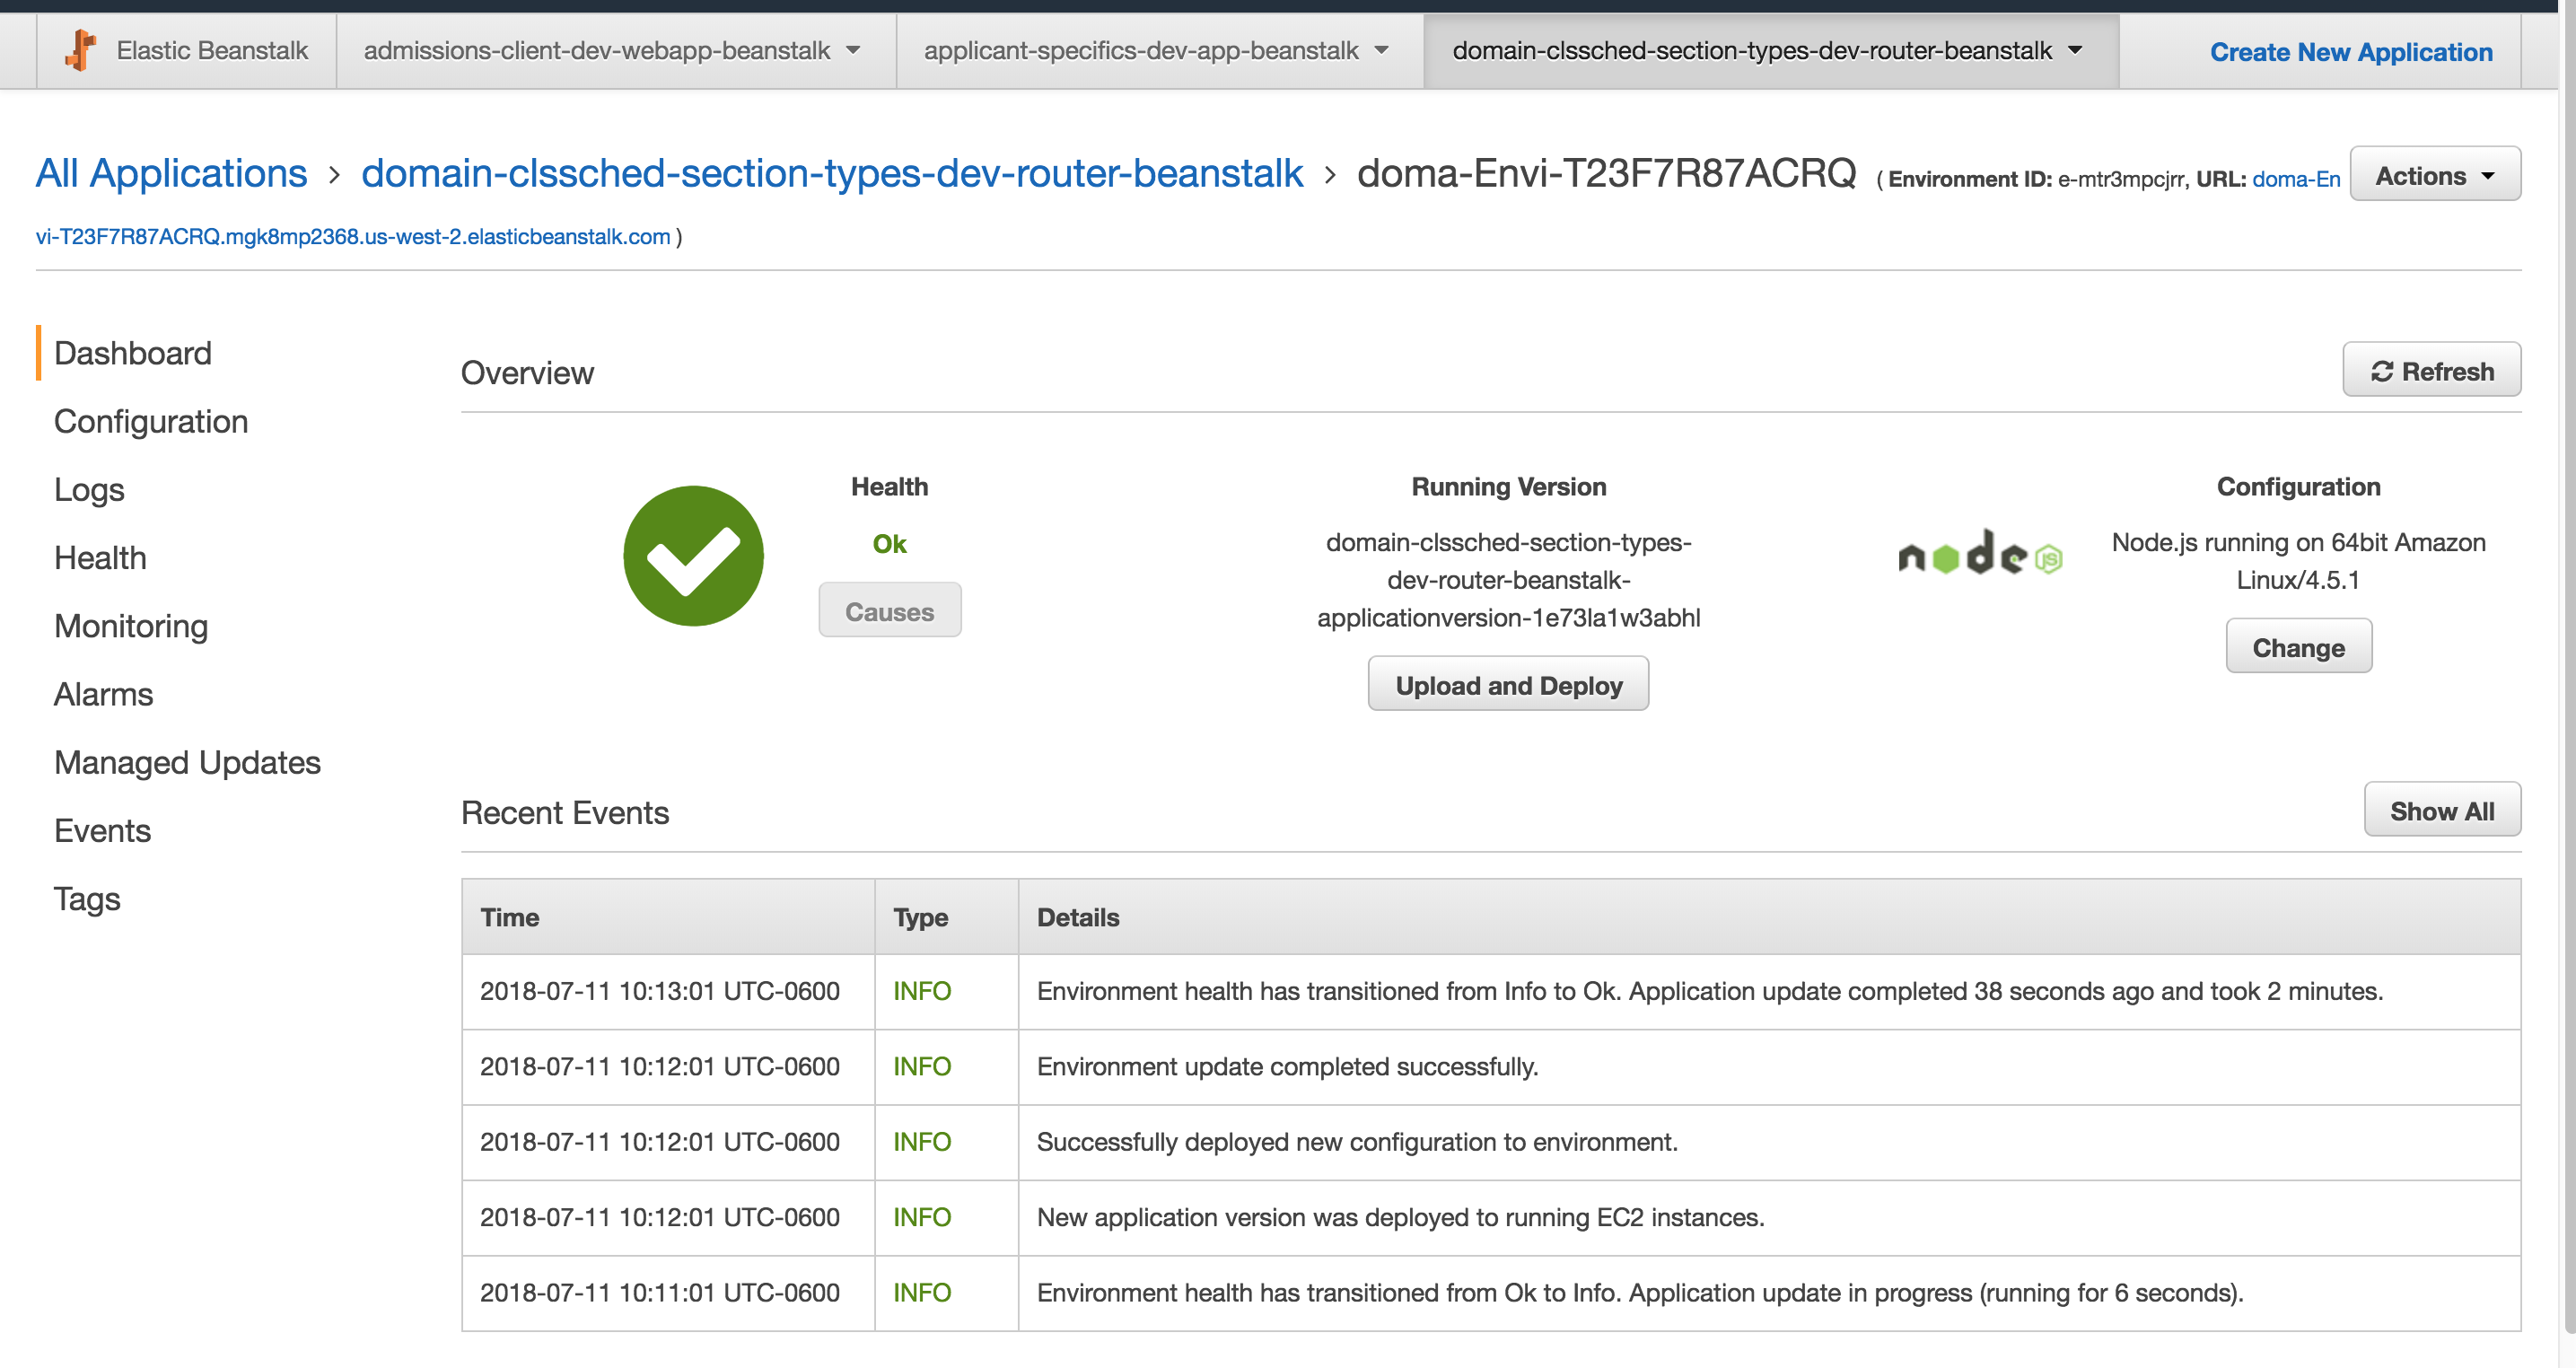
If any part of your pipeline is red, you have some debugging to do (I would begin by looking at the 3 files we just made: buildspec.yml, handel.yml, and handel-codepipeline.yml. Make sure they match what we gave you!). When your pipeline is successfully deployed, go to the Elastic Beanstalk service and search for your beanstalk.
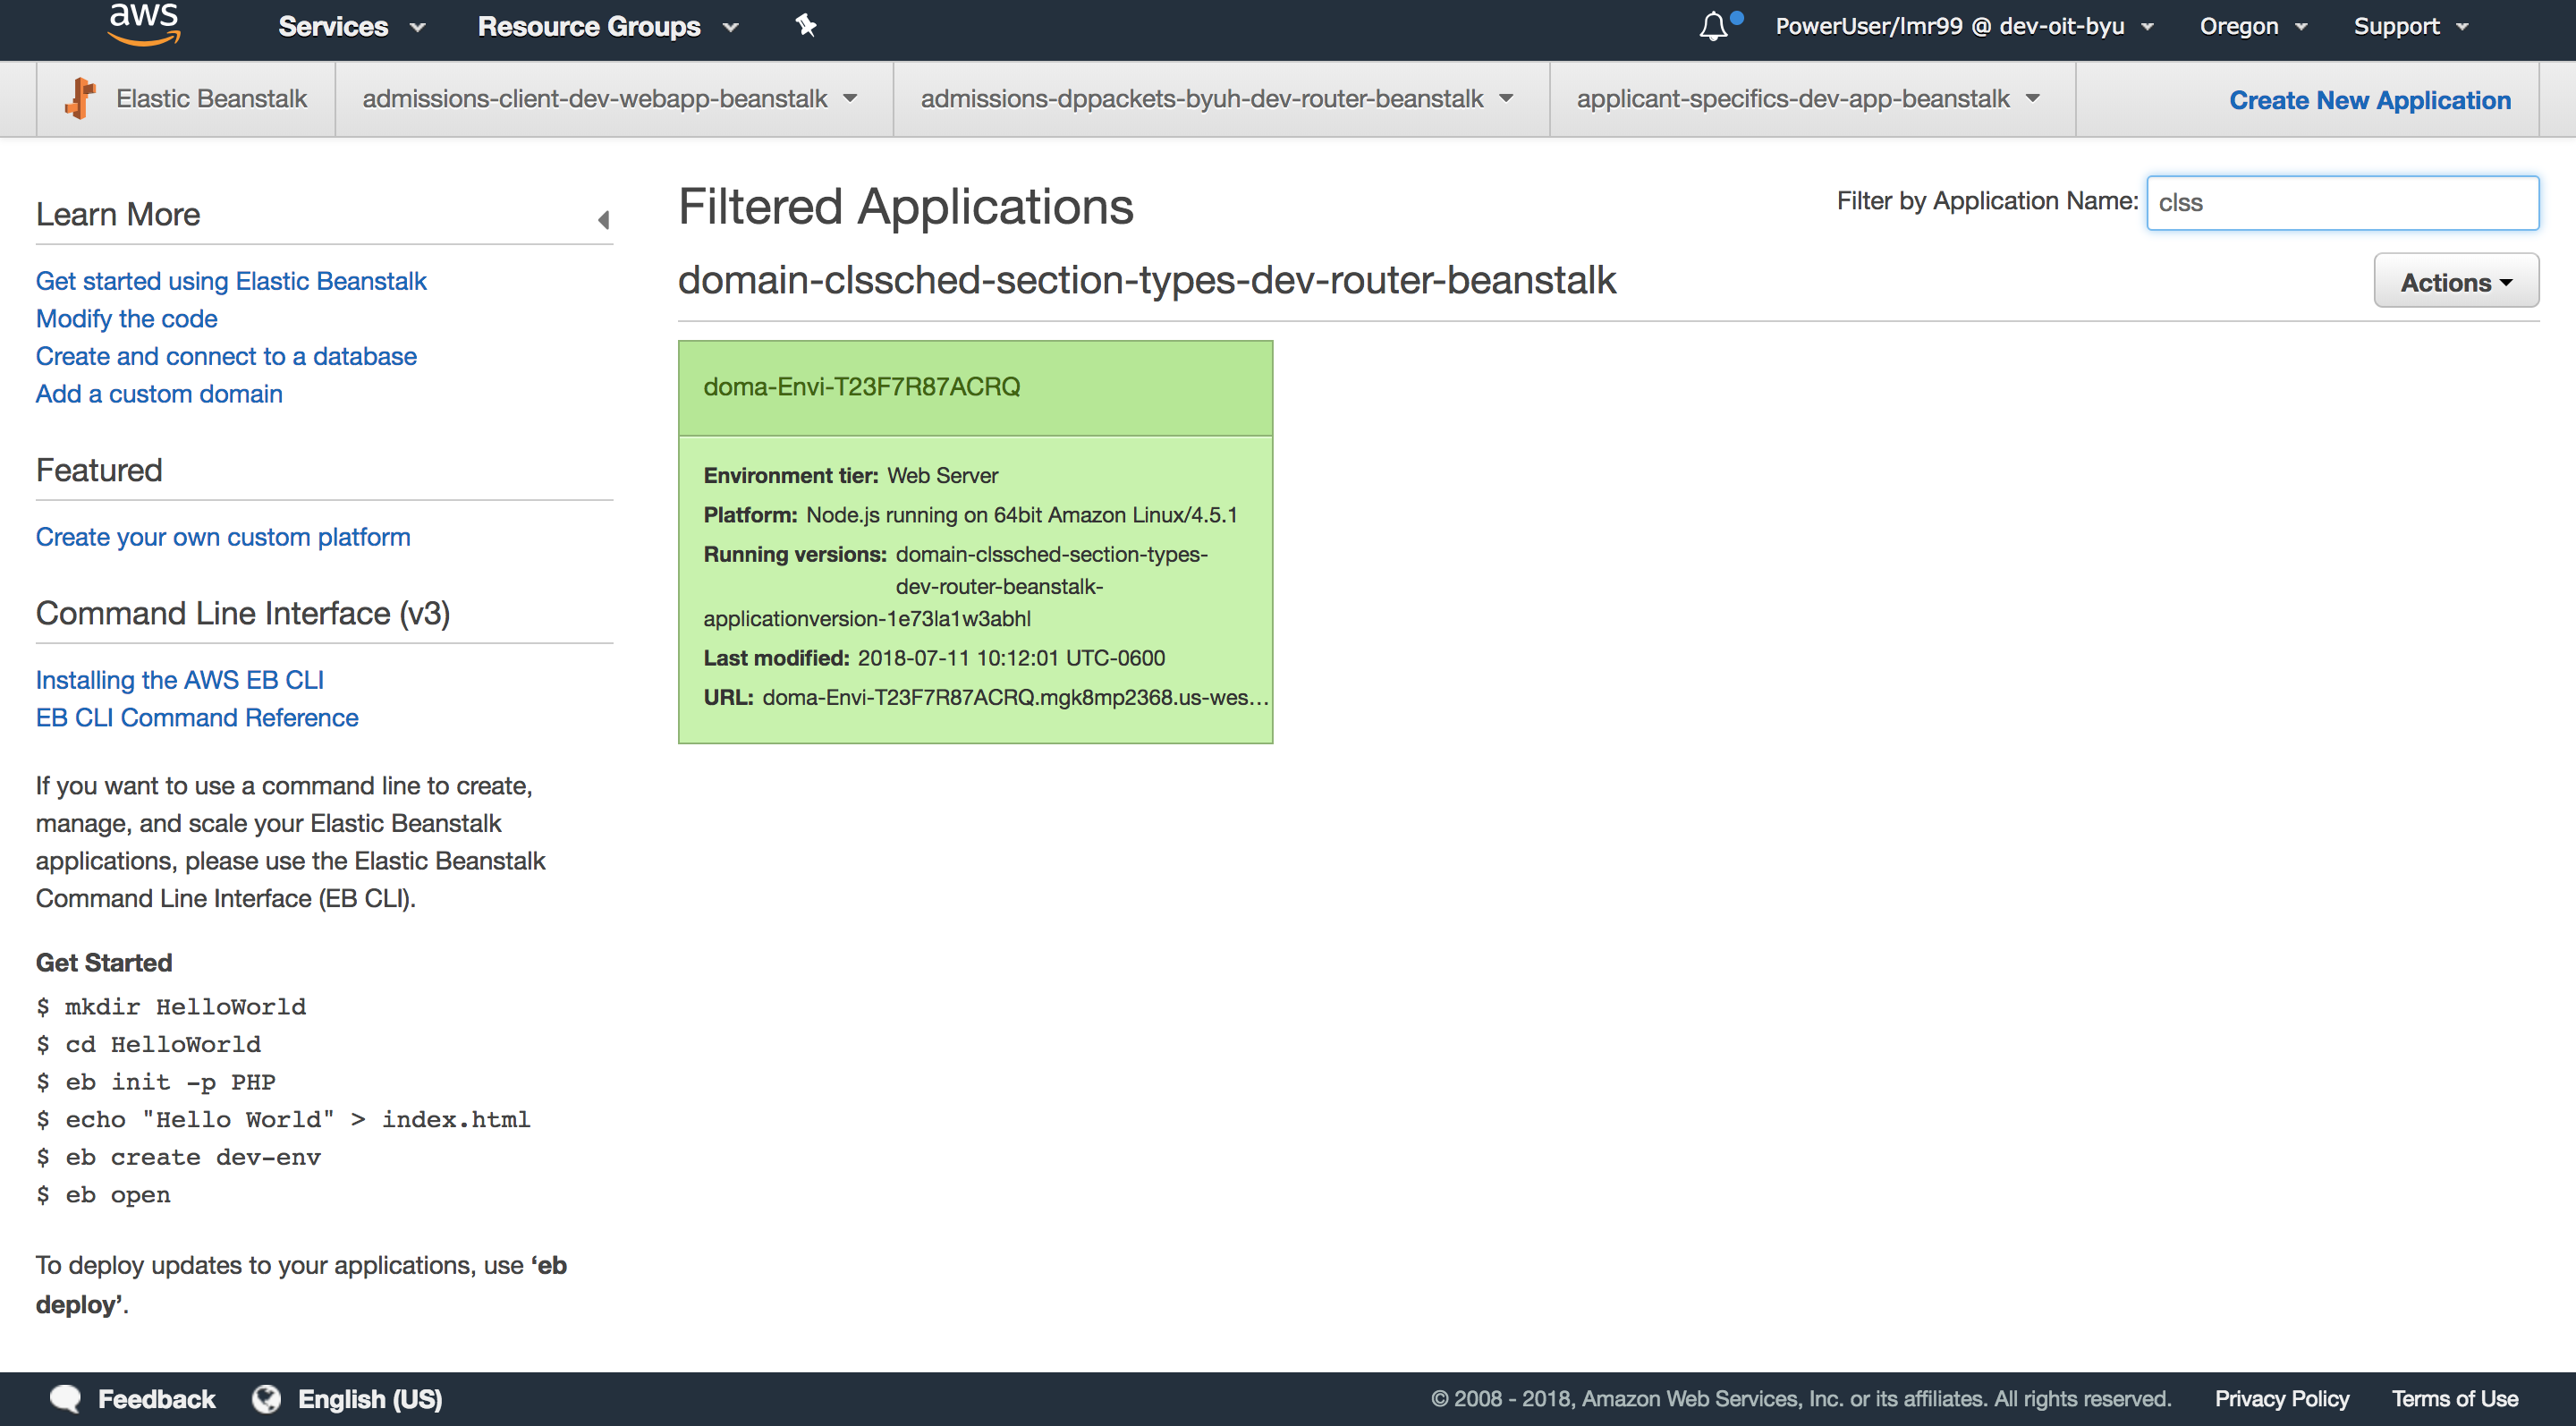
Click on your beanstalk. If everything worked out right it should say that it is healthy!
Yay! You finished this step of the tutorial!
Thanks Lyndsey!
Testing
Before we wrap things up, let’s make sure that everything works. Click Logs on the left of the page-
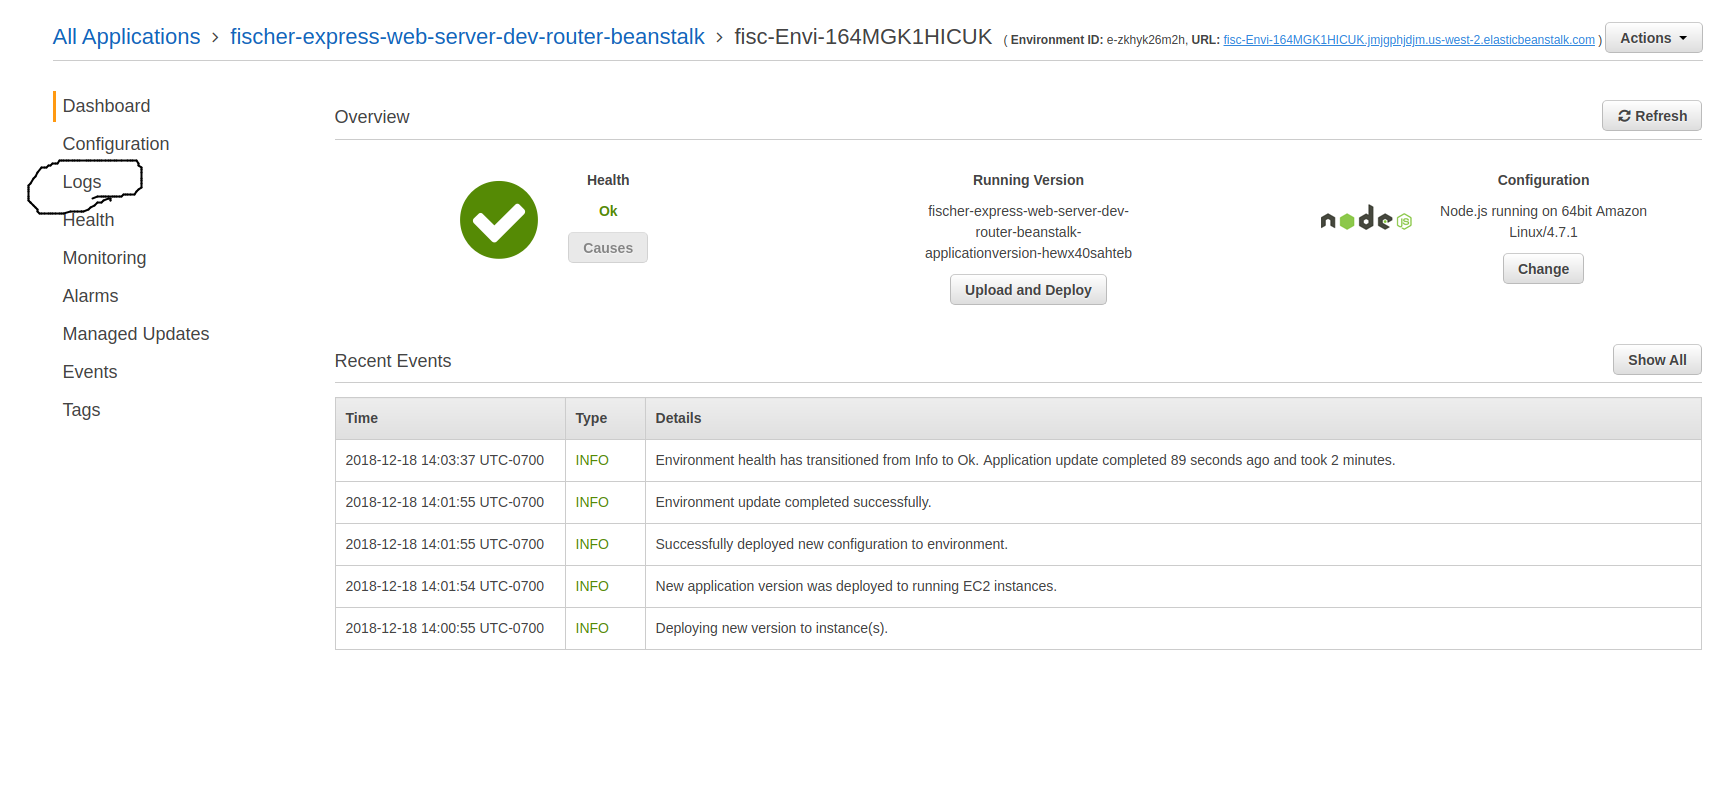
Click Request Logs and then Last 100 lines. Then Download.

You should see a lot of logs that came as the system deployed.
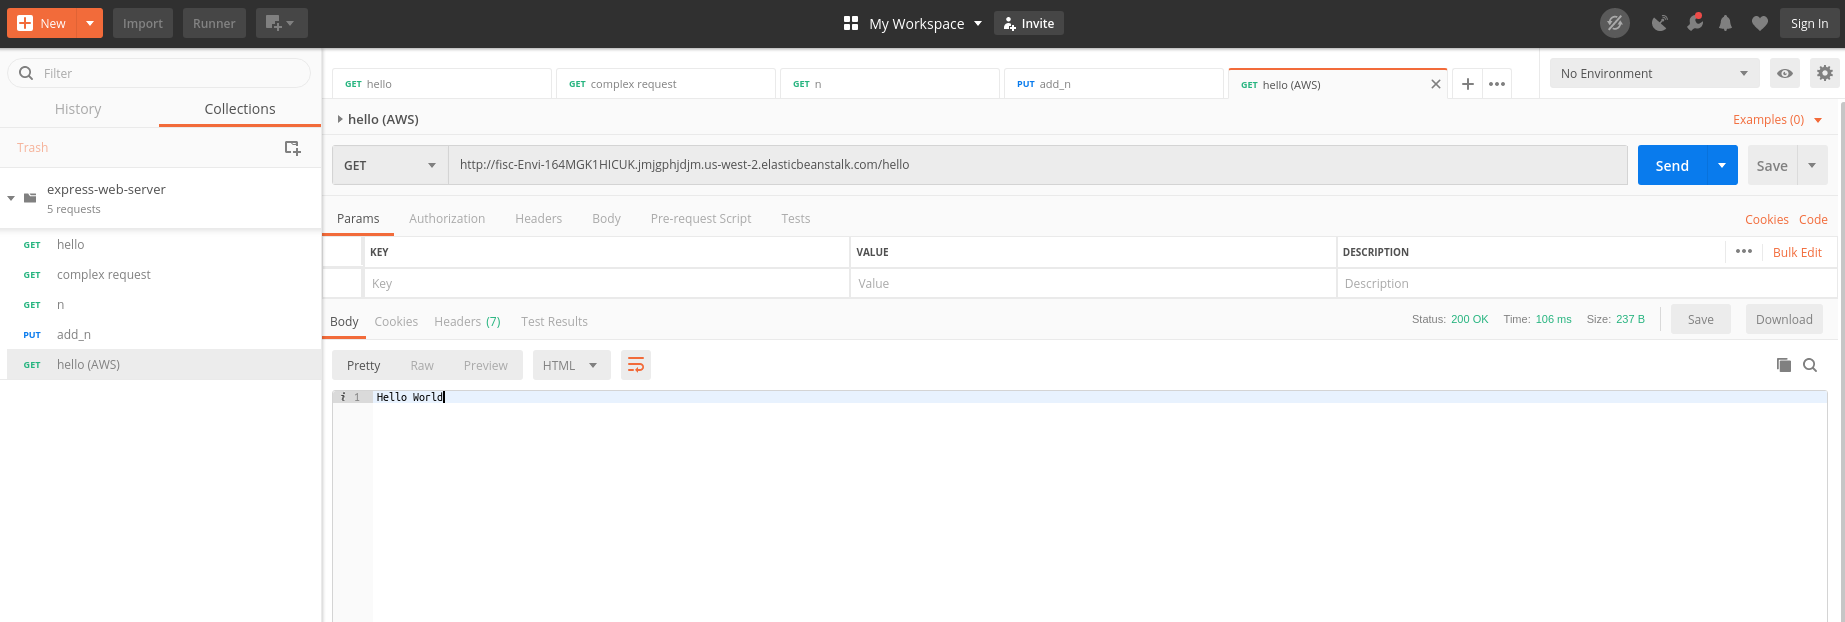
Try using Postman to make requests to the server. Use the URL given to you on the beanstalk page in the upper-right-hand corner:

Here’s an example of what yours might look like:
You can also run tests in JavaScript. Just replace your localhost URLs with your elastic beanstalk URL.
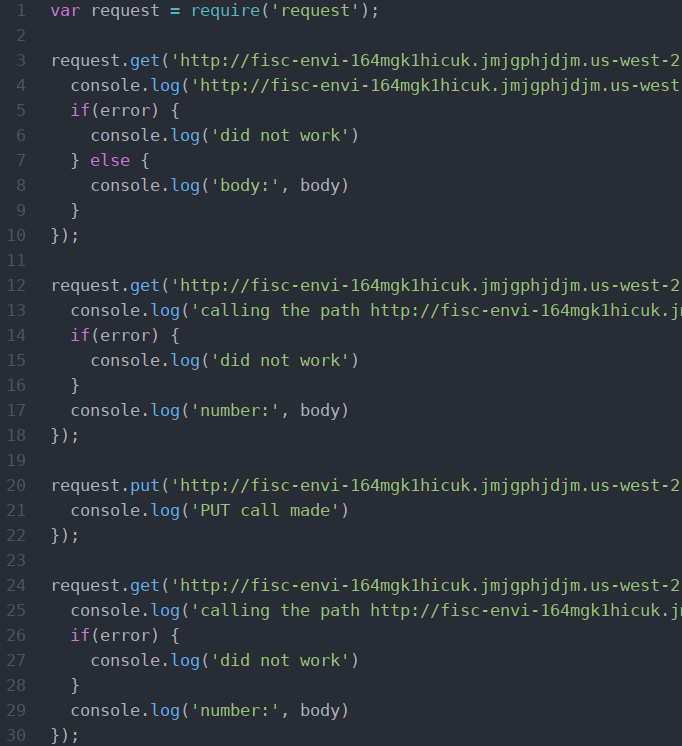
Then run it in the terminal.

Yay! it all works! If it doesn’t work, ask someone for help!