Update Server add open API Enforcer Middleware
Setup
In your project that you just made, make these files:
- index.js
- handel.yml
- handel-codepipeline.yml
- buildspec.yml
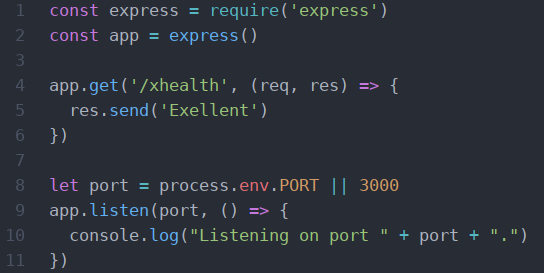
In your index.js file you can copy the lines provided below:
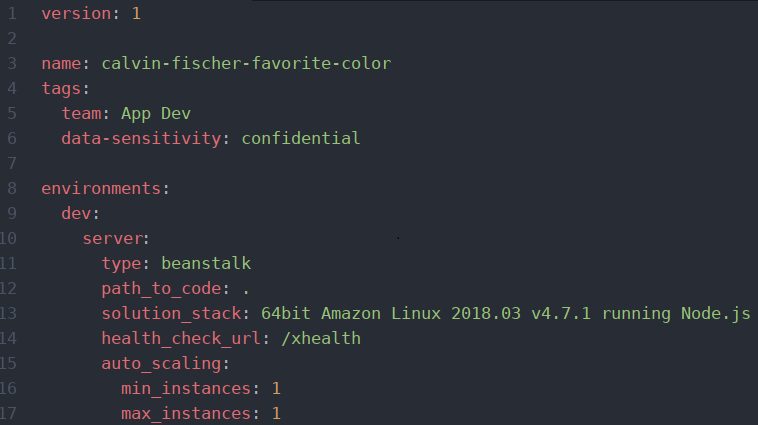
You can copy all of the handel.yml file, just remember to change the name.
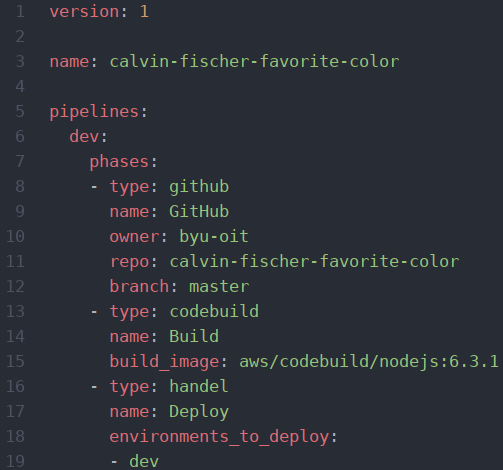
The handel-codepipeline.yml will also be similar, but change both the name and repository. Let’s also set up the build image to something more current. You can find the most current build image here: https://docs.aws.amazon.com/codebuild/latest/userguide/build-env-ref-available.html
As I write this, the most current version is “aws/codebuild/nodejs:10.14.1”
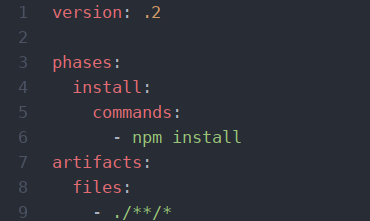
And the buildspec.yml will be exactly the same.
Now you just need to set up you node package modules.
In the terminal run “npm init” and fill out the information.
Then run “npm install express”. It will ask you some questions and for the most part, just use the default by pressing “enter”. You can put your name as the author and “Apache-2.0” as license:
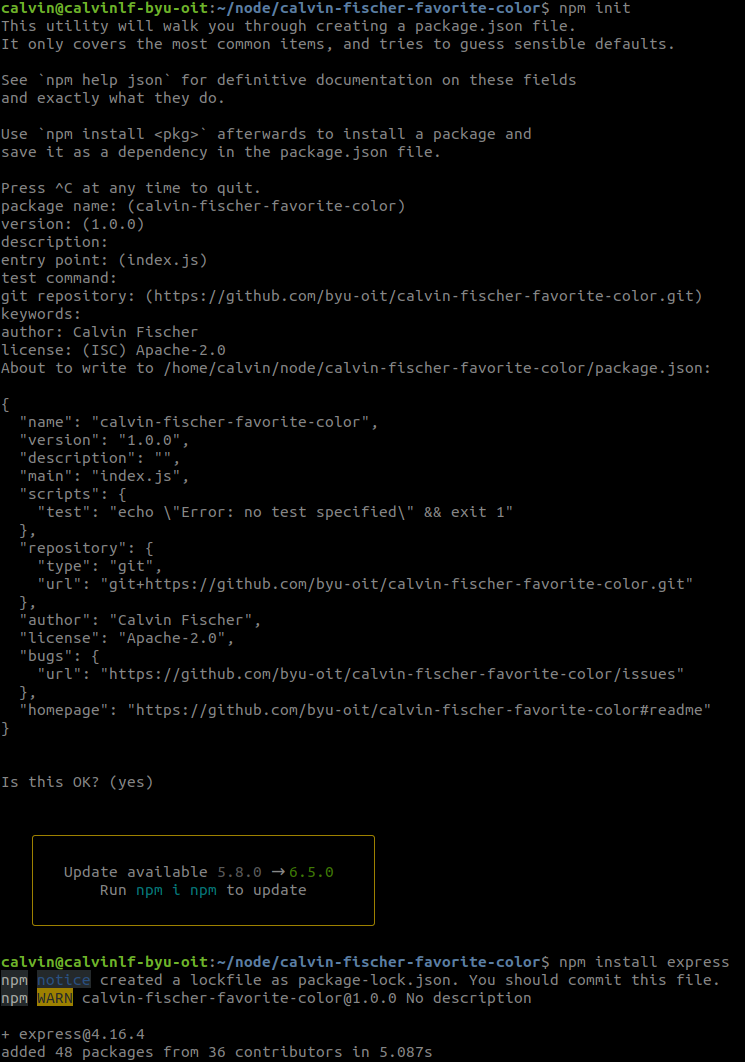
Note: if you are using Linux you will need to add --save any time you use npm to install something (ie: npm intsall –save express)
Don’t forget to add a start script to package.json:

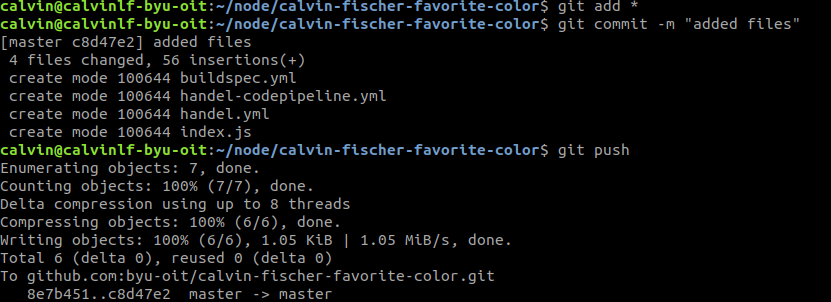
Push all your changes to GitHub.
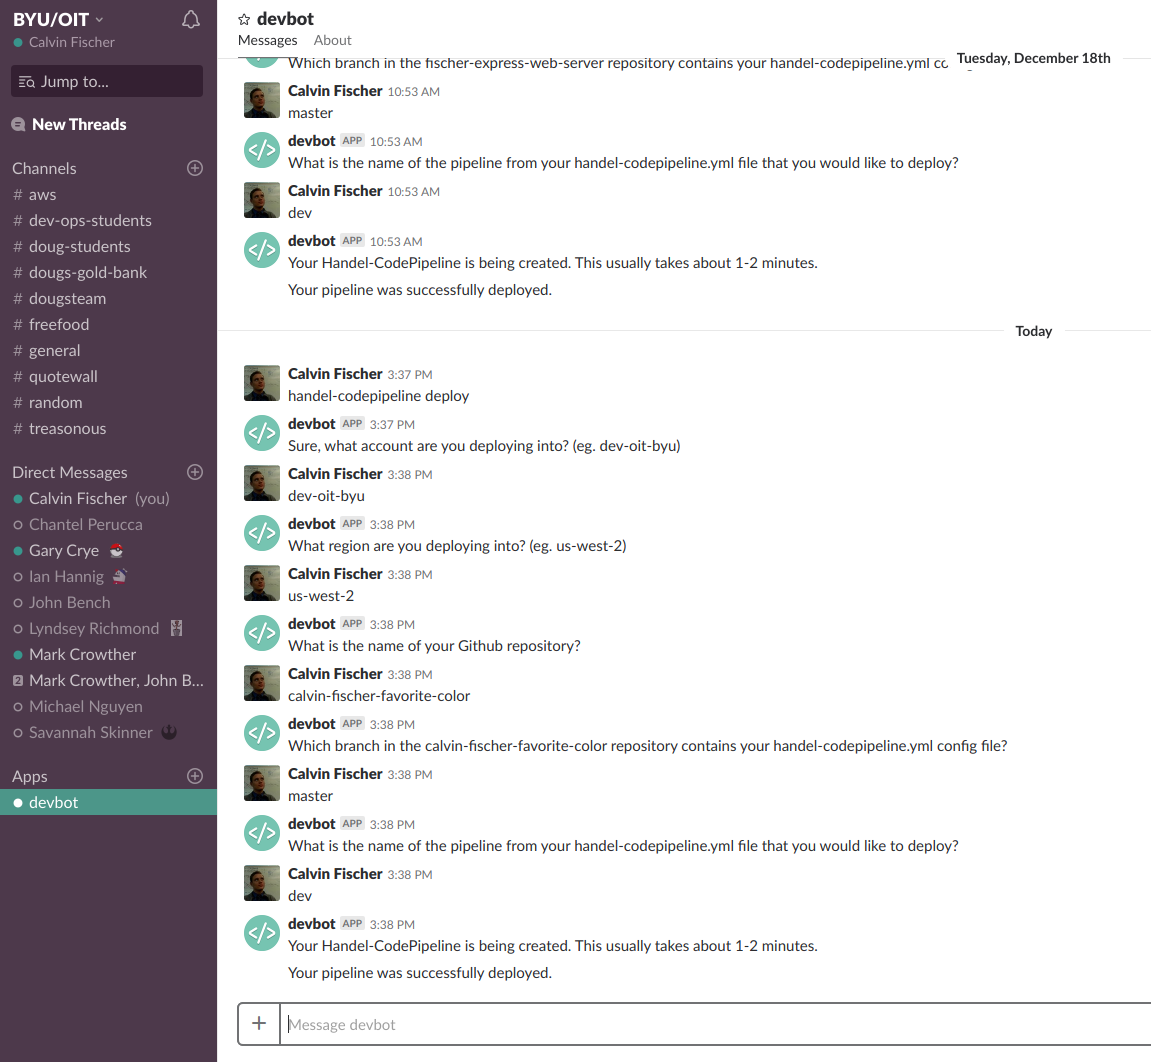
Use devbot to set up the pipeline.
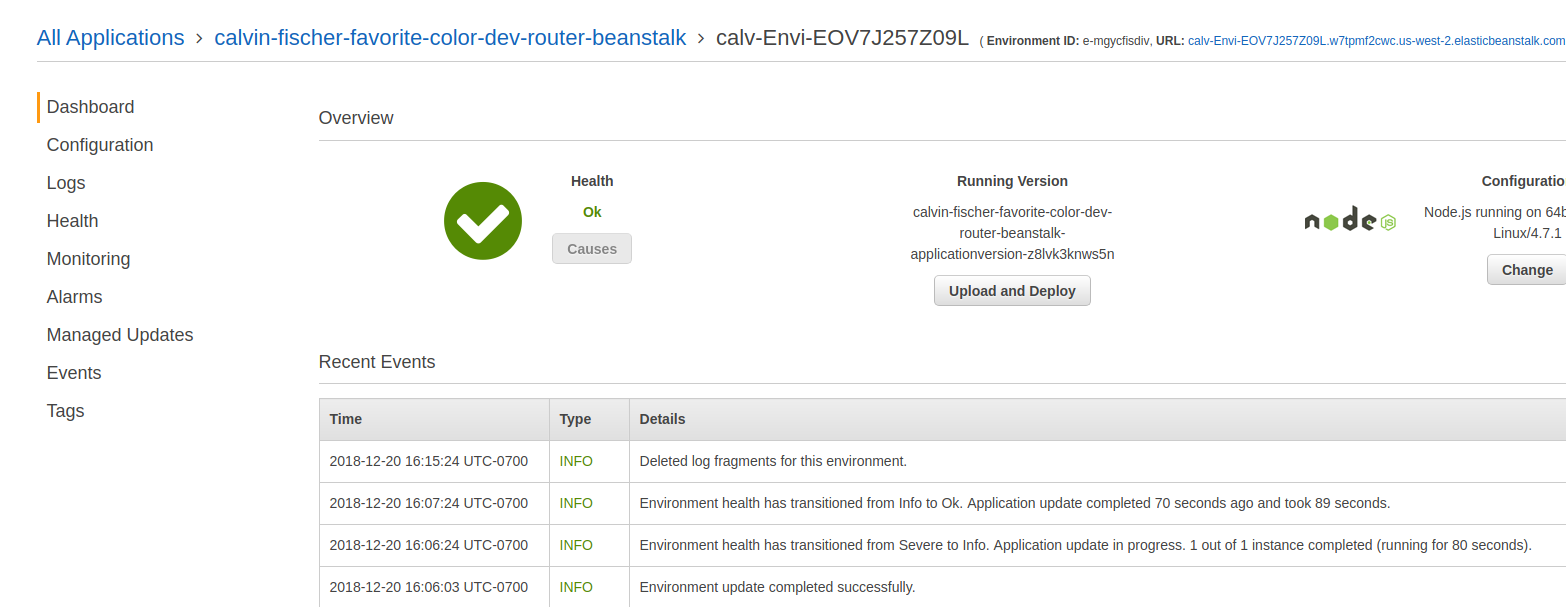
Wait for it to deploy (go to codePipeline on the AWS website):
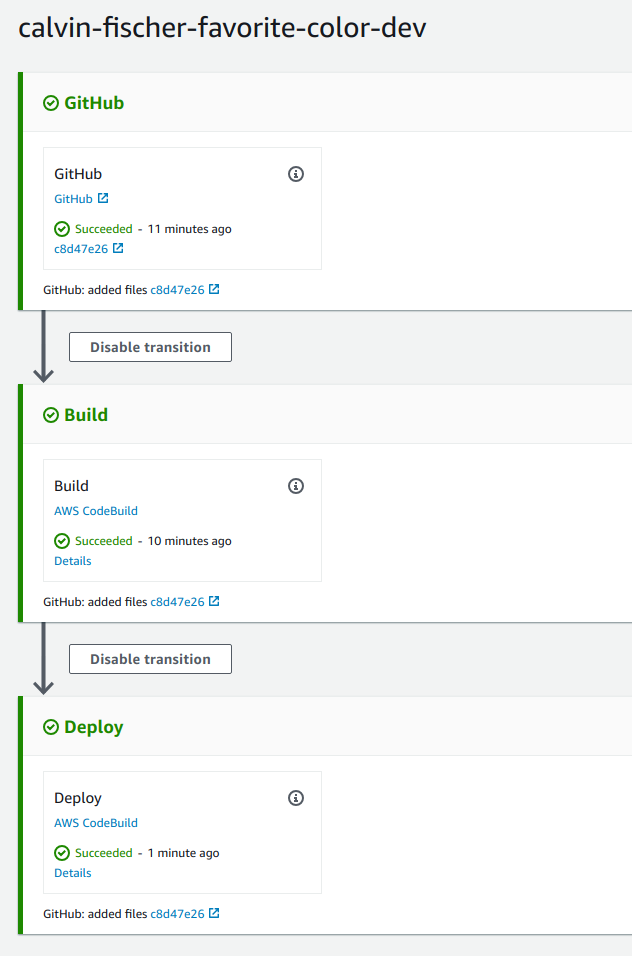
When it’s deployed, go check the elastic beanstalk to make sure it is healthy. If you had any fail, or if your beanstalk isn’t healthy, ask someone for help!

Our API can’t really do much right now, so let’s give it some functionality by writing our index.js file according to the swagger document we wrote earlier.
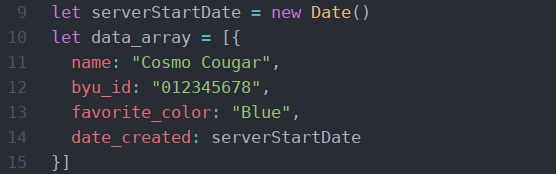
The program is going to need something to write to, so let’s make an array that will hold our data:
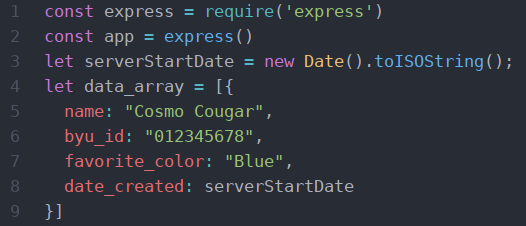
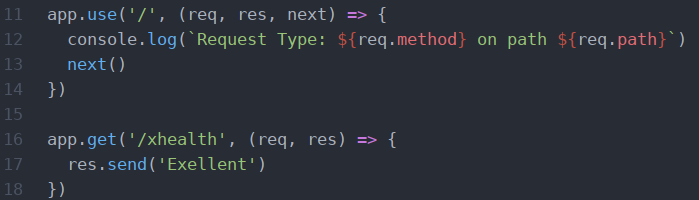
Let’s also add some middle-ware right before the health check function that will help us debug if we need to later.
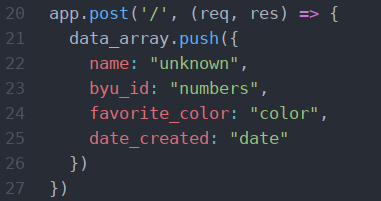
Now we are ready to start writing the functions that our swagger document specified. Let’s start by looking at our POST method in the swagger document.
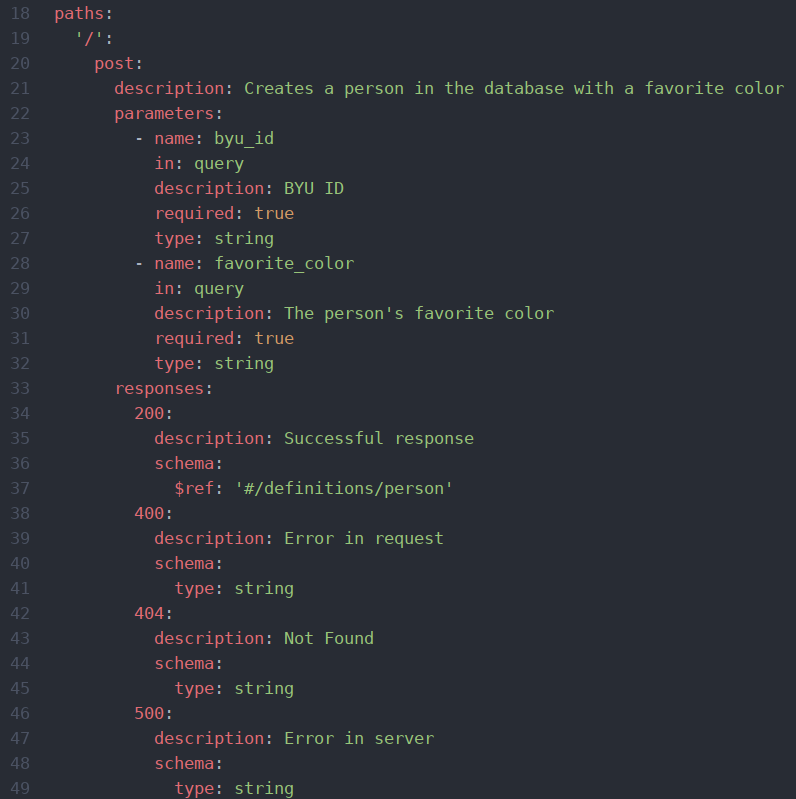
So we know that the path is going to be ‘/’.
![]()
We also know that it is going to add a new person to the database, so we can look at what the swagger document says a person should look like.
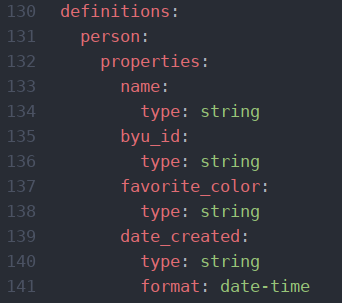
Let’s add a person that looks like that:
The swagger document says that the favorite color and BYU ID are going to be in the query, and we can get the data we need from there.
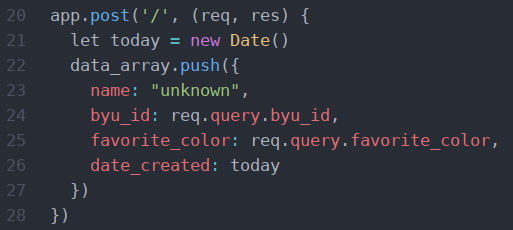
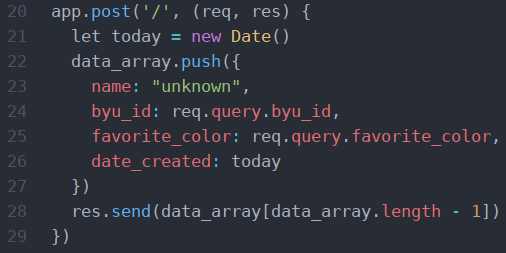
Don’t worry about the name for now; we will take care of that in a later portion of the tutorial. The swagger document says we are going to send, as a result, the person that just got created.
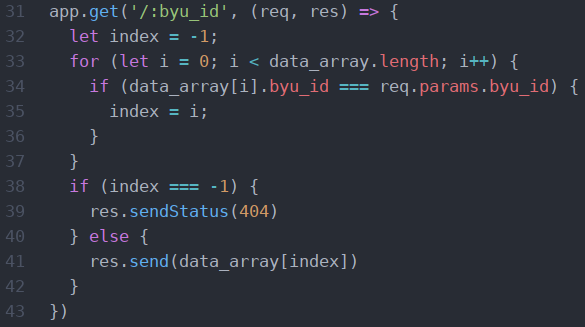
Let’s do the same thing for the GET method. First, let’s take a look at the swagger document:
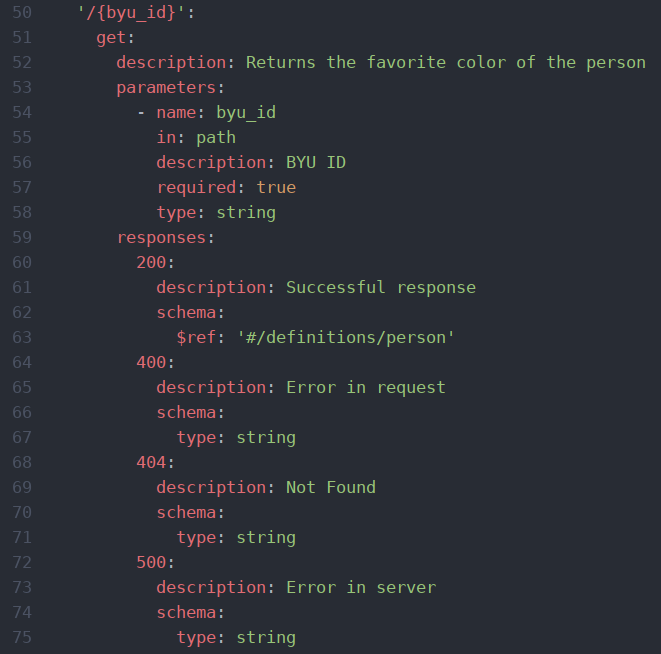
It is going to get the BYU ID in the path. That is represented in the express module as a colon:
![]()
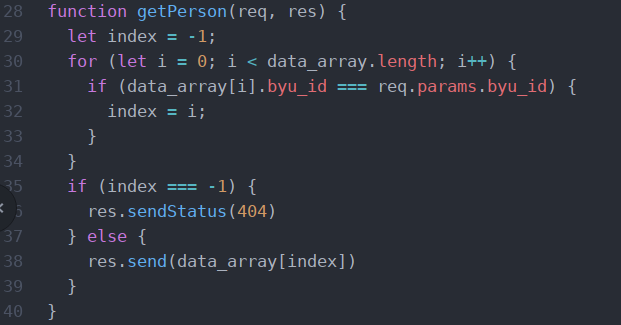
You are going to want to find and return the person from a BYU ID and if it’s not there return a 404 response:
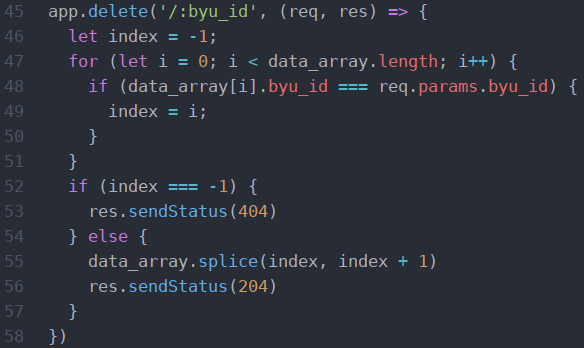
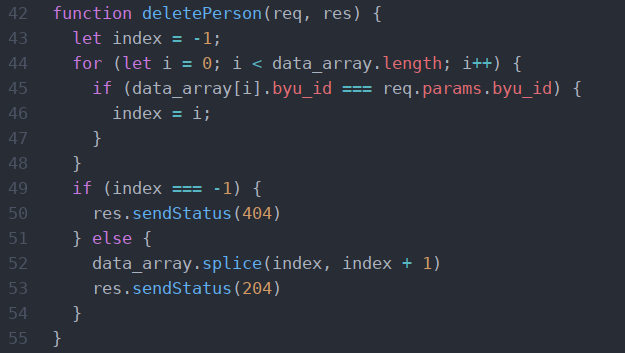
The DELETE method is similar.
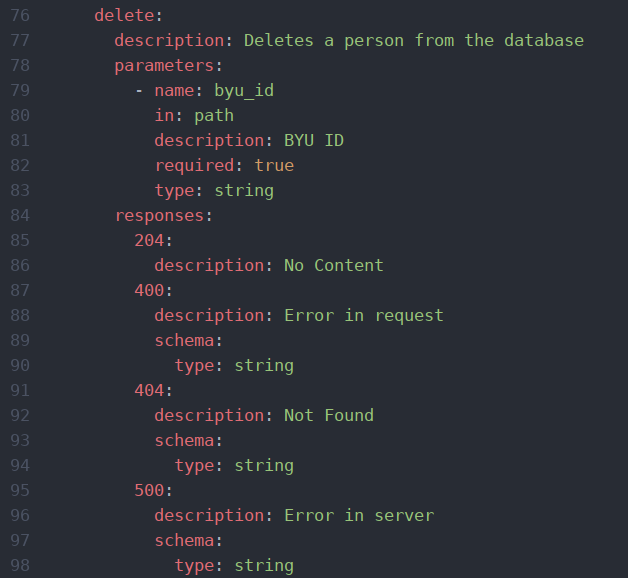
Notice that you will send a 204 status code instead of the information, because there will be no more information.
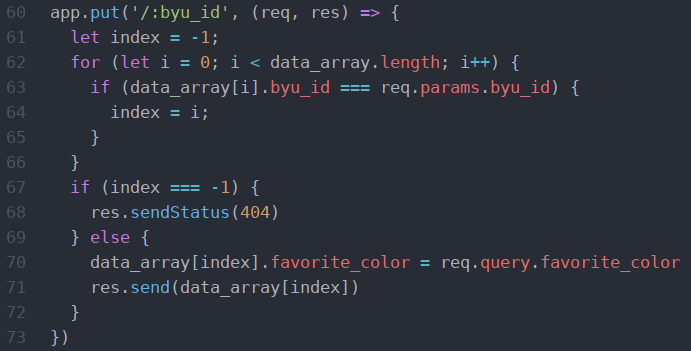
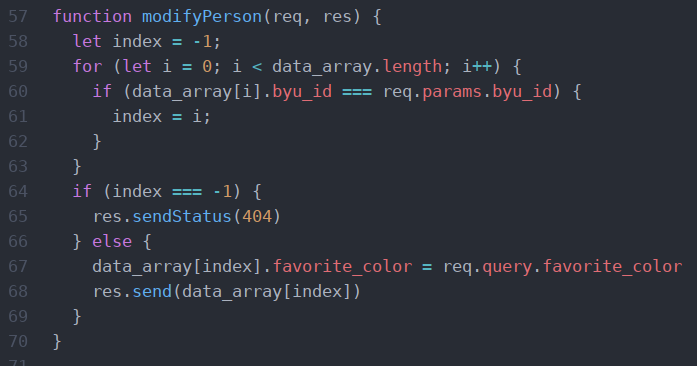
Let’s look at what swagger says for the put requests.
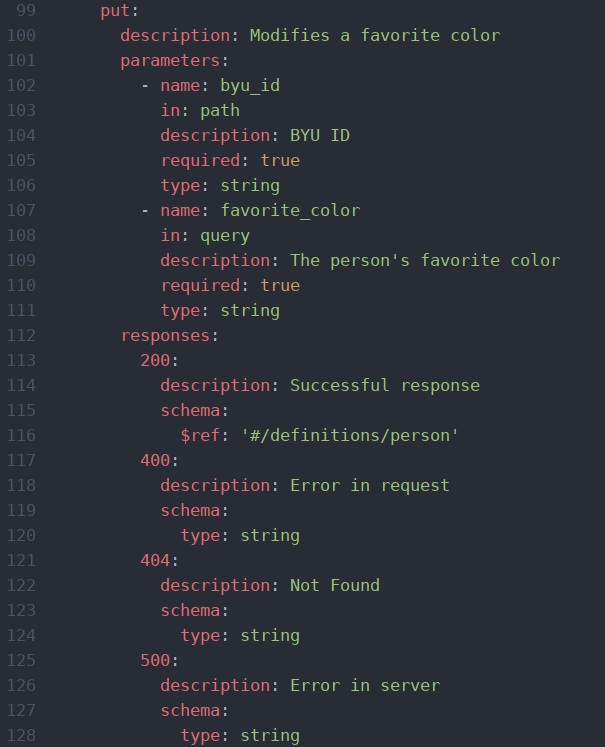
Notice that you are going to get one of the variables from the path and the other will be in the query.
Push everything to GitHub and watch it deploy. Check to make sure it is healthy. (If it’s not healthy, ask someone for help!)
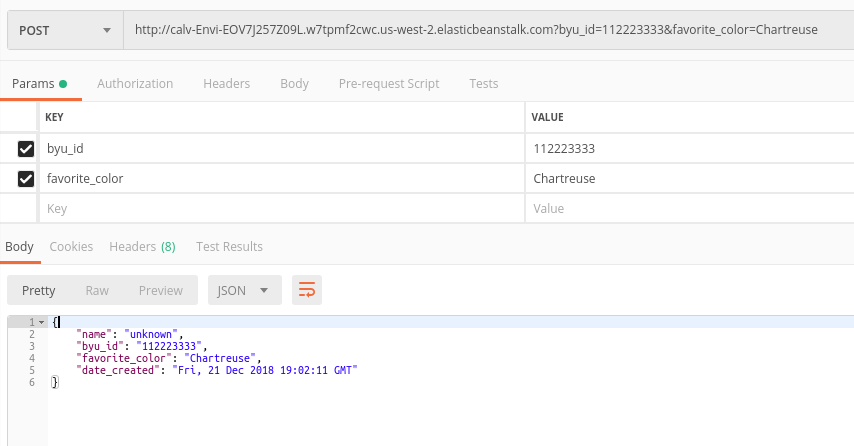
Let’s test our server in Postman. First, try to make a POST request. It should look something like this (though, the date should be a little different):
Then you can try a GET request
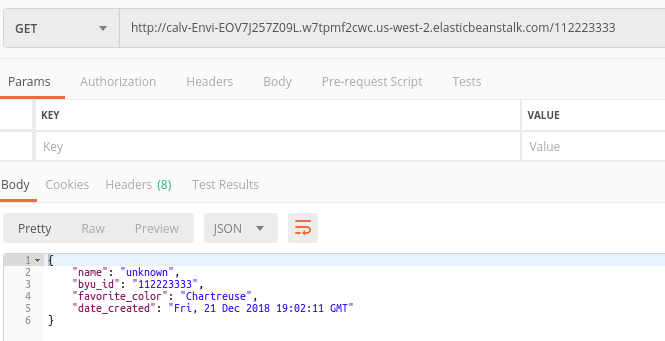
Try different things; make sure all your requests work.
Open API Enforcer Middleware
The enforcer is really powerful. It allows you to simplify your code and allows your swagger document to become really useful.
You can learn about the Enforcer here https://github.com/byu-oit/openapi-enforcer-middleware
It was developed by BYU to make sure that the swagger document was followed.
First, we are going to need to update our swagger document.
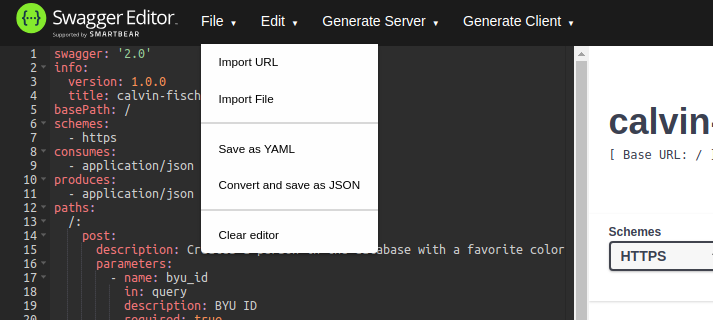
Let’s change it into a JSON file. This can be done in the Swagger Editor. Click “File” and then “Convert and Save as JSON”.
When that is done, you can move the new JSON file to the folder of your project and delete the old YML one.
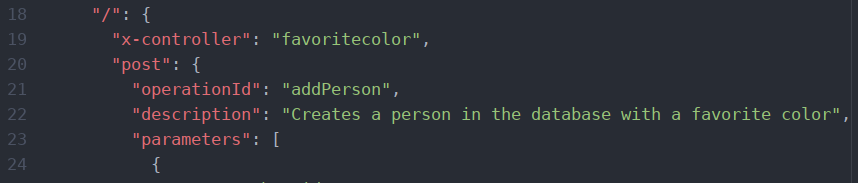
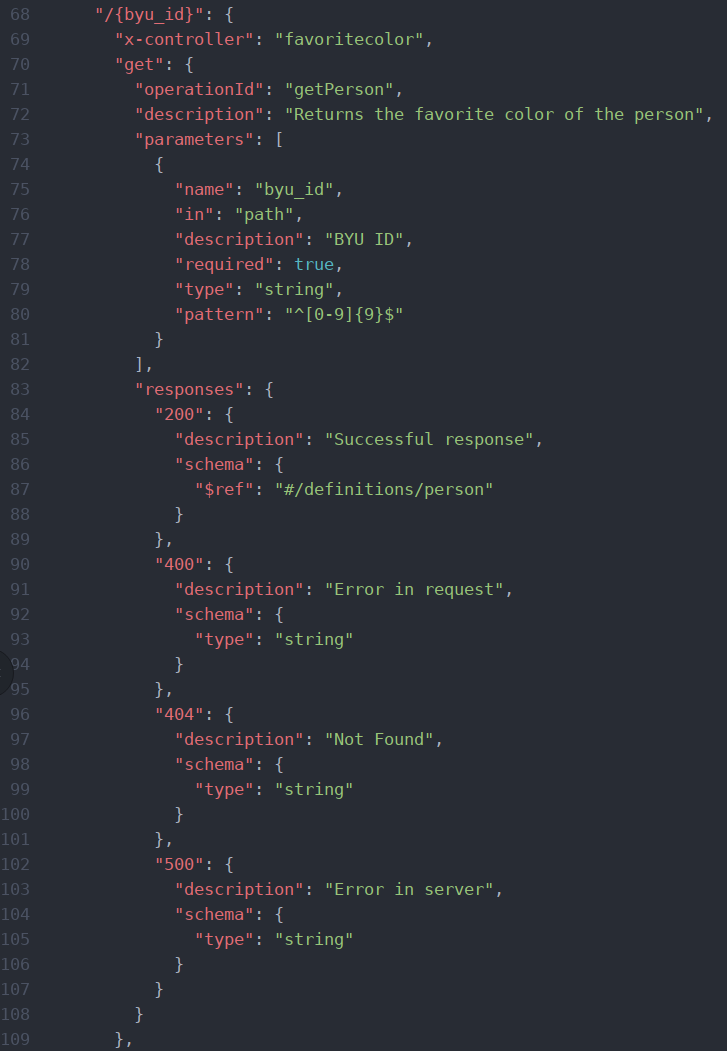
Let’s start by telling the swagger document where it will be finding the code. Later, we will create a file called “favoritecolor.js”. But for now, let’s just tell the swagger document where it will be able to find it. We do that by designating it as an “x-controller”. We will designate that on line 19.
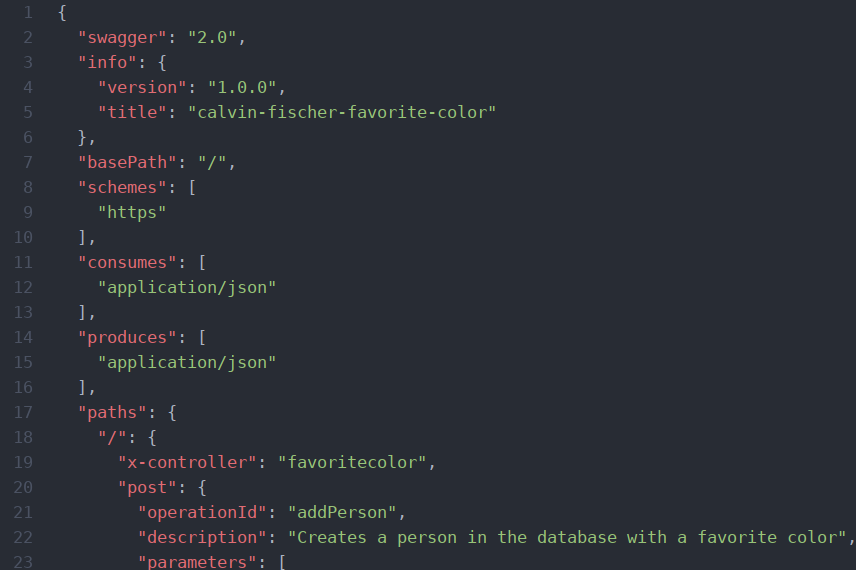
Let’s also tell in the swagger document what the name of the function that a request will call. This is done with the “operationId” on line 21.
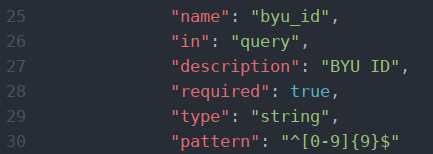
Let’s be more specific about what a BYU ID will contain.
Do the same thing for the GET method.
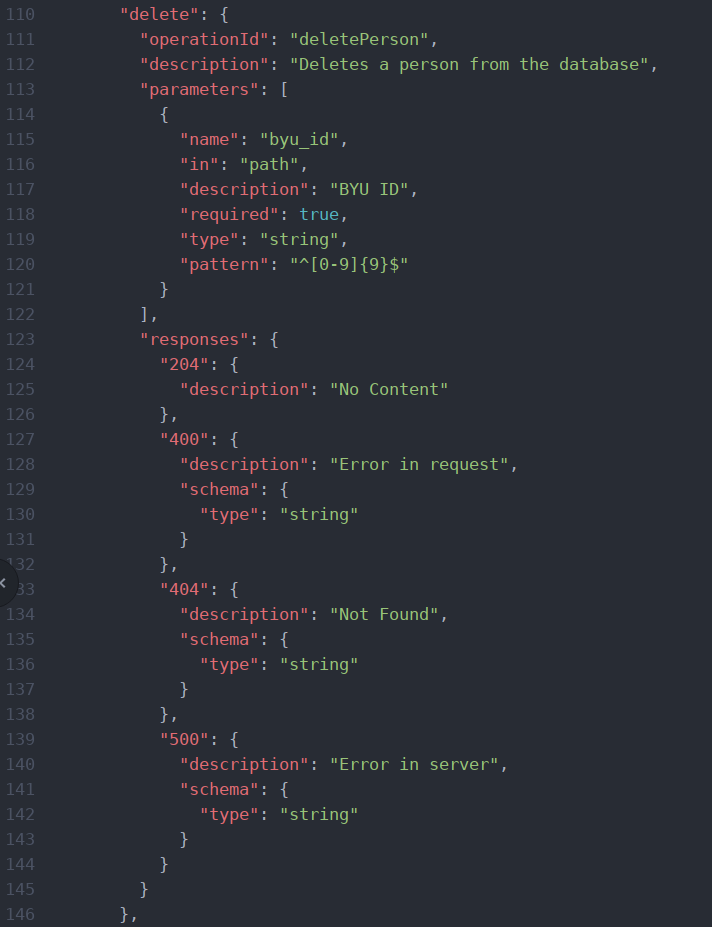
The DELETE method.
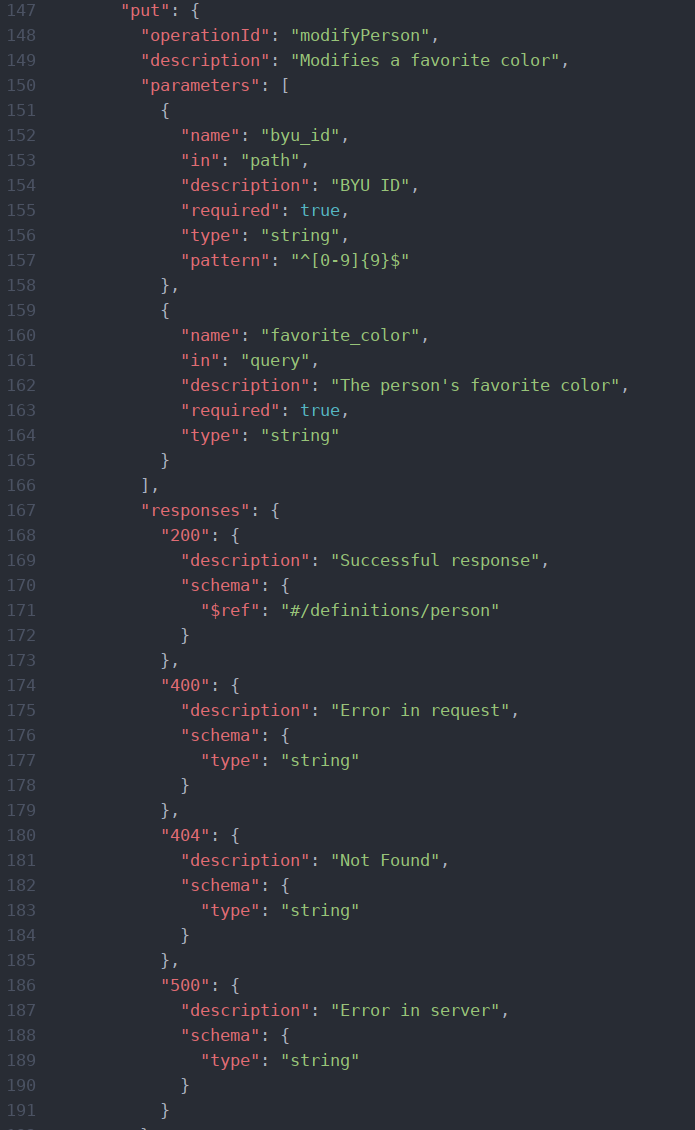
The PUT method.
Now we want to add some mock data. This is powerful because it can be used to send mock data for testing.
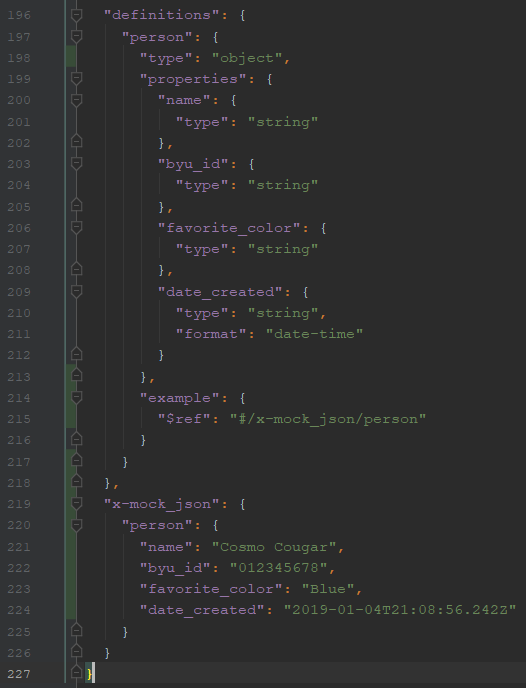
Now your swagger file is ready! Save your swagger.json file in your firstname-lastname-favorite-color folder.
You are going to need to install the openapi-enforcer-middleware module:
(use the command: npm install openapi-enforcer-middleware@0.11.12)
(we only add the @0.11.12 because we are using a previous version of this node module)

Also, run “npm install body-parser” and “npm install path”. You will use these also.
Now let’s create a new folder called “controllers” inside of your firstname-lastname-favorite-color folder. Now create a new file “favoritecolor.js” inside of your newly created controllers folder. Leave this file blank for now.
The Enforcer Middleware will use the Swagger document to find and use the functions in that file to do what you want it to do.
You are going to need to completely redo our “index.js” file. You might want to save the old version somewhere else so you can copy and paste from it later.
First, you will want to import all the modules.
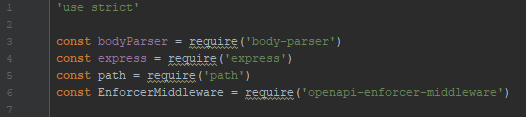
The next part will be similar to what you have done before.
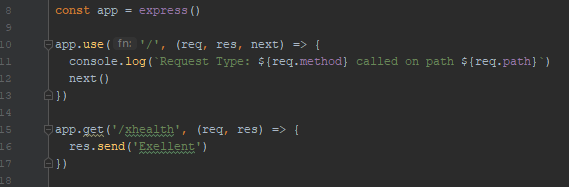
Then use the body parser middleware. This makes sure that the requests the server receives are formatted correctly.

Then put in the paths that will tell the Enforcer where the swagger documents and controllers are.

Then you can set up and implement and the Enforcer middleware.
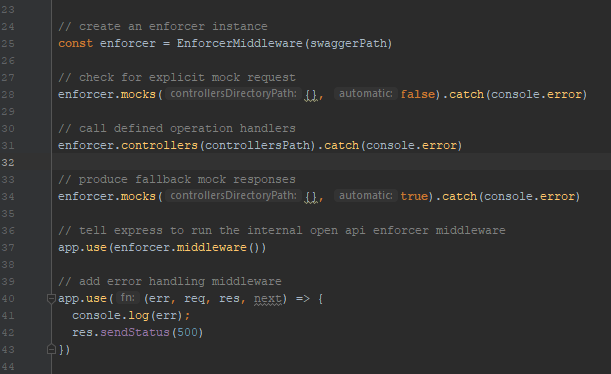
The empty brackets may cause some warnings to appear, but you can ignore them.
Now you need to only set up the app to listen. Let’s add a little bit more information.
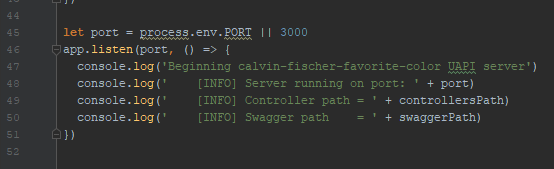
Now your “index.js” file is ready!
However, before we move on, let’s talk about something that will demonstrate a useful feature of the Enforcer. If you look at the specifications for the openapi-enforcer-middleware (https://www.npmjs.com/package/openapi-enforcer-middleware) you will see that it talks about mock data. Mock data makes it so that if the middleware can’t find the function in the controllers folder, it can still send mock data from the swagger document (like we did with the ‘x-mock_json’ in your swagger.json file). If you write mock controllers, it can use that too. But if you pass it empty brackets (just like you implemented in your ‘index.js’ file when you call ‘enforcer.mocks({},false)’, or ‘enforcer.mocks({}, true)), it does it automatically (although as of now this causes a warning or sometimes errors as demonstrated below). There seems to be plans to change this soon. This makes it so that you can start testing the server before it is even done.
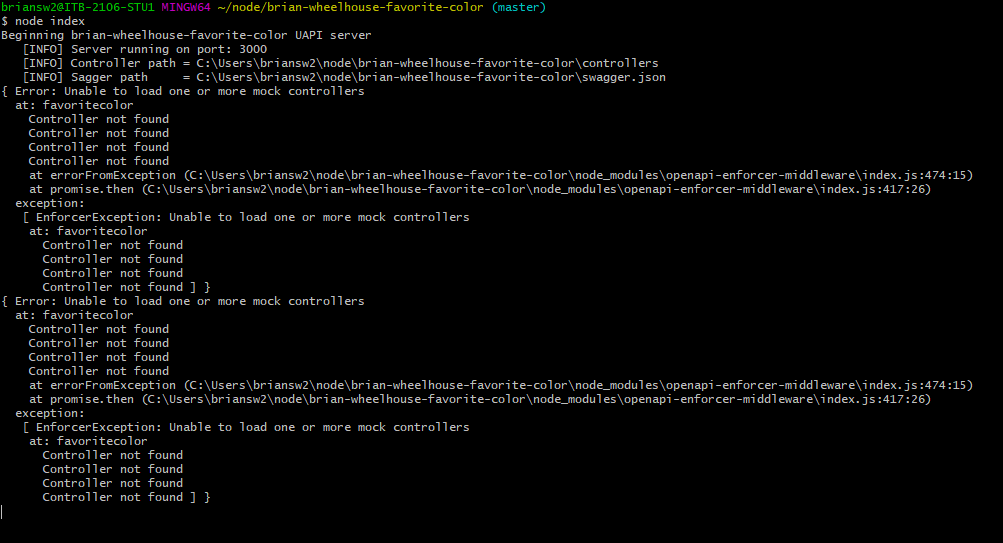
Try to start up your server using the terminal.

You will probably get some warnings, but that is okay for now. They just tell you that the enforcer is working. If you have errors like the ones displayed below, your server should still work, so run the requests listed in the next part of this training and see if they work. If they don’t, ask someone for help! (These errors are effects of the changes that are being made as previously discussed)
Test your server by sending a request using the request module.
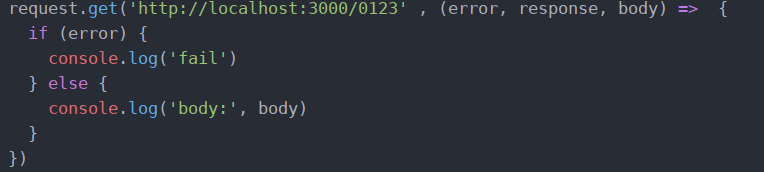
I used the same “request-practice” file that I have been using. Run the program in the terminal.

If you got an error like this, then everything is good! Pat yourself on the back and know that the Enforcer is working. As you look at your swagger document, you will see that it as it looks for a BYU ID which is a 9 digit set of numbers, and because we sent something other than that, it sent back an error. Let’s give it a proper BYU ID.
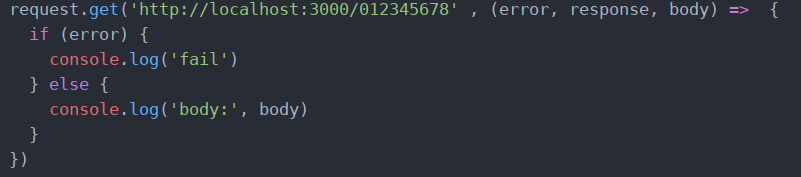
Send the request.

Awesome, now remember this is just mock data. Try putting in your student ID. It should look something like this:

Now you are ready to write the functions.
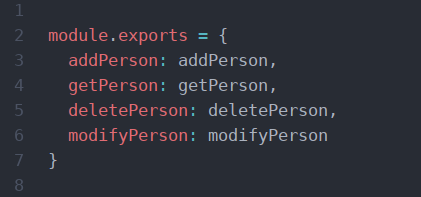
Open up the “favoritecolor.js” file in the “controllers” folder. It should be blank. Let’s ensure that all of our functions are going to be exported. Go and check the “operationId”s in your swagger to know what functions you are going to make.
Initialize the data just like before.
Now you are ready to make the addPerson function. You can copy and paste from your old code:

Same with getPerson:
And deletePerson:
And modifyPerson:
Push everything to gitHub and watch it deploy on CodePipeline.
Hopefully, everything works!! Use Postman or your “request-practice” program to test it just to be sure.