Docker Container
Installing Docker:
What is Docker?
Docker is a system that allows developers to deploy their applications in isolated containers (like a sandbox environment) which are run on the host operating system. These Docker containers are very efficient and have a low overhead. With Docker, we’ll be able to package our API into a single file, which is known as a Docker image. Using that image file, anyone who has access to it can run our API on their own system, which is partly why developers like Docker so much. It makes sharing and testing projects easy!
We’re going to make a Docker image for our API and then deploy that image to Elastic Beanstalk using the Handel-codepipeline!
Let’s begin by making sure you have Docker installed on your computer. We’re just going to install it again (which will instead upgrade it if it is already on the computer).
Go to: https://www.docker.com/get-started
You should see something like:
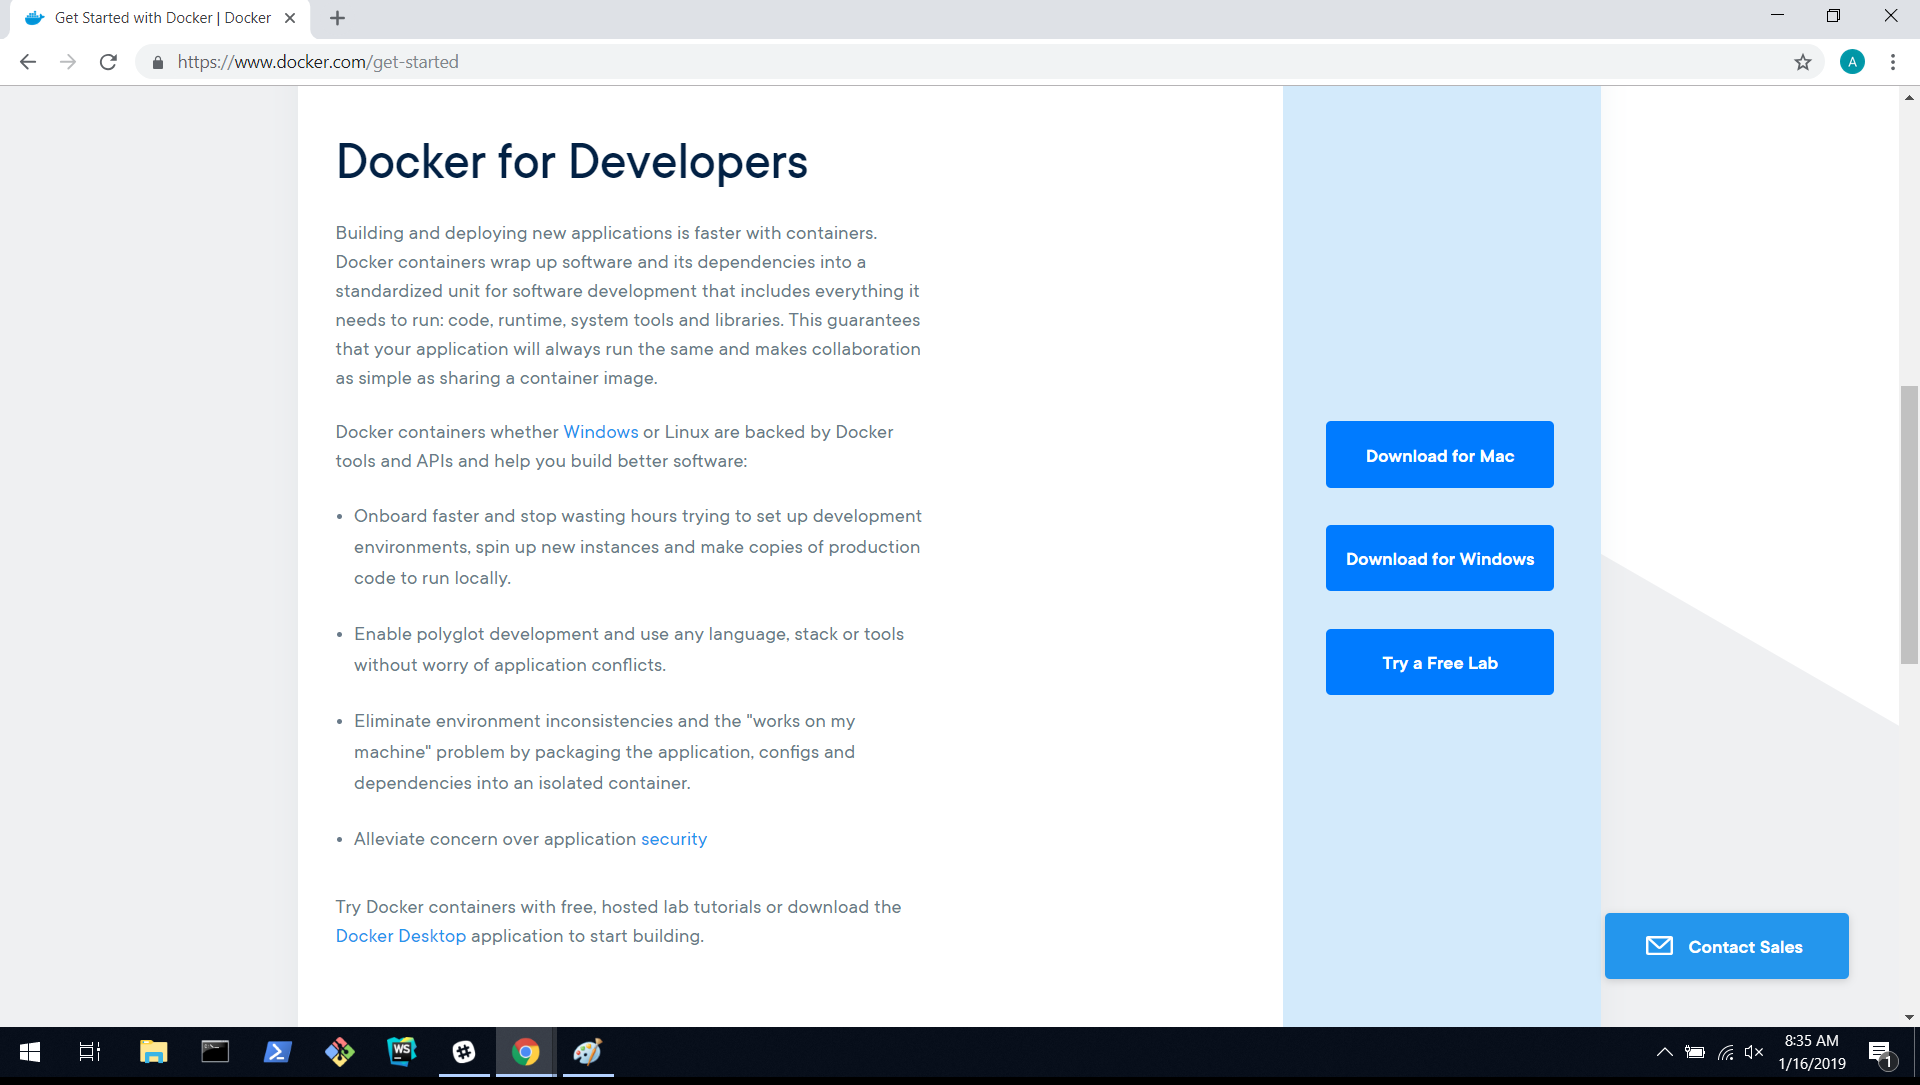
If it prompts you to make an account, go ahead and do so! Then, download the version for whatever operating system you’re on.
You should see:
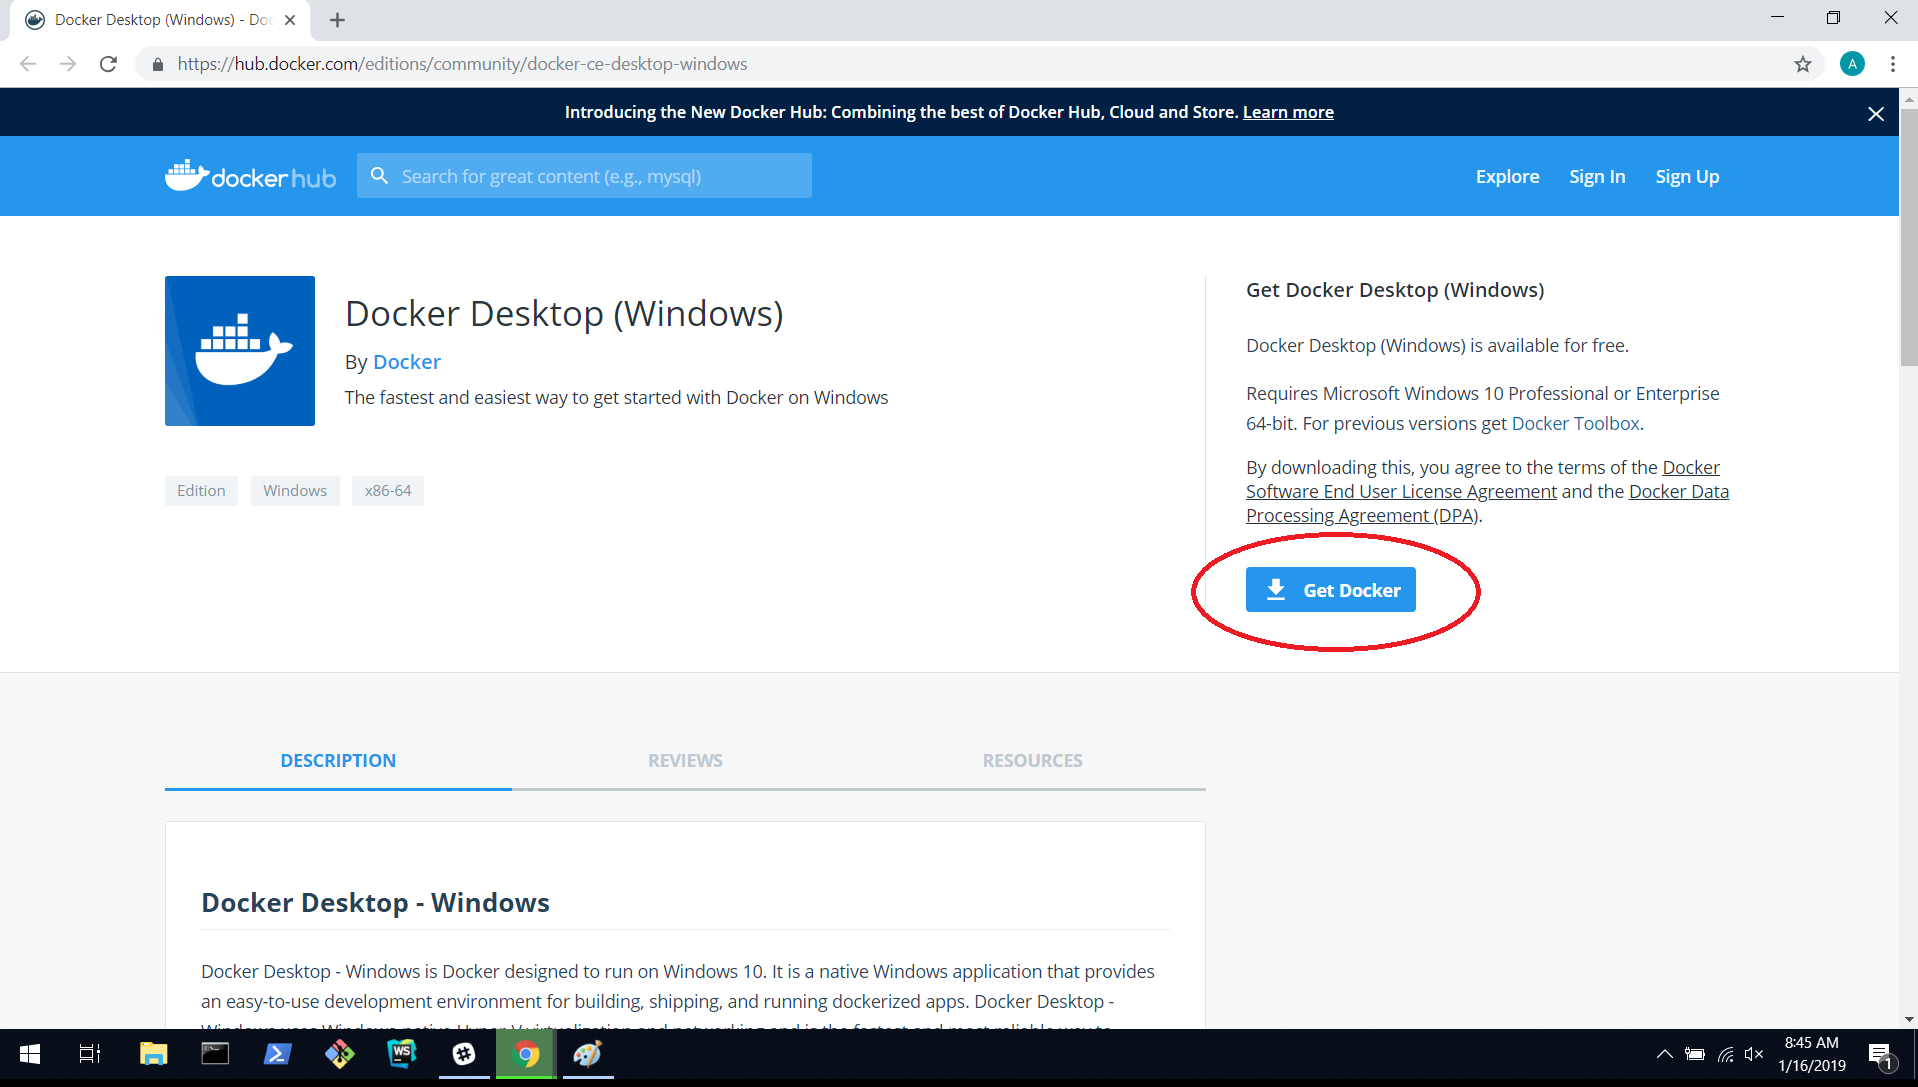
Select the “Get Docker” button to start downloading the installer.
Once the installer is done, open it up and just accept all the defaults when it prompts you.
The installer may both log you out and do a restart once Docker is installed. Allow it to do so.
Once your computer is back on and the install is complete, you should see the Docker icon on your Desktop. It looks like this:
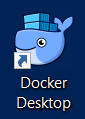
If you do, great job! You installed Docker!
Login:
Go ahead and double click on the Docker icon to run it! Docker typically runs in the background on the computer, so don’t expect to have any programs pop-up.
In the bottom right corner of your screen, expand the running programs arrow:
If you have mac, I believe the whale symbol is in the top right corner of your screen (if you can’t find it ask for help!).
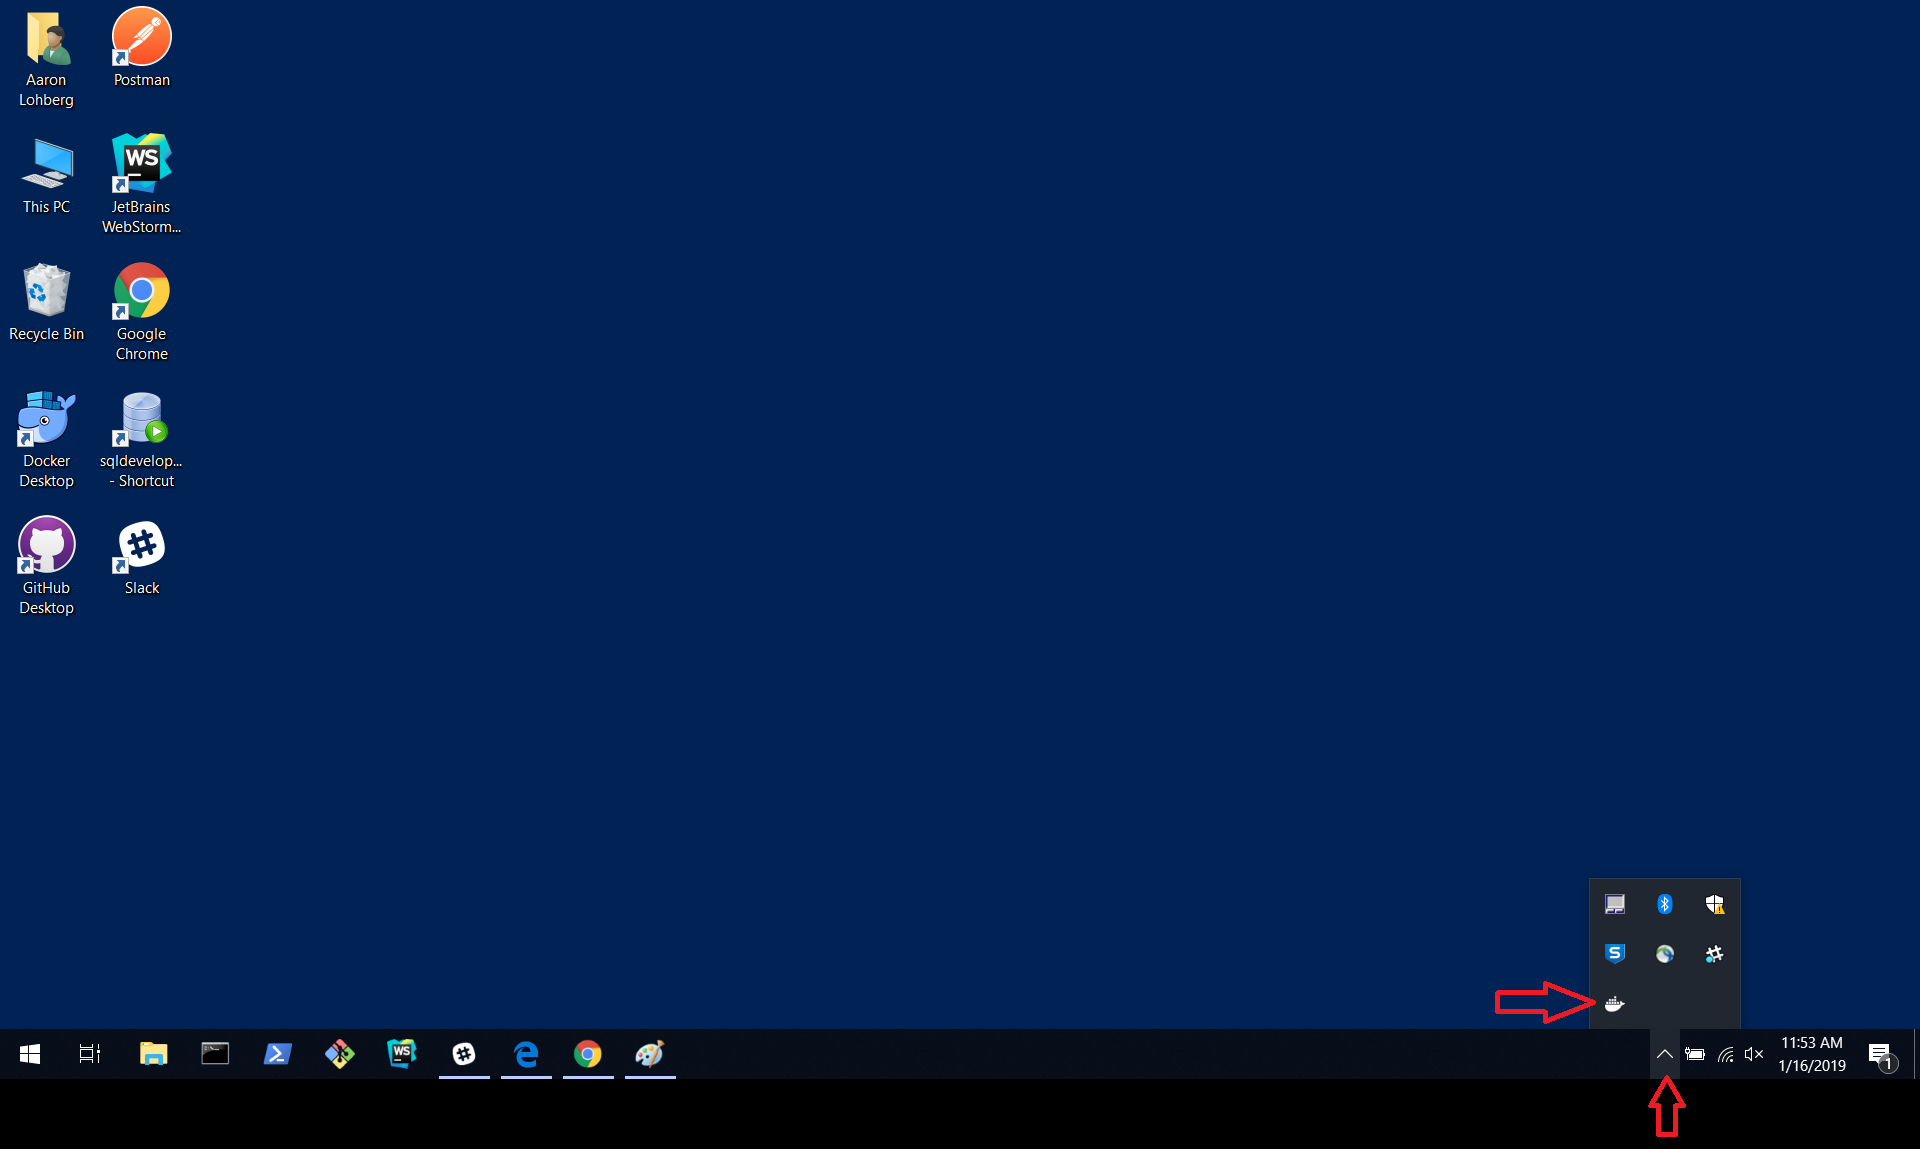
Right click the Docker program (the whale with containers on its back) and select: “Sign in / Create Docker ID …” You should see:
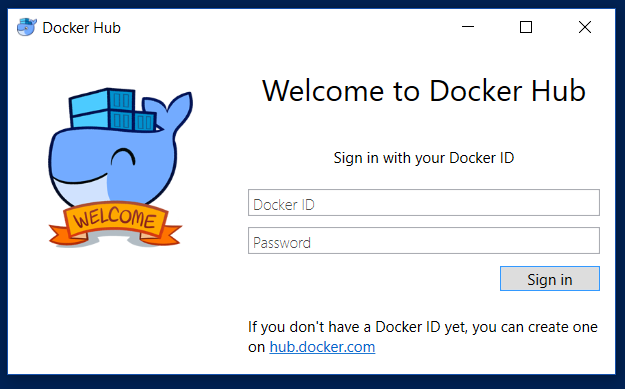
Use the username and password you used to make your account on the Docker web page. If you haven’t done so, click the link shown above “hub.docker.com” to create a Docker ID.
Docker Commands:
Similar to Git, Docker has commands that allow us to build our image (project) and pull it from other locations. Here are some of the more common Docker commands:
- docker build
- This command allows us to build a Docker image. We’ll be using this!
- docker run
- This command allows us to run a command inside of one of the containers we’re running.
- docker pull
- This command lets us pull an image or a repository from a registry (a place where images are stored).
- docker push
- This command lets us push an image or repository to a registry (opposite of pull).
- docker ps
- This command lets us list all of our current containers.
- docker rm
- This command allows us to remove one or more of our current containers.
Let’s try a couple out!
Open a terminal. If you’re on Windows I would recommend using the Git Bash terminal.
Let’s see if we have any containers running currently. Type: docker ps
You should see something like:

This is what we expect; it’s basically telling us we have no running containers.
We need to pull an image (container) from the Docker hub. Let’s type: docker pull hello-world
You should see:

Now we have the image, we just need to give it a command so it will run our command.
Let’s run our new Docker image! In the terminal, type: docker run hello-world
You should see (with some additional documentation after):

Awesome! We got a Docker hello-world image, and then ran it so that it printed hello-world!
Making a Dockerfile:
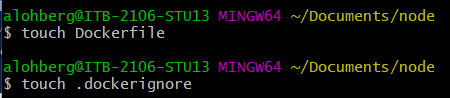
In order for us to make a Docker container, we need to create a Dockerfile inside our project that will specify how Docker should create our container or image. Let’s begin by creating two files inside of our [first name]-[last name]-favorite-color project folder. Let’s call the first file “Dockerfile” and the other file “.dockerignore”.
These two files can easily be made by the following commands once we’re inside of our project folder (make sure you’re actually in your project folder; in my pictures, I am not):
Using WebStorm, let’s open our Dockerfile and begin writing it!
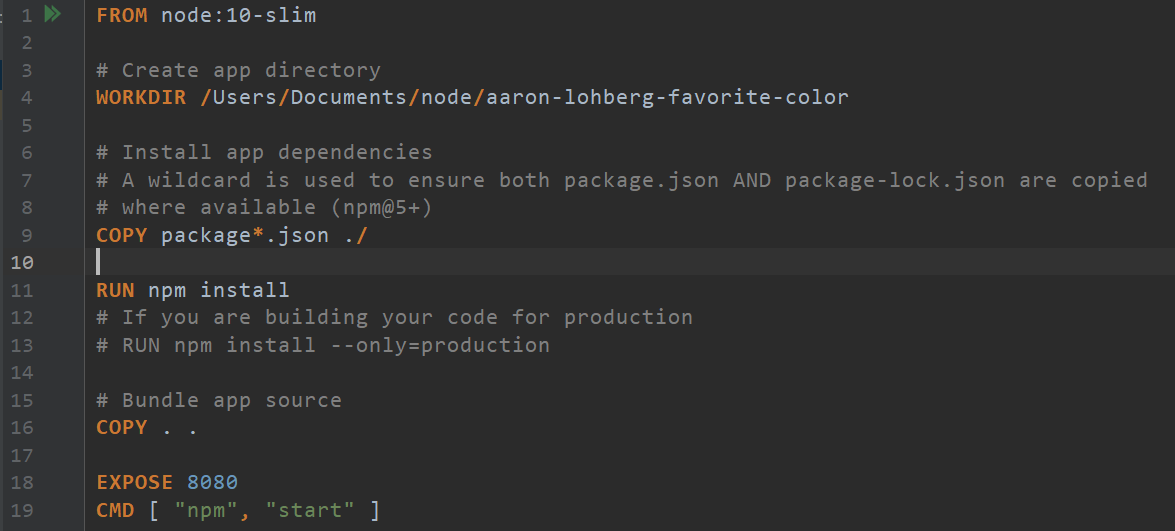
The first thing we need to do is to specify in our Dockerfile what the base image will be. Dockerfiles can be seen as having multiple layers, but we need to start somewhere. In this case, we want to start with node as our base image. To do this, enter the following:

Then we’re going to specify the working directory or folder of our image, which is our favorite-color server folder.

Now we need to grab the json that our app is dependent on. We can do this by adding the following line:

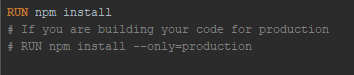
Next, we need to tell it to install npm so that our container will have npm for our node server.
This copies the files we need for our node server to make sure they’re in our container.

This tells the container which port to expose.
The next lines will be the commands that will start npm for us.

In the end, your Dockerfile should look like this:
Now, we’re going to write a .dockerignore file which will tell our Docker container which files are not important.
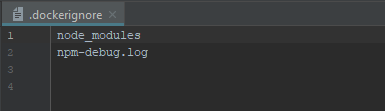
This will basically tell our computer (or other’s computers) when they go to make the Docker container that they don’t need to include all the node_modules and the npm-debug file, which is fine for our purposes.
Creating a Docker image:
On Windows, open a git bash terminal.
Navigate to your [first-name]-[last-name]-favorite-color project.
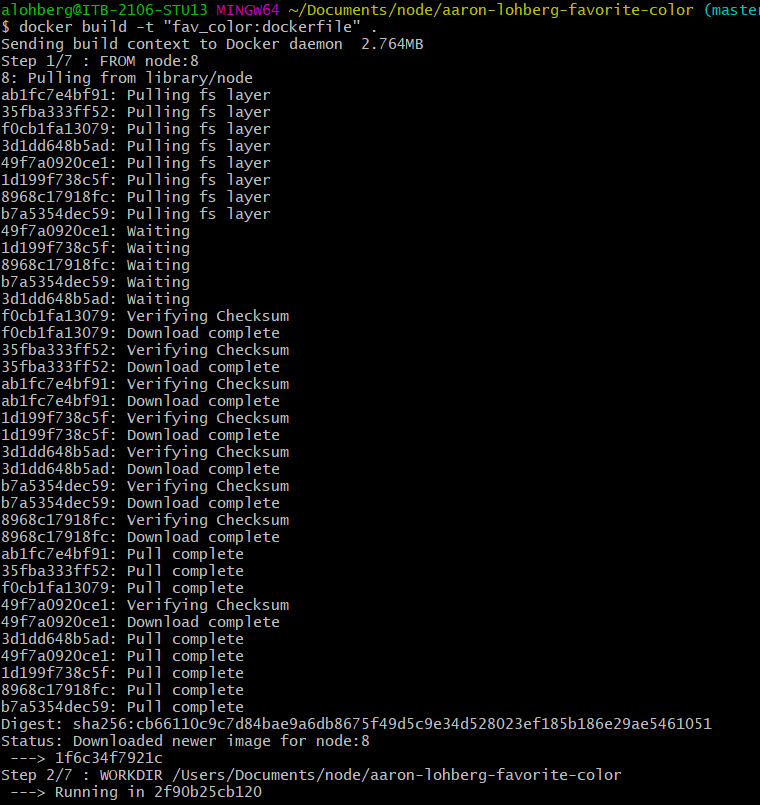
Once you’re in the correct file, here’s what we’re going to type to create our Docker image and what you should see:
And a long block of text ending with:

If you see an error like this instead:
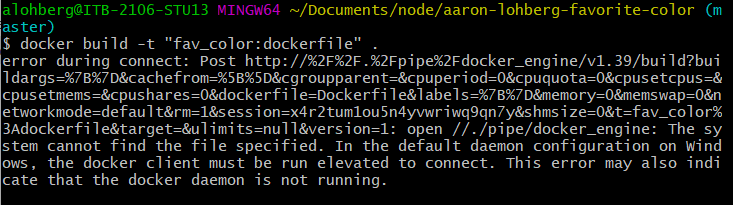
The fix is a little annoying. Right click on the whale icon like we did earlier when we had you login. Go to “Settings”. Under setting’s, click “Reset.” It should look like this:
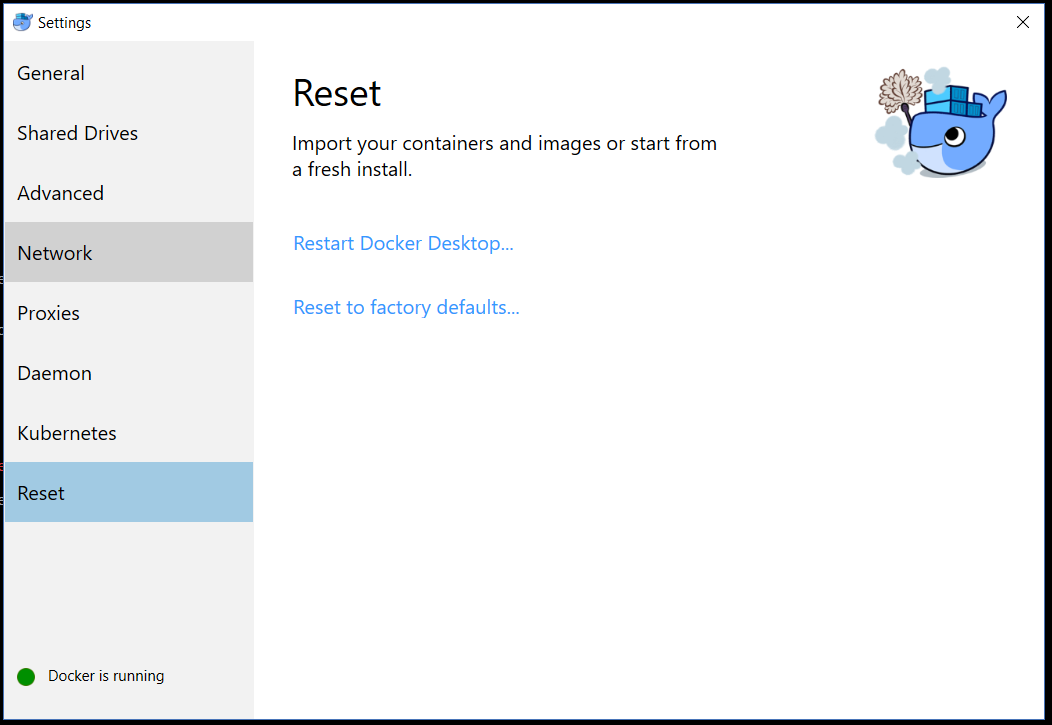
Select the “Reset to factory defaults” option and then say yes to any prompts the program gives you. Once your Docker is reset and running again, login and then run the ‘docker build -t “fav_color:dockerfile” .’ command again and it should work this time. Ask someone for help if it doesn’t!
Running a Docker Container:
Okay, now that we have our Docker image made, we’re going to run it. We can do this by typing:
“docker run -p 4000:3000 –rm –name test fav_color:dockerfile”
You should see:
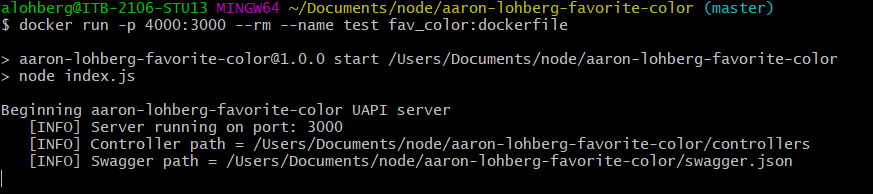
Congratulations! You made your favorite-color server work on a Docker container!
Let’s make sure it’s working by requesting the /xhealth path for our server in a browser.
In a new tab, go to “localhost:4000/xhealth.” You should see:
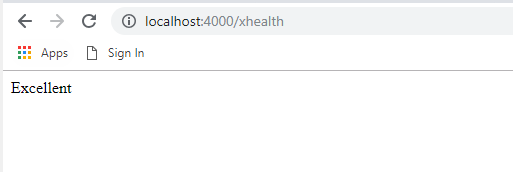
If you don’t, ask someone for help!
We could run our Postman tests here as well to see how it works, but we’re not going to show you how to do that here. It should basically be the same as before, but your Postman url to test would be “localhost:4000” followed by your requests path, ie: “/xhealth”.
Using Handel to Create our Beanstalk:
In order to create our Beanstalk, we’ll need to create and update some files! Go to your node/aaron-lohberg-favorite-color directory. Let’s create the following files (remember that the “touch filename.filetype” command can be used to make files): buildspec.yml, Dockerrun.aws.json, handel.yml, handel-codepipeline.yml
Then we’re also going to create a new directory called ecr. That can be done with “mkdir ecr”
Go into your ecr folder and let’s make 3 more files: access-policy.json, create-repo-if-missing.sh, and lifecycle-policy.json
Great! Now we need to actually fill these files. While being with buildspec.yml, there’s a lot going on, but the basic idea is that we need to tell our pipeline how to create a beanstalk that can actually support and run our Docker image. Let’s begin writing buildspec.yml. Go ahead and copy what’s below.
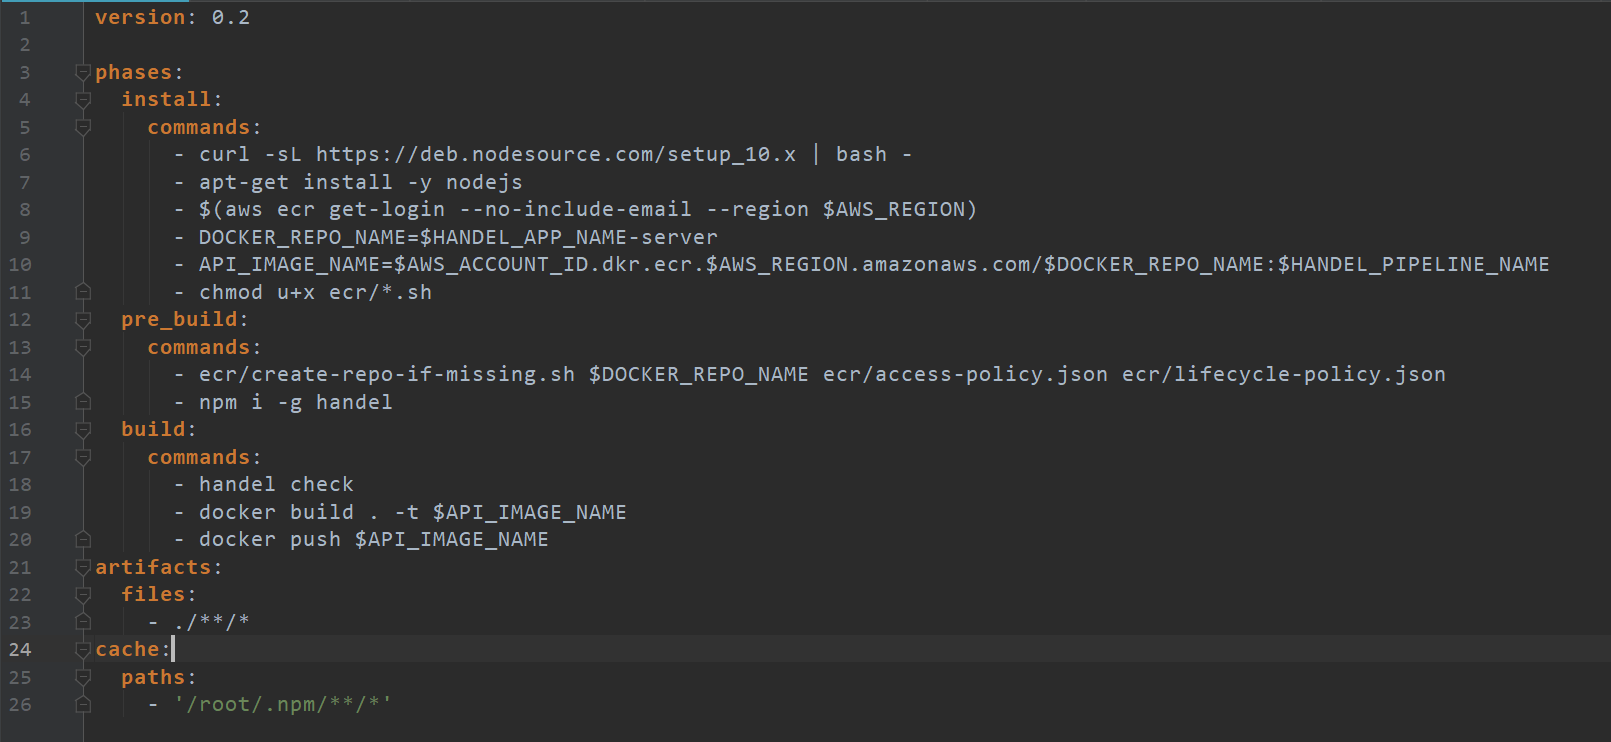
The install commands pretty much prepare our beanstalk by installing packages like node.js and changing ownership of certain files so that our beanstalk can function. The pre_build commands run a script “create-repo-if-missing.sh” that has to do with creating a repository for our image if it doesn’t already exist. Then lastly, the build commands section is actually building our image, giving it a name, and then pushing it to our repository that we created.
Next we’ll write Dockerrun.aws.json:
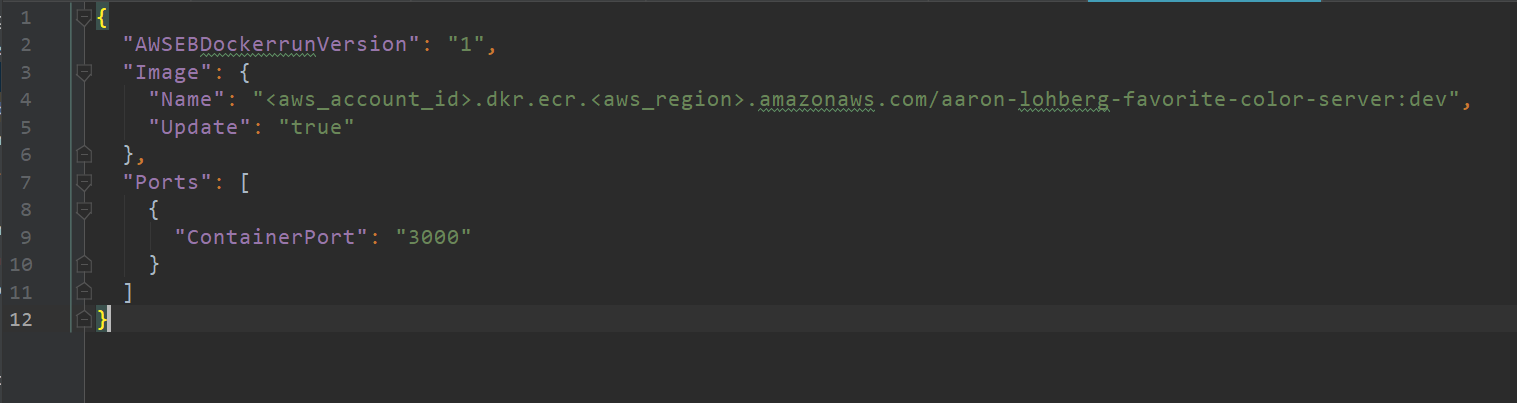
This file is specifying where our pipeline should look to find our Docker image and what port should be open for it to listen on.
Now we’re going to write our handel.yml file:

You can find the current stack solution on this link under “single container docker.”
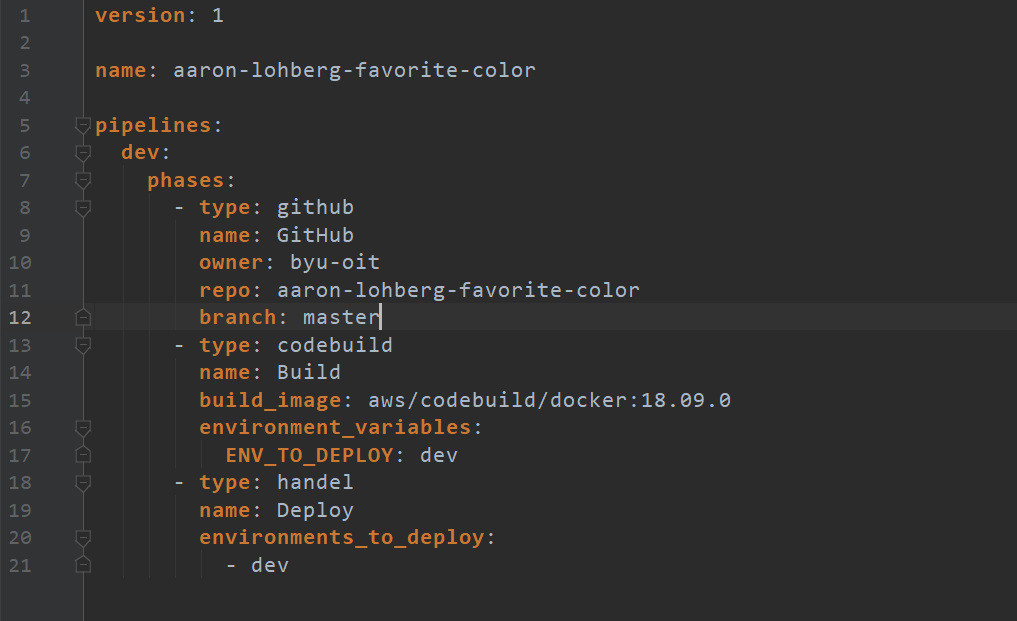
This next file is pretty straightforward as a handel-codepipeline file. The only differences you should note is that we’re giving it a build image from one of the more current Docker versions.
Time to write our handel-codepipeline.yml:
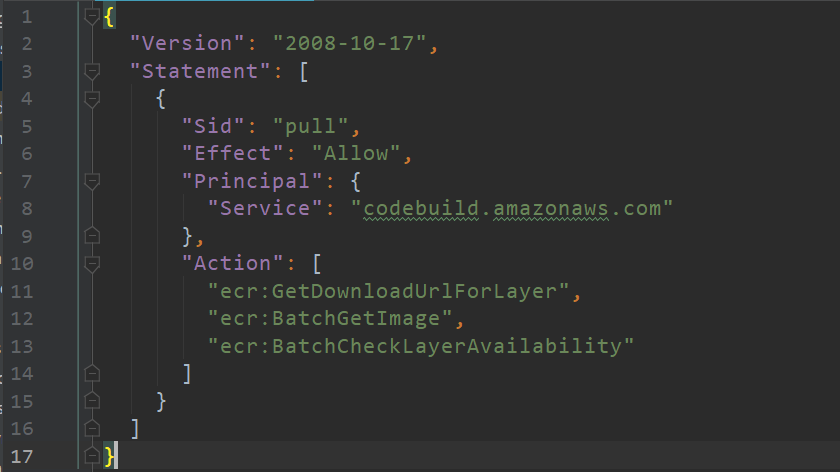
Now let’s go into our ecr folder and write the files inside there.
It’s not super pressing that you know what the following file does (and it’s not always a necessary file to have). You can pretty much just copy it. That being said, let’s begin write access-policy.json:
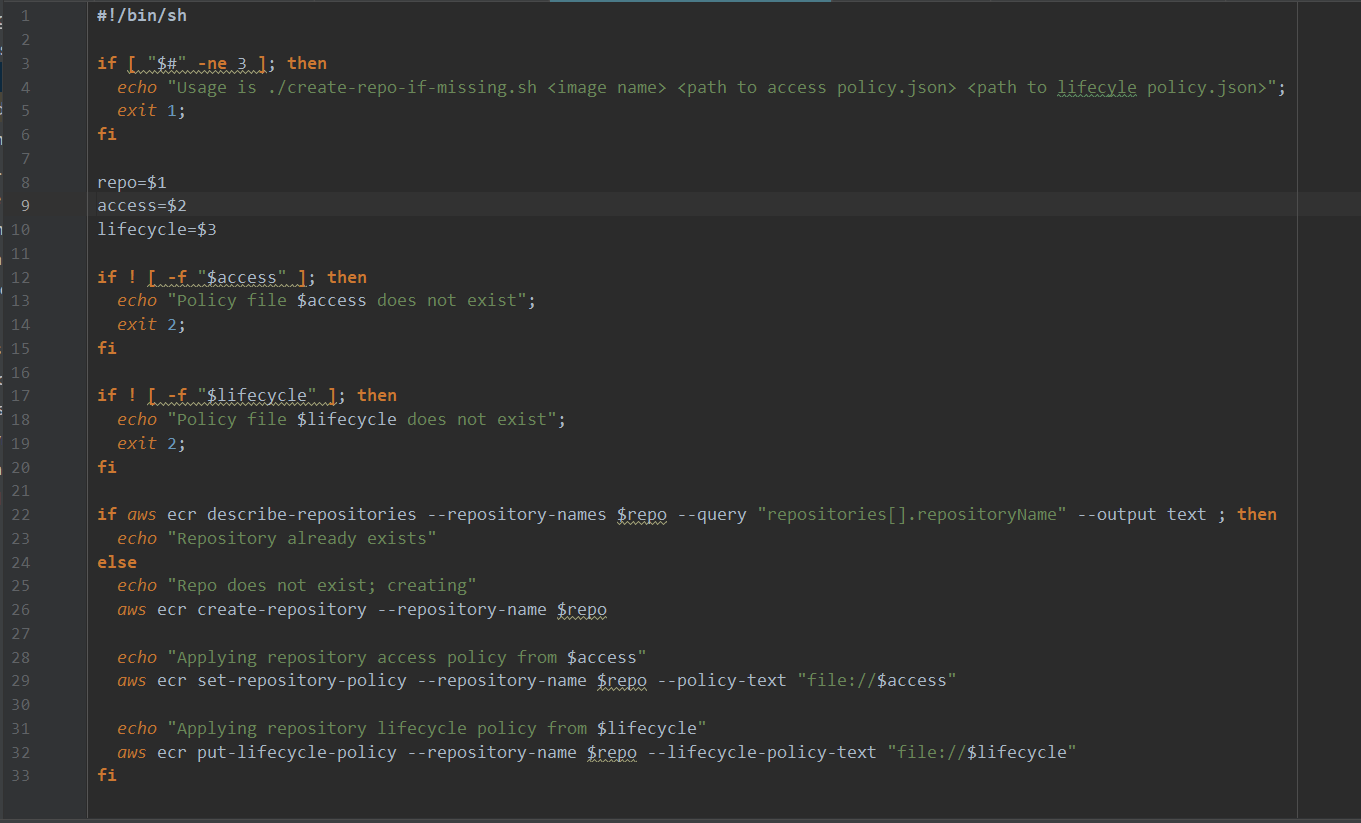
This is our script. I mentioned earlier its purpose is just to create a repository for our image if it doesn’t exist! Now let’s write our bash script - create-repo-if-missing.sh:
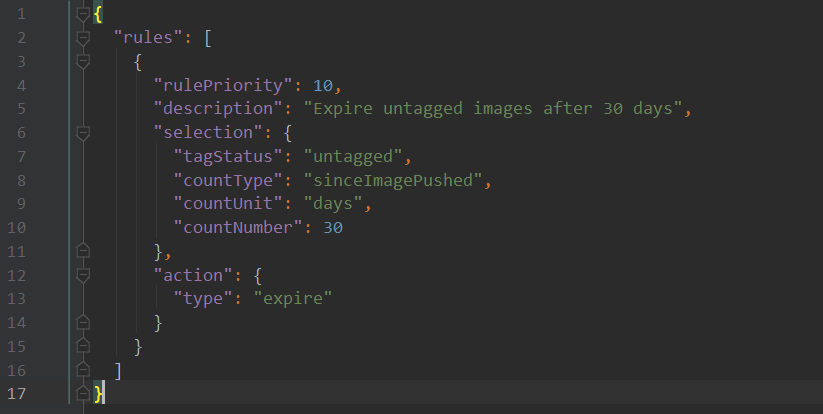
Lastly, let’s write lifecycle-policy.json which basically declares the life-cycle of our Docker image:
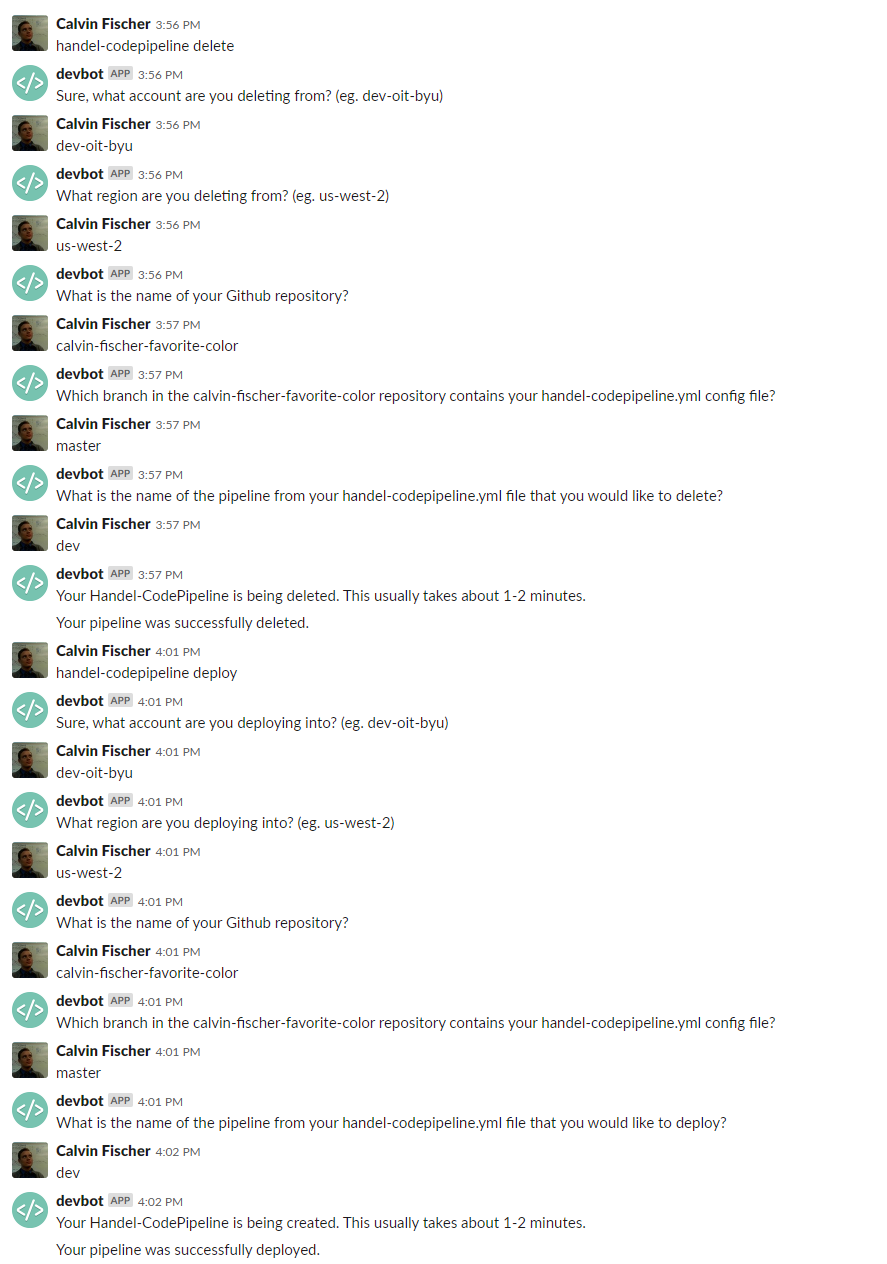
There is a lot going on here, but what you need to know is that you have changed enough that you are going to need to redeploy your codepipline. Go to the devbot and delete the pipeline, then deploy it. Remember to use byu-org-trn.
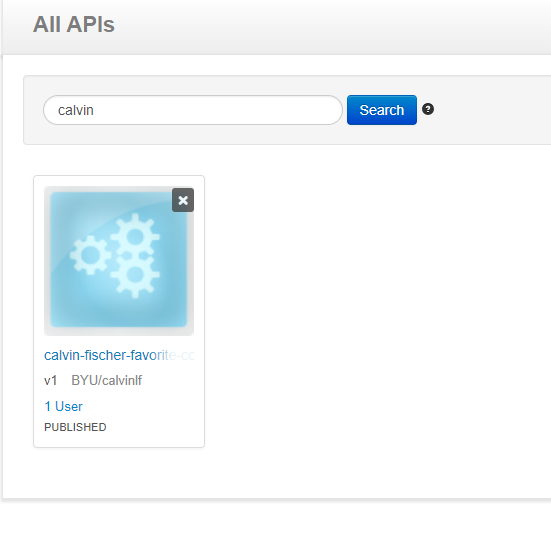
Now the only problem is that your WSO2 still calls the deleted API, so go to https://api.byu.edu/publisher/ and navigate to your API
Click “edit” and go to the second page “Implement”.
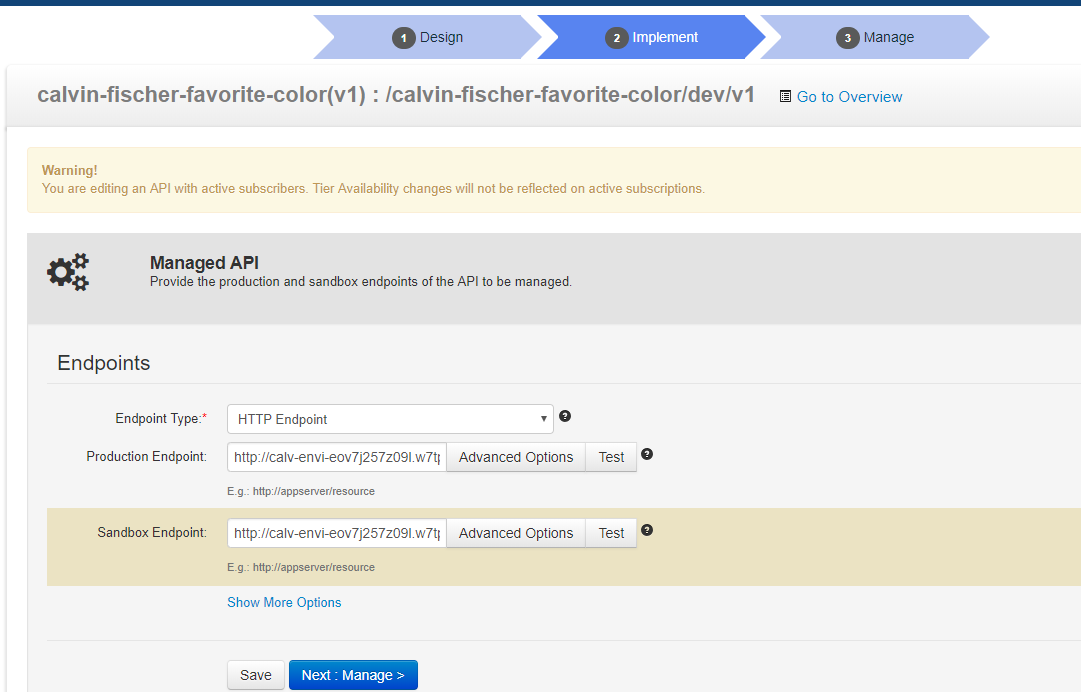
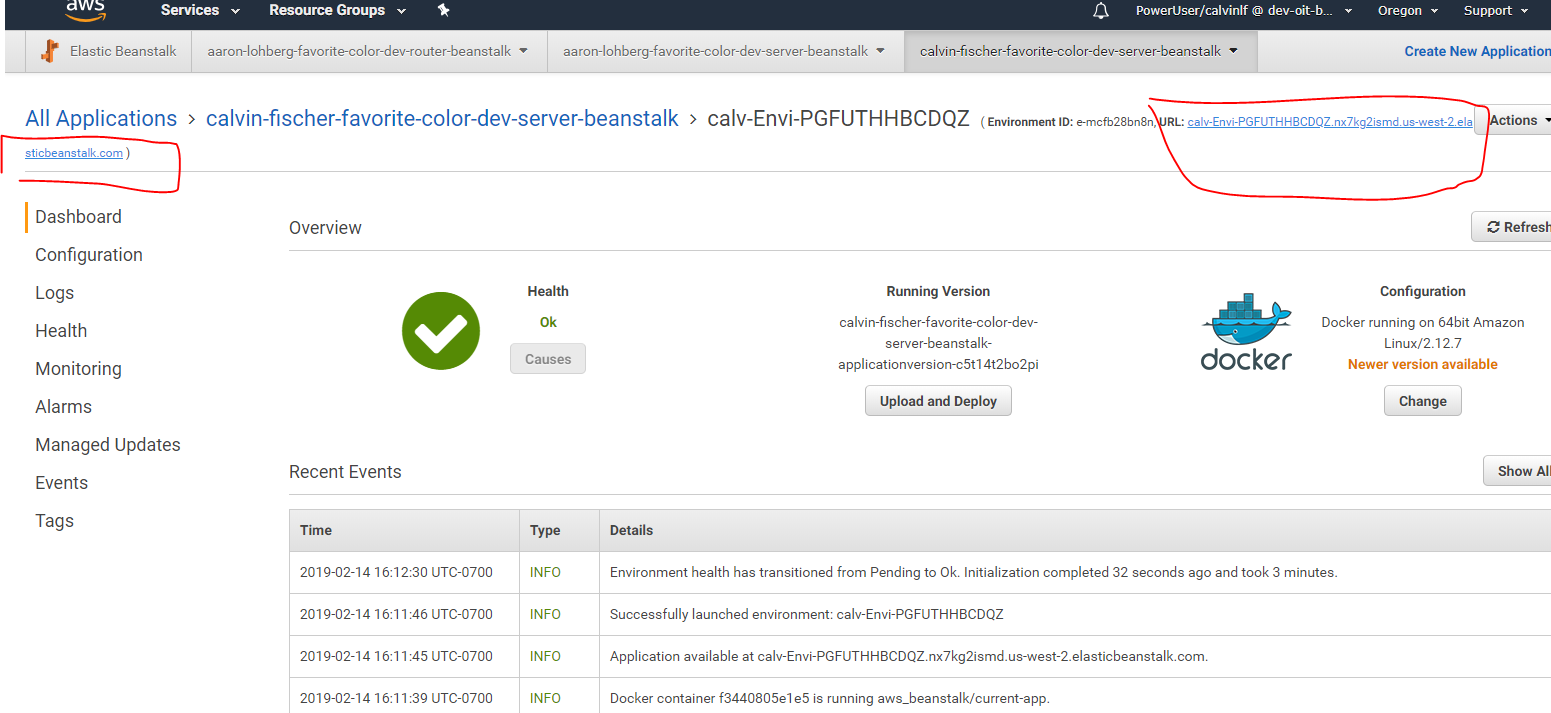
Once you are there, you will need the new URL. So login into AWS and go to the Elastic Beanstalk. Find your API and copy your new URL.
Then paste it into WSO2 for both endpoints.
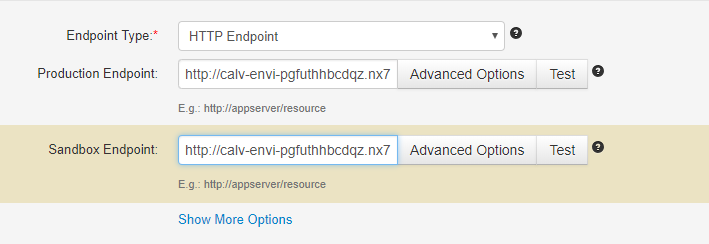
Then press “save”, “next”, and “save and publish.”
Test it using the Try it Out feature and Postman.
Once it works, that’s great!!