AWS CLI


AWS CLI - Amazon Web Services Command Line interface
In this lesson, you will install the AWS CLI.
Install AWS CLI
For everything to work properly, you will need to have a working version of AWS CLI Version 2.0 on your computer.
If you are running Linux or Mac, here are the instructions: https://docs.aws.amazon.com/cli/latest/userguide/getting-started-install.html
If you are on Windows here are some step by step instructions:
To use all AWS Code Pipeline features, you want to use of the AWS CLI (Amazon Web Services Command Line Interface). AWS CLI is a unified tool to manage your AWS services. (see https://aws.amazon.com/cli/)
Open a powershell or terminal window and enter
aws --version
If you see

You need to install the AWS CLI (version 2).
On WIndows, here is the link to the installer: https://awscli.amazonaws.com/AWSCLIV2.msi
Download the AWS CLI MSI Installer, either 64 bit (recommended) or the 32 bit.
Once downloaded, run the file by clicking on it.
You should see:
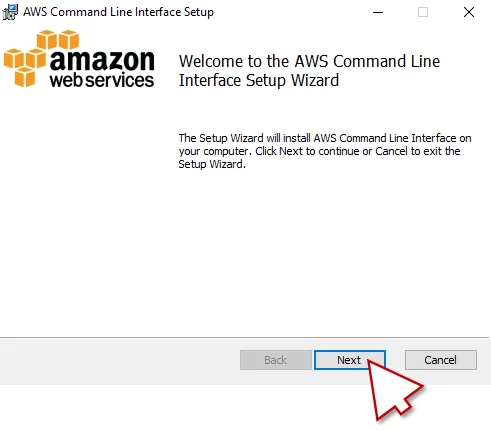
Click next to continue the installation.
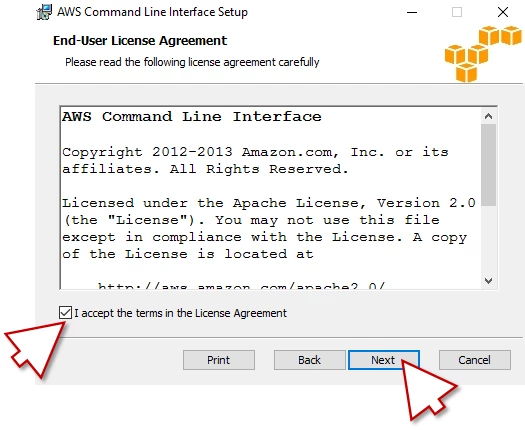
Click the accept check box to accept the terms of the License Agreement, then click Next.
You should see something like:
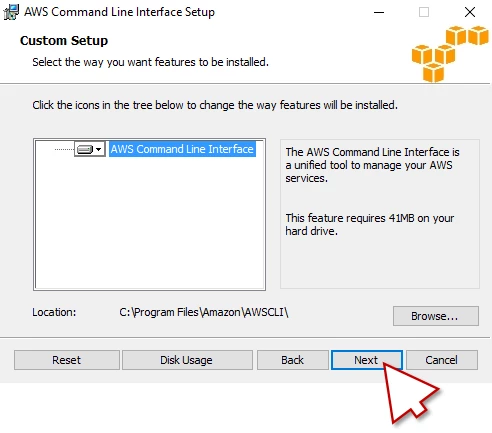
Click Next to continue.
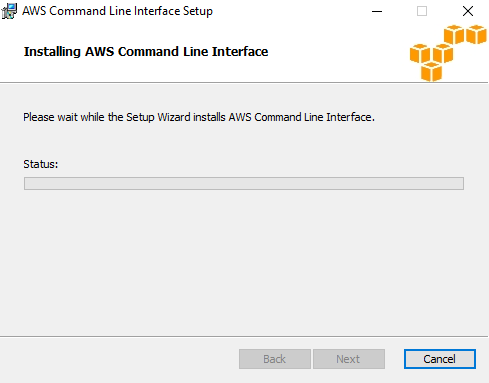
You should see something like:
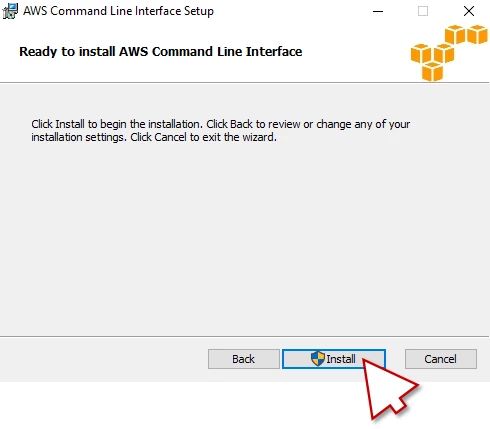
Click Install.
You should see something like:
When it is done, click Finish.
Before it starts working you’ll probably have to add AWS CLI to your path. Adding something to your ‘path’ means making the location that that app is stored available to any other app/cli on your computer so that it can run it without having to navigate to it. Follow this tutorial (make sure to click the ‘Windows’ tab if you are on windows) to add AWS CLI to your path: https://docs.aws.amazon.com/cli/latest/userguide/getting-started-path.html
Once you’ve done that, you’ll probably have to restart your computer to get everything refreshed.
Once that’s done, open a new instance of the Power Shell
enter:
aws --version
you should see:

Congratulations, you have installed the AWS CLI.
If you are still getting errors running AWS commands, you may have to uninstall older versions of AWS CLI. It is easiest to fully uninstall all versions of AWS CLI (On windows, do it easiest by searching up ‘Add or Remove Programs’ from the start menu) and then reinstall just version 2. See this link for additional information.
Command-Line Access to AWS
Introduction
This part contains information on how to authenticate to AWS from the command-line. Authenticating to our AWS accounts is required prior to using command-line tools like the AWS CLI
The process of logging in to AWS is most easily done in the following manner:
Go to https://aws.byu.edu. You’ll want to bookmark this URL, it is one that you will visit at least every day to copy your credentials after they expire.
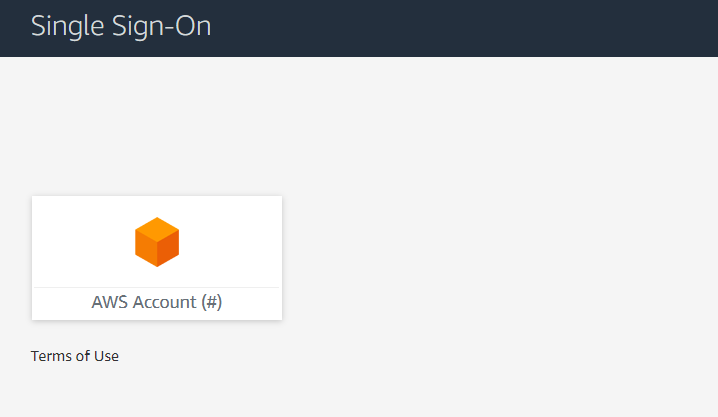
After logging in to BYU and authenticating through Duo, you should see a screen like this, with a number instead of ‘#’. When you click on it you should see the account you need, for example:
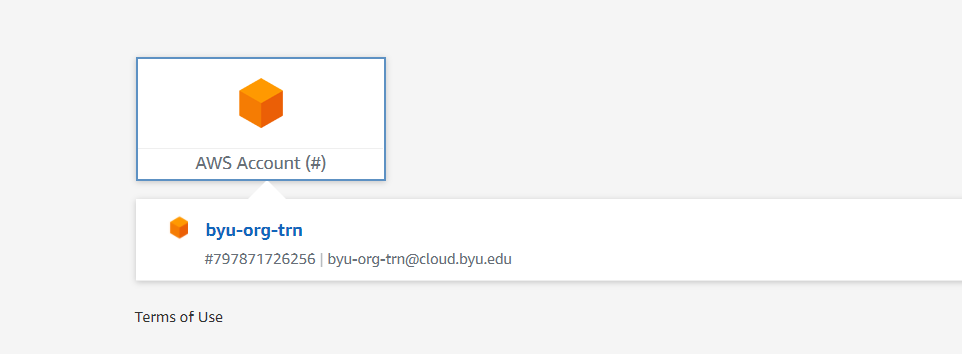
If the account you need to access is not there, or if you see no accounts, you will need to request access to the account. The process will vary depending on what account you need access to, so make sure to ask your team leader if the account you need access to is not the byu-org-trn account. If that account is the one that you need to access though, continue with this tutorial. If you do have access to the account as pictured, skip to the next heading.
Getting access to byu-org-trn
Go to https://support.byu.edu/navpage.do and log in. Find the search bar that says ‘Filter Navigator’ and search for ‘Order Forms’
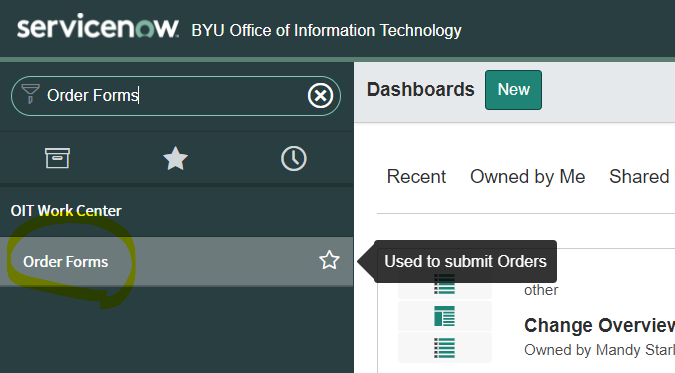
Click on the result. The item at the top of the list should be ‘Add Person to AWS Training Account’. Click on that result.
The form should appear like this:
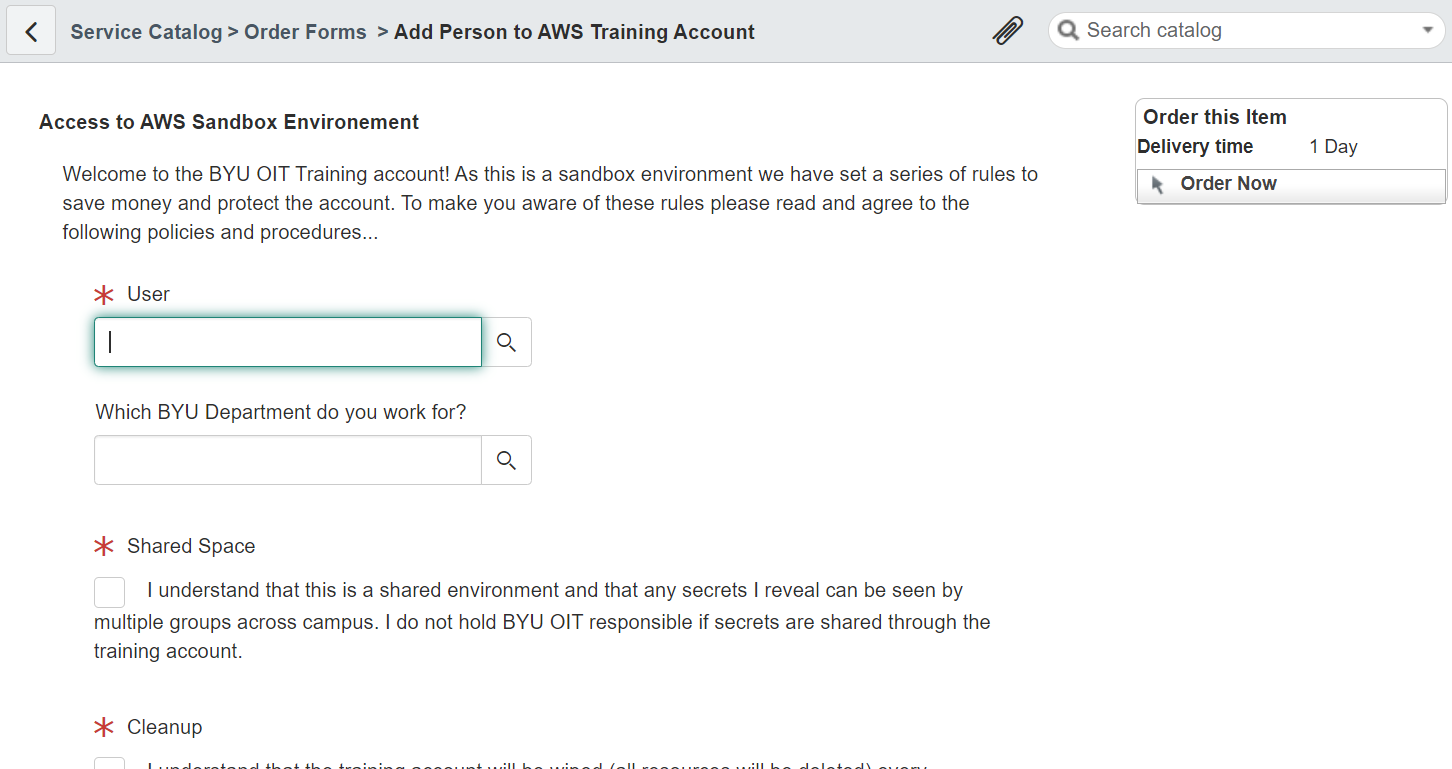
Fill it out and submit. You should recieve access in a day at most, though usually it only takes about 15-30 minutes. Recieving an email confirmation of the request does NOT mean that you have access, but it means that everything is working properly and the servers should update within the timeframe described above.
If the above form isn’t working or you can’t find it, you can also try this one. They should do the same thing.
To check to see if you’ve recieved access, refresh this link: https://aws.byu.edu
Be patient. If it takes longer than an hour for you to recieve access, ask for help from your team leader or on the Slack/Teams channel #aws.
Entering your credentials in the command line
Now that you have access to the correct AWS account, it is time to copy the commands into your command line.
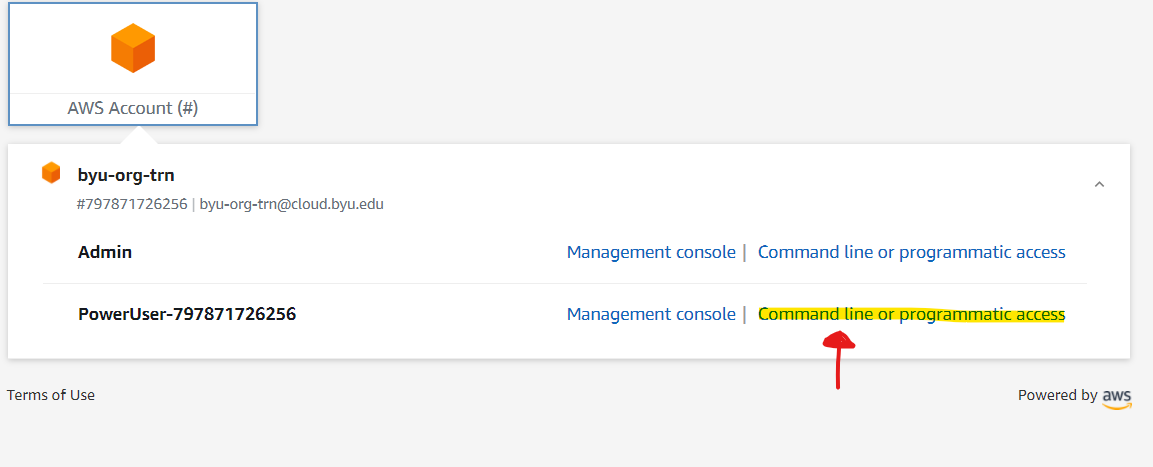
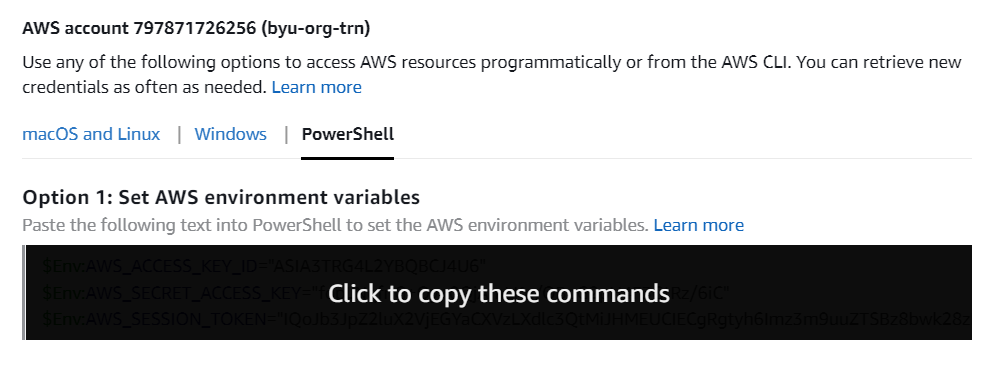
Click on the indicated button and then click the proper tab for the command line that you are using. If you are entering these commands into Webstorm, use the PowerShell commands. Hover over the commands and click when it says ‘Click to Copy’, as shown below.
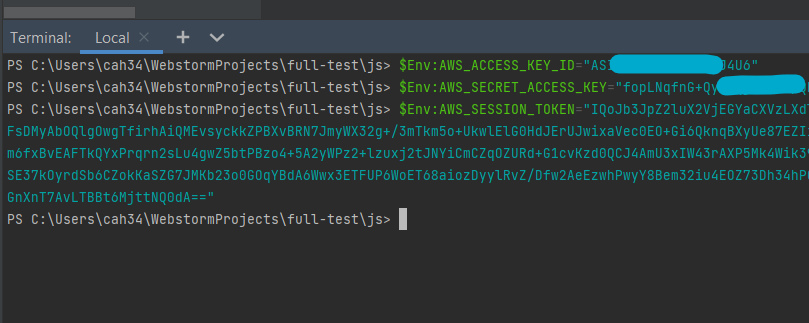
Enter them into your terminal. It is working normally if the terminal has no output. It should look like this:
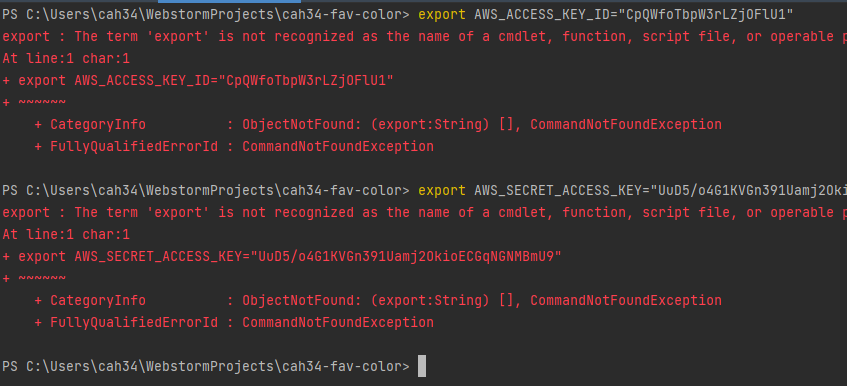
If you see an error like the one below, it is because you are not using the correct commands for your type of terminal. Make sure you are going to the right tab at the ‘Click to copy these commands’ step. If you are on windows and you are still getting this error, try the ‘PowerShell’ tab.
Again, you won’t see any output once you do it right. What this is essentially doing is setting your AWS credentials to environment variables that your program can use to log you in through your javascript code. An environment variable is a variable whose value is set outside the program. See this link for documentation on the getParameters command that will do this.
You are now logged in for AWS!
Using aws-sso-creds-helper
The following tutorial is optional. The steps outlined above are sufficient to log in to AWS. Read on if you want a more streamlined way:
For faster work, there is another way to log in that doesn’t involve going to to aws.byu.edu every day. If you prefer to run a single shell command to log in instead of going to the website, this is another option.
Run this command to install the ssocreds/aws-sso-creds-helper package:
npm install -g aws-sso-creds-helper
If you frequently switch between multiple versions of node, you’ll have to do this for all of your versions.
For this process to work you will need to add a file in your .aws folder that contains information about your aws account.
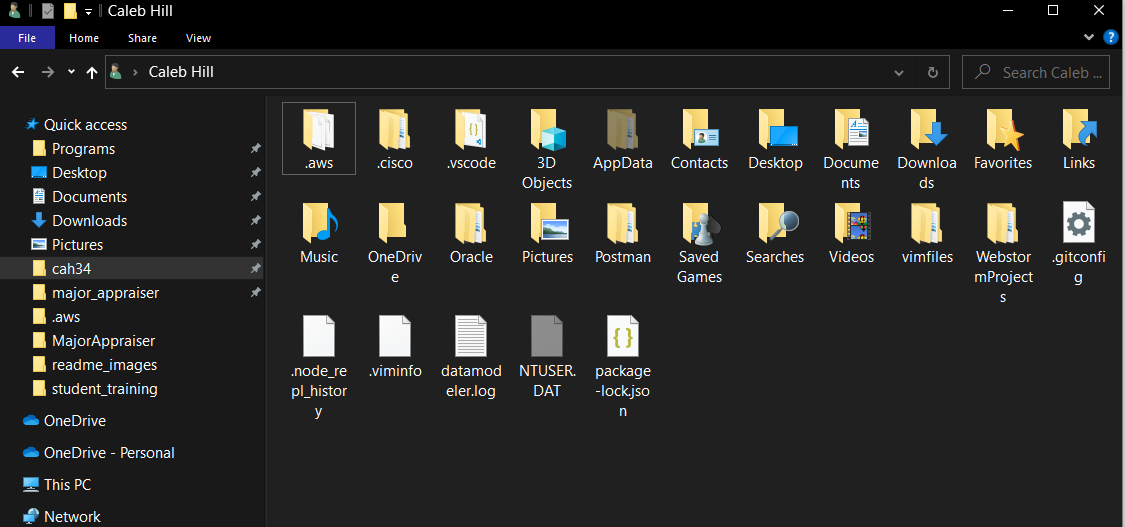
Navigate to your .aws folder in your home directory. This should be the main directory for you user. On Windows, you can access it by typing %HOMEPATH% into a Run window (Win + R). If you want to access it from a terminal, just type cd ~ in most terminals. It is the the one that looks like this:
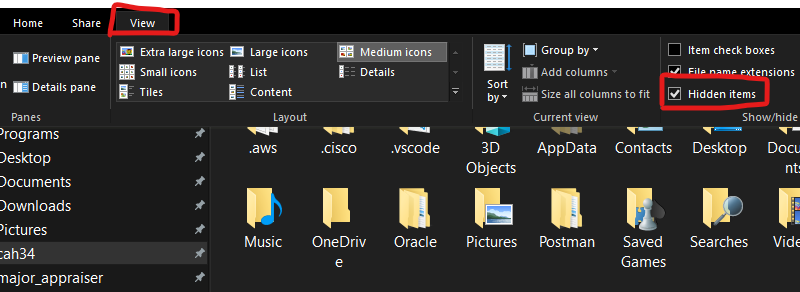
If you can’t find a folder called ‘.aws’ in this folder, you might have to ‘Show Hidden Items’ in your explorer window, as seen below:
If you still can’t find it, that is totally normal. Just create a folder called .aws. Mind the period there, that is important.
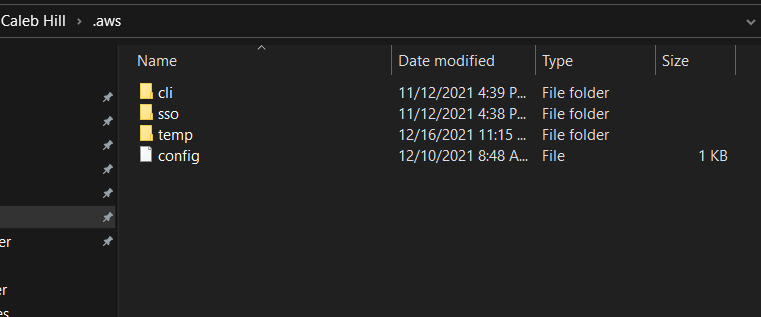
Inside that folder make a file called ‘config’ with no file extension (Don’t worry about the other folders you see in the screenshot below), as seen below:
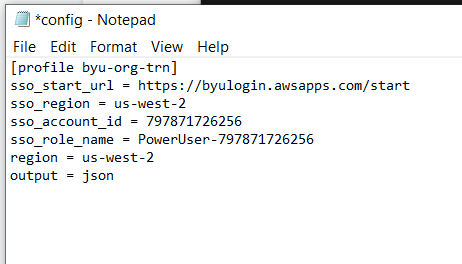
Open that file with any text editor by right-clicking on it and selecting ‘Open With’. The default notepad will do just fine for this. Add the following lines to that file:
[profile byu-org-trn]
sso_start_url = https://byulogin.awsapps.com/start
sso_region = us-west-2
sso_account_id = 797871726256
sso_role_name = PowerUser-797871726256
region = us-west-2
output = json
If you are not configuring this for byu-org-trn, then you will have to change the lines accordingly, including the ‘[profile ...]’ line, the ‘sso_account_id’ line, and the ‘sso_role_name’ to match information that you can find at
To be clear, to do this for an account other than byu-org-trn, you will also have to get the sso_account_id, which you can find by going to aws.byu.edu and copying this number, as shown below. You can also get the name of your account here to replace with sso_role_name.

You should have it look something like this:
[Ctrl] + [s] to save and then close the file.
Go back to your project shell, for example, in WebStorm, if that is where you are writing your code. Do the following:
Run ssocreds -p byu-org-trn. Of course, if you are not using byu-org-trn, then change it to the correct account name.
You may see the following error message:
The config profile (byu-org-trn) could not be found
This will happen if you have not correctly created your config file, or if you make it in the wrong location. Double check that the config file exists, is in the right place, and everything inside it is typed correctly.
If you have done everything right, then you should see a new tab open up in your default browser asking you to allow AWS to have CLI access:

Click the ‘allow’ button and then return to your shell. You should see a success message that says something like Successfully loaded SSO credentials for profile byu-org-trn.
You are done! You should now be authenticated.
If you want to use this step to log in to a command line application, you’ll have to additionally run a command to set the AWS_PROFILE environment variable (replacing byu-org-trn if you’re doing this for a different account):
| Shell/OS | Command |
|---|---|
| Mac/Linux/Git Bash | export AWS_PROFILE=byu-org-trn |
| Windows CMD | SET AWS_PROFILE=byu-org-trn |
| Windows Powershell | $Env:AWS_PROFILE="byu-org-trn" |
In the future, to log in, all you have to do is run the ssocreds -p byu-org-trn command, plus setting the environment variable, to get logged in.
If you’re doing this step before running your app in a JetBrains run configuration, then create an environment variable for that run config with ‘AWS_PROFILE’ being the key and ‘byu-org-trn’ (or whatever your desired account is) being the value.
If any of the above didn’t make sense, you can also refer to an OIT tutorial video, available here made for this new AWS login system. Also, ask for help!
That’s it!
For more information