VPN/SQL Developer

To access the data we are going to need to make sure we are on the VPN.

You will connect from your machine to machines in the Data Center and other locations with a secure VPN connection. You do this using a Virtual Private Network (VPN). We use a product called GlobalProtect
What is a VPN?
“… a VPN creates a virtual encrypted tunnel between you and a remote server operated by a VPN service. All external internet traffic is routed through this tunnel, so your data is secure from prying eyes. Best of all, your computer appears to have the IP address of the VPN server, masking your identity.
When your data reaches the VPN server, it exits onto the public internet. If the site you’re heading to uses HTTPS to secure the connection, you’re still secure. But even if it was intercepted, it’s difficult to trace the data back to you, since it appears to be coming from the VPN server.” (Eddy, Max; “What Is a VPN, and Why You Need One”, PC Magazine; February 21, 2018)
Request a VPN Account
VPN Go to: BYU VPN Request Form
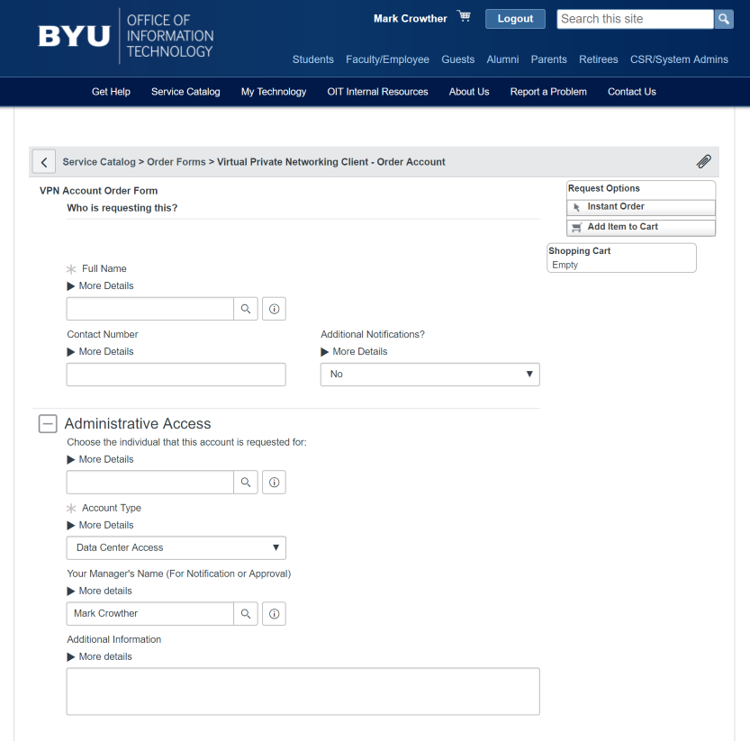
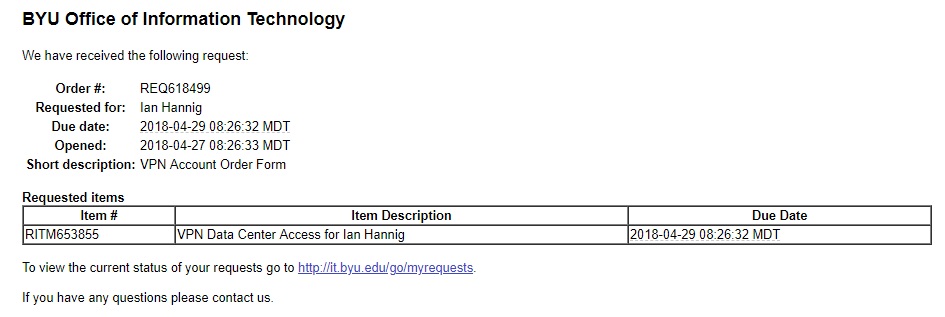
Fill out the form and submit it. This can take anywhere from fifteen minutes to a couple of days, so be patient. You should immediately receive an email that contains the following information:
Mark Crowther will be sent an email from Service now asking for his approval. Check with him to see if he has approved it.
Mike Watson (@mwatson) is the security analyst who will grant you VPN and Data Center access. After Mark Crowther has sent the approval, feel free to send Mike Watson a slack message letting him know Mark Has approved the request and asking when you can expect to receive it.
You can check the status of your request using the link on the bottom.
Now move on to installing the GlobalProtect VPN Client
Download and Install GlobalProtect
To download the VPN, navigate here
Download the version appropriate for your computer.
Open the downloaded (.exe or .pkg) file and follow the on screen instructions.
When prompted for the vpn portal address, enter gp-dc.byu.edu and login with your BYU credentials.
NOTE: You will always want to connect to the VPN before using Oracle SQLDeveloper!
-
For Mac Users
If you are a Mac User, you may see an error like this:
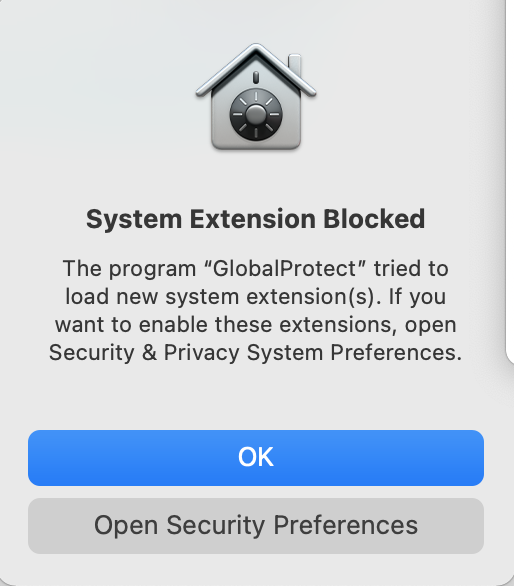
To resolve this error, do the following:
- Click “Open System Preferences”
- A window like the following will pop up:
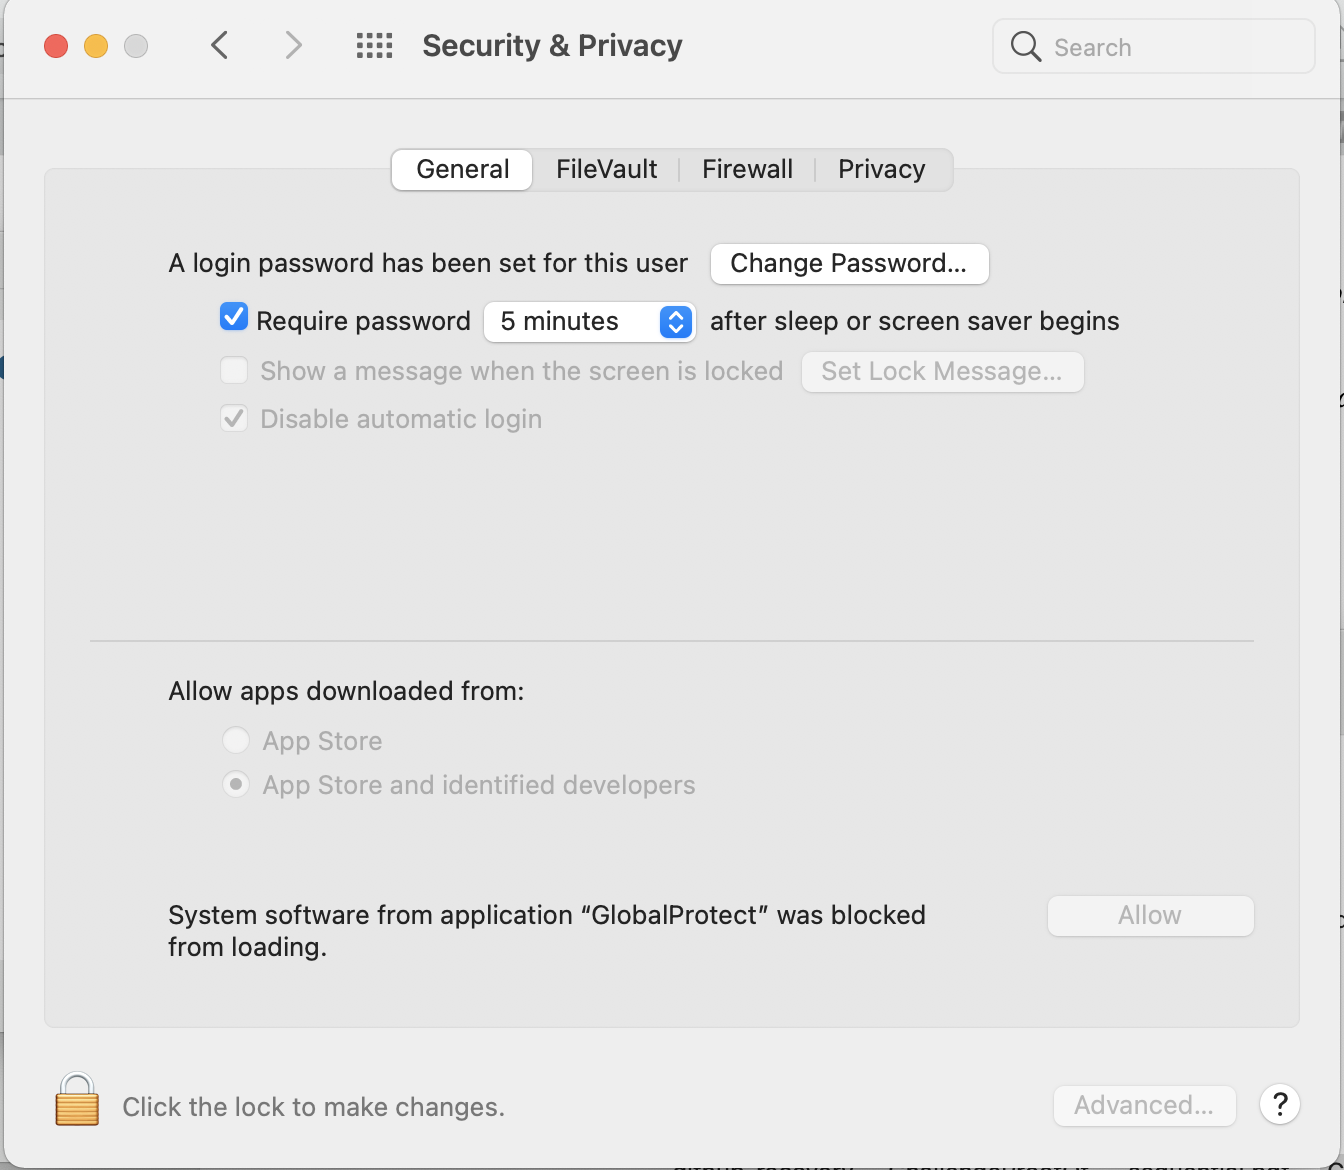
- Click the lock icon to make changes
- Type in your password and press ‘Return’
- Click the “Allow” button to allow the GlobalProtect system extension to run
- Another prompt from GlobalProtect will ask you to allow the system extensions to run. Click “Allow”
Oracle SQL Developer

Oracle SQL Developer is a software tool that allows you to access, create, manage, and use SQL to query Oracle Databases. This tool is written in Java so you just need to download it to your machine, then extract it and put the files in an appropriate directory. Don’t leave it in your Downloads folder. You may want to make a shortcut to it after you have it in the place you would like.
Download
Go to: http://www.oracle.com/technetwork/developer-tools/sql-developer/overview/index.html
and choose the “Download” button.
Click the radio button to accept the License Agreement
Choose the version you need for your machine. For the Windows version(s), we recommend you get the version with the JDK. If you don’t, you will have to download and install the appropriate JDK separately.
Click on Download. If you don’t have an Oracle account, create one.
Unzip
Use the tool of your choice to unzip the file. For windows we typically use 7-Zip.
Unzip the file to a directory.
Then once the directory is unzipped, move it to a location other than your downloads directory.
For Windows machines, we recommend C:\Program Files\sqldeveloper
Shortcut
On a Windows machine, if you so desire, create a shortcut. You could even place it on your taskbar.
Password Setup
In order to log into OIT’s Oracle databases, you will be required to make a password that follows a certain set of rules. This is not the same as your online oracle account (the account you may have made to download sql developer), it is an account just for OIT that gives you database access. You will also be provided a username: ‘OIT#net_id’, where net_id is your personal net id, for the database access.
Read the following sections:
- Password Rules
- When to Change Your Password
- Synchronizing Your Password
- Where to Change Your Password
- OIT Developer Personal Accounts
- SQL Developer
- Reset Password Example of the document at this link:
https://byu.app.box.com/s/mr8vzbrfs9xo88xhc3jdrhwhfne9ziul
Once your Oracle Accounts have been set up, you will receive a Microsoft Teams message, or a slack message, from the DBAs (data base administrators), or from Mark Crowther, with your password. This password is expired which means when you login, you will need to change it. This way you can change it to what you want it to be. But in order to change it, you need to create a connection.
You won’t change your password just yet, but make sure you read the documentation and be familiar with the basics so that you can refer to it in the following steps.
Create connection to DBAPRD1
Start the GlobalProtect app, connect and login. This will ensure that you are logged into the OIT VPN which is required for database access.
The next step is to configure SQL Developer to access the BYU Oracle Databases you will need. There is one database we need to connect to in order to change your password for the first time, and then a second where you will be doing all your work in.
Start SQLDeveloper. You should see something like the following:
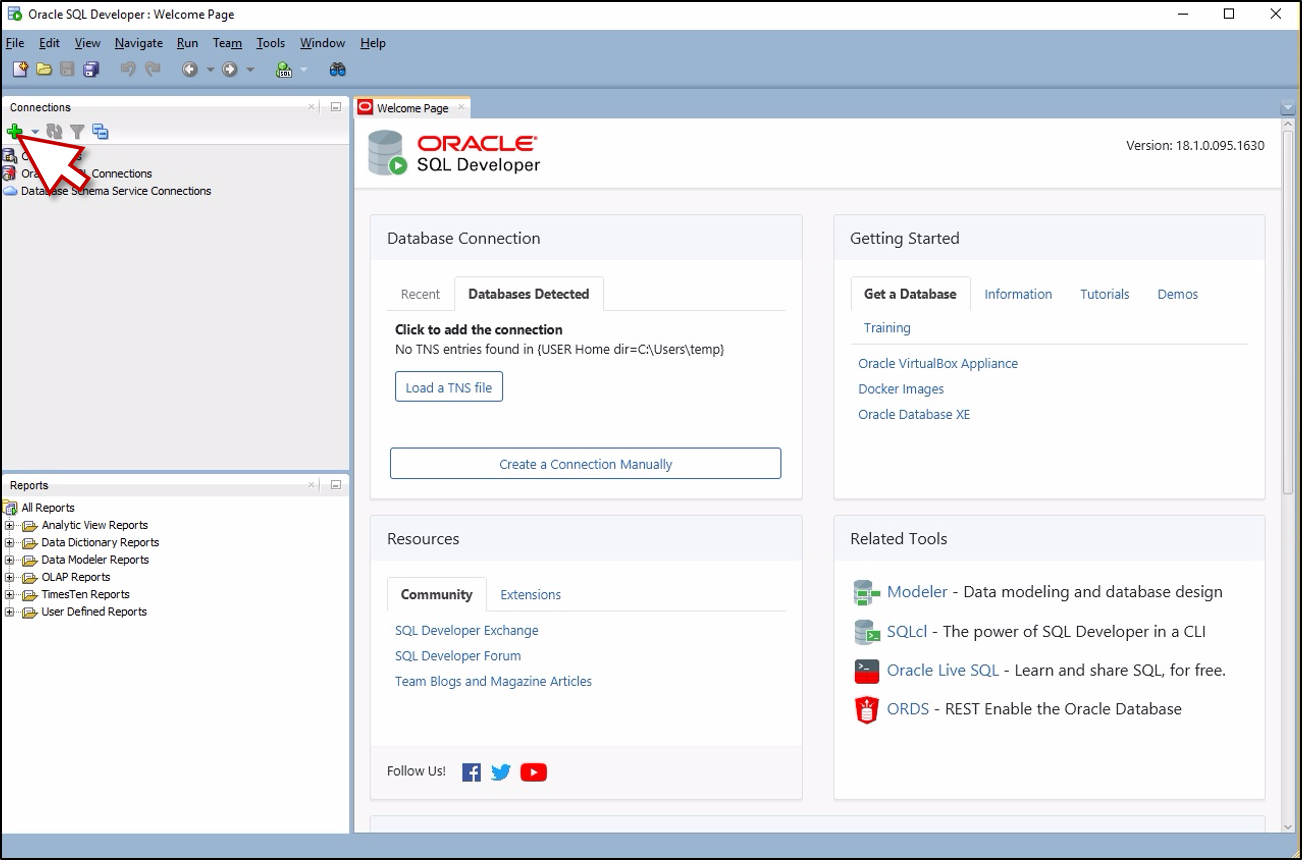
Click on the Green Plus sign as shown above.
You should see the following dialog:
![]()
We are first going to connect to DBAPRD1 so that you can change your password and have it update for all of the databases. You should have read about this in the pdf on box that is linked above.
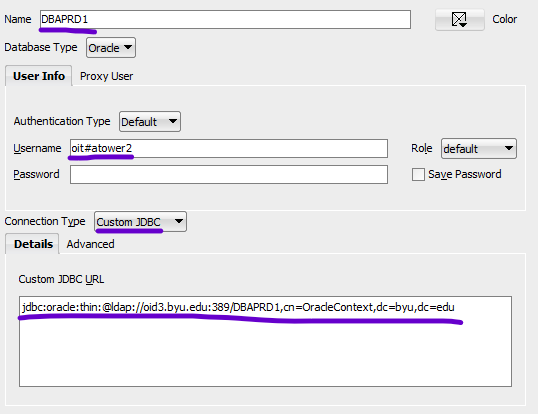
Let’s set up your connection to DBAPRD1.
For the “Connection Name” enter “DBAPRD1”
For the “Username” enter, “oit#” followed by your NetId.
For example, my NetId is atower2, so I would enter “oit#atower2”
Leave the “Password” blank.
For “Connection Type” select “Custom JDBC”
In the box for “Custom JDBC URL” enter “jdbc:oracle:thin:@ldap://oid3.byu.edu:389/DBAPRD1,cn=OracleContext,dc=byu,dc=edu”
NOTE: The first letter in ldap is a lower case L not an I
When you have filled out the fields, it should look something like the following:
Click on the “Save” button.
Reset Your Password
Once it is saved, you should see something like:
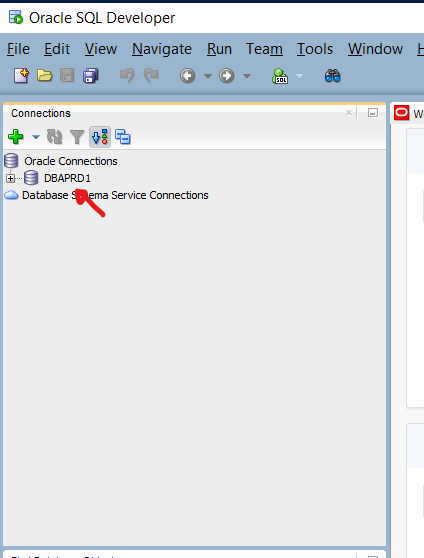
Right click “DBAPRD1” as shown above.
You should see something like:
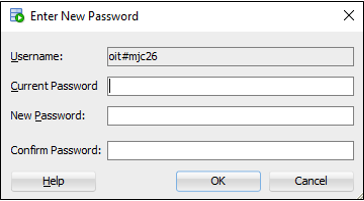
The username should be your username, not mine.
Enter the password that was slacked to you in the ‘Current Password’ field.
Then, enter a new password in ‘New Password’ and ‘Confirm Password’. Remember, it must:
- Be at least 14 characters long, and no more than 30 characters (important!)
- Use ASCII characters
- Start your password with an alphabetic character
Note: You shouldn’t use one dictionary word only - you can combine dictionary words to create a passphrase (see https://byu.app.box.com/s/mr8vzbrfs9xo88xhc3jdrhwhfne9ziul).
Then type your new password again in the confirm password text box.
Then click “OK”.
It may take a few minutes the automatic processes to synchronize your password. In the pdf it says 5-10 minutes. If it takes longer than an hour, ask for help.
Create connection to CESCPY
This is where you will be creating databases for your training projects. The process for adding it is pretty much the same as for DBAPRD1 but with a different name and a different url.
You should probably wait for your password reset to sync before you add this database for it to go smoothly.
Click the green plus button, as you did before, and fill in the information as follows:
For the “Connection Name” enter “CESCPY”
For the “Username” enter, “oit#” followed by your NetId.
For example, my NetId is atower2, so I would enter “oit#atower2”
For “Password”, enter your new password.
In the box for “Custom JDBC URL” enter “jdbc:oracle:thin:@ldap://oid3.byu.edu:389/CESCPY,cn=OracleContext,dc=byu,dc=edu”
NOTE: The first letter in ldap is a lower case L not an I
When you have filled out the fields, it should look something like the following:

Click on the “Save” button.
Before you move, on I would like to add a quick note about CESCPY. This database is a copy of the production database and is refreshed every week. If you’re table disappears over the weekend, this is probably why. As you can imagine, this is a good database for training, but be careful what you save to this database for other projects.
Configure additional DB Connections
Click on the Green Plus sign as you did before.
Make sure that your VPN is running or you will not be able to connect to the databases!
You should see the following dialog:
![]()
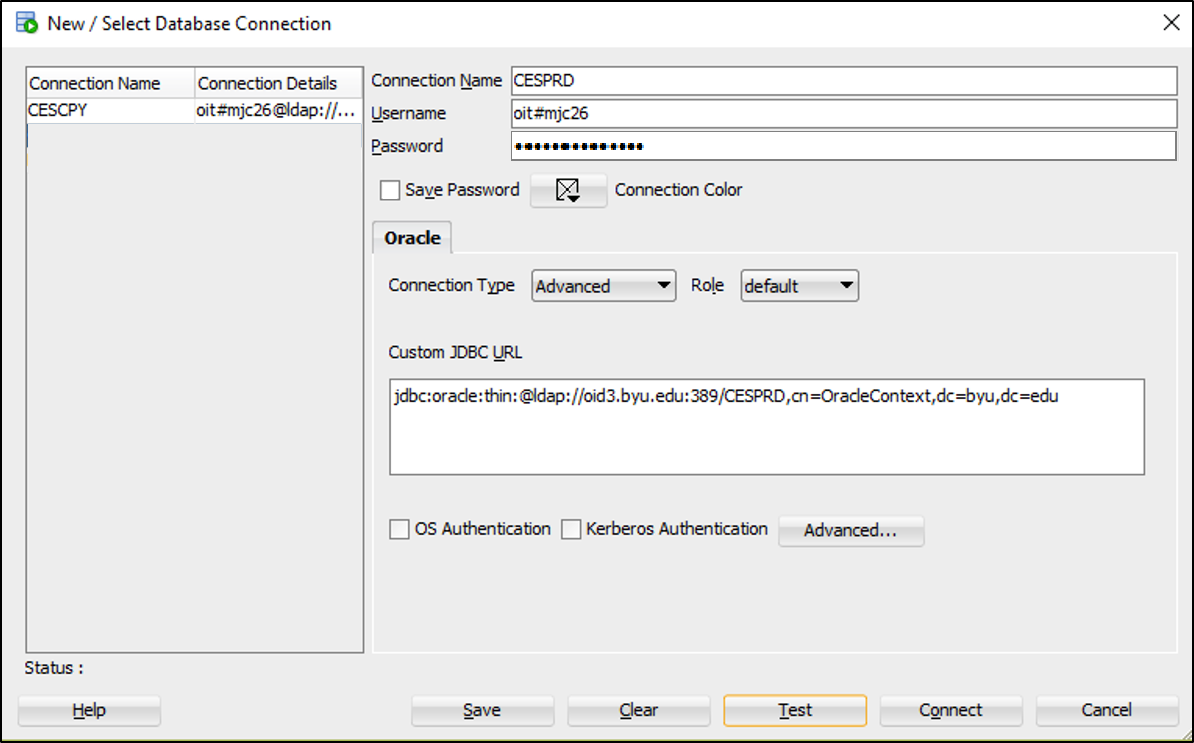
Let’s set up your connection to CESPRD.
For the “Connection Name” enter “CESPRD”
For the “Username” enter, “oit#” followed by your NetId. For example, my NetId is mjc26, so I would enter “oit#mjc26”
For the “Password”, enter your new password.
For “Connection Type” select “Advanced from the drop down list.
For the “Role” leave it as default.
In the box for “Custom JDBC URL” enter: “jdbc:oracle:thin:@ldap://oid3.byu.edu:389/CESPRD,cn=OracleContext,dc=byu,dc=edu”
When you have filled out the fields, it should look something like the following:
Click on the “Test” button.
Enter the new Oracle account password.
You should see something like:
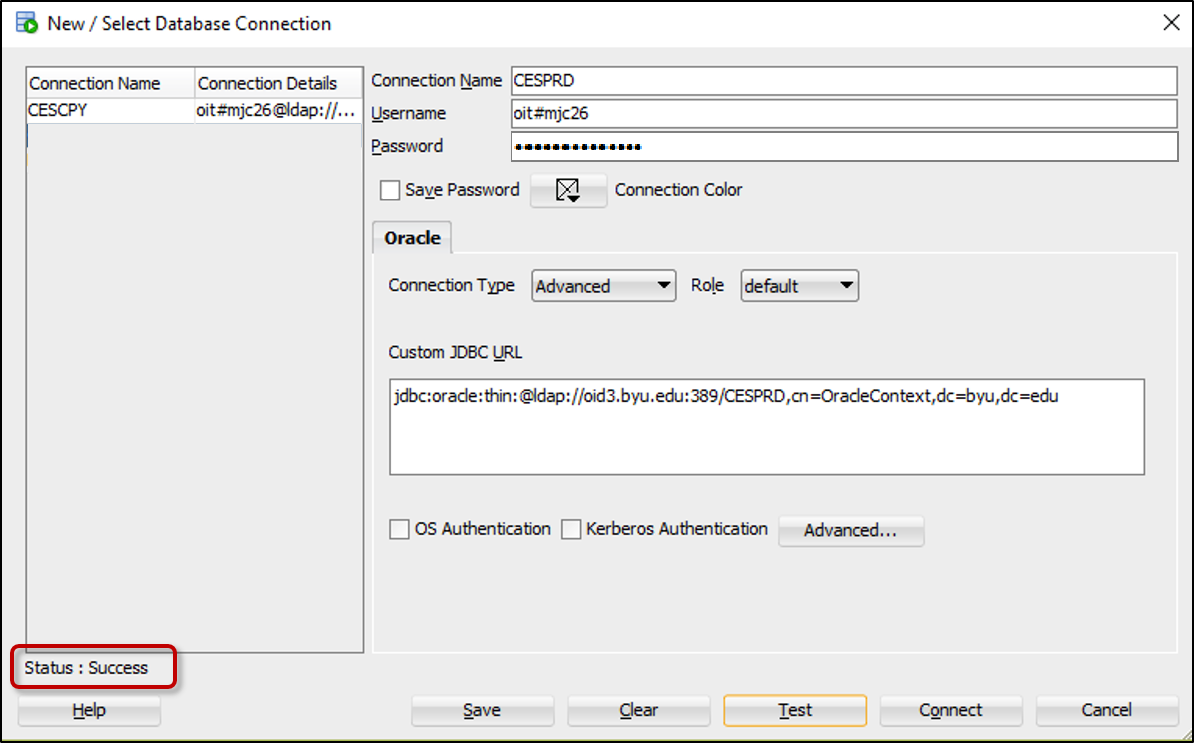
If you see the Status of “Success” as shown above, Click on the “Save” button.
This will save your configuration as follows:
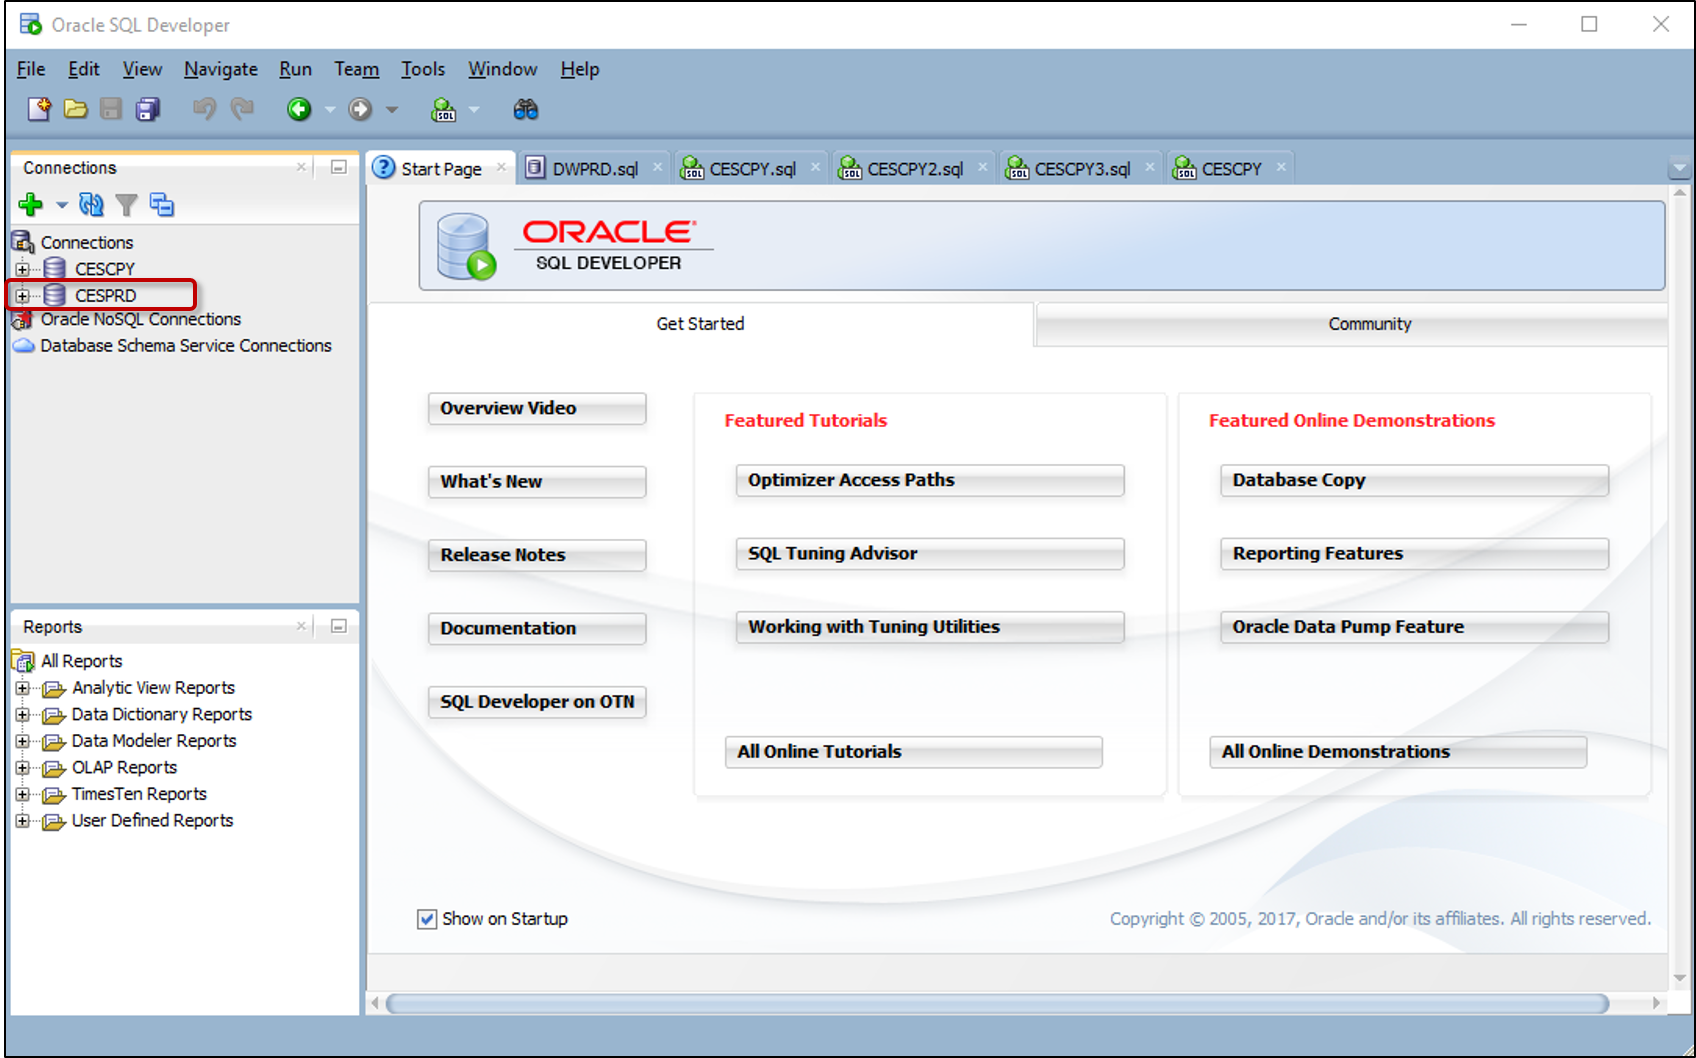
Notice CESPRD is now listed in the upper left of the page as one of the Connections.
You can repeat this step for additional Databases you need to connect to.
Also, here are some SQL tutorials to help you write SQL. Take a look at them before moving on-
https://www.codecademy.com/learn/learn-sql (Good source for a very general basic introduction to SQL) https://www.w3schools.com/sql/default.asp (Basic SQL programming information/syntax)